overview
Sanka’s approval actions allow you to build flexible approval flows, such as step-by-step approval by multiple approvers, conditional approval, and information collection using custom fields.Main features
1. Specify approver
- Single Approver: Request approval from one specific user
- Multiple Approver: You can specify multiple users as approvers and require approval from all or some of them.
2. Custom fields
You can set up custom fields that allow you to enter additional information during approval:- Text field: Enter comments and explanations
- Date field: Specify deadline or scheduled date
- Selection field: Select from preset options
- Checkbox: Yes/No confirmation items
3. Approval options
Approvers can choose from three actions:- Approve: Proceed to the next step in the process
- Reject: Stop the process and state the reason
- Revert: Revert to previous step and ask for corrections
Setting method
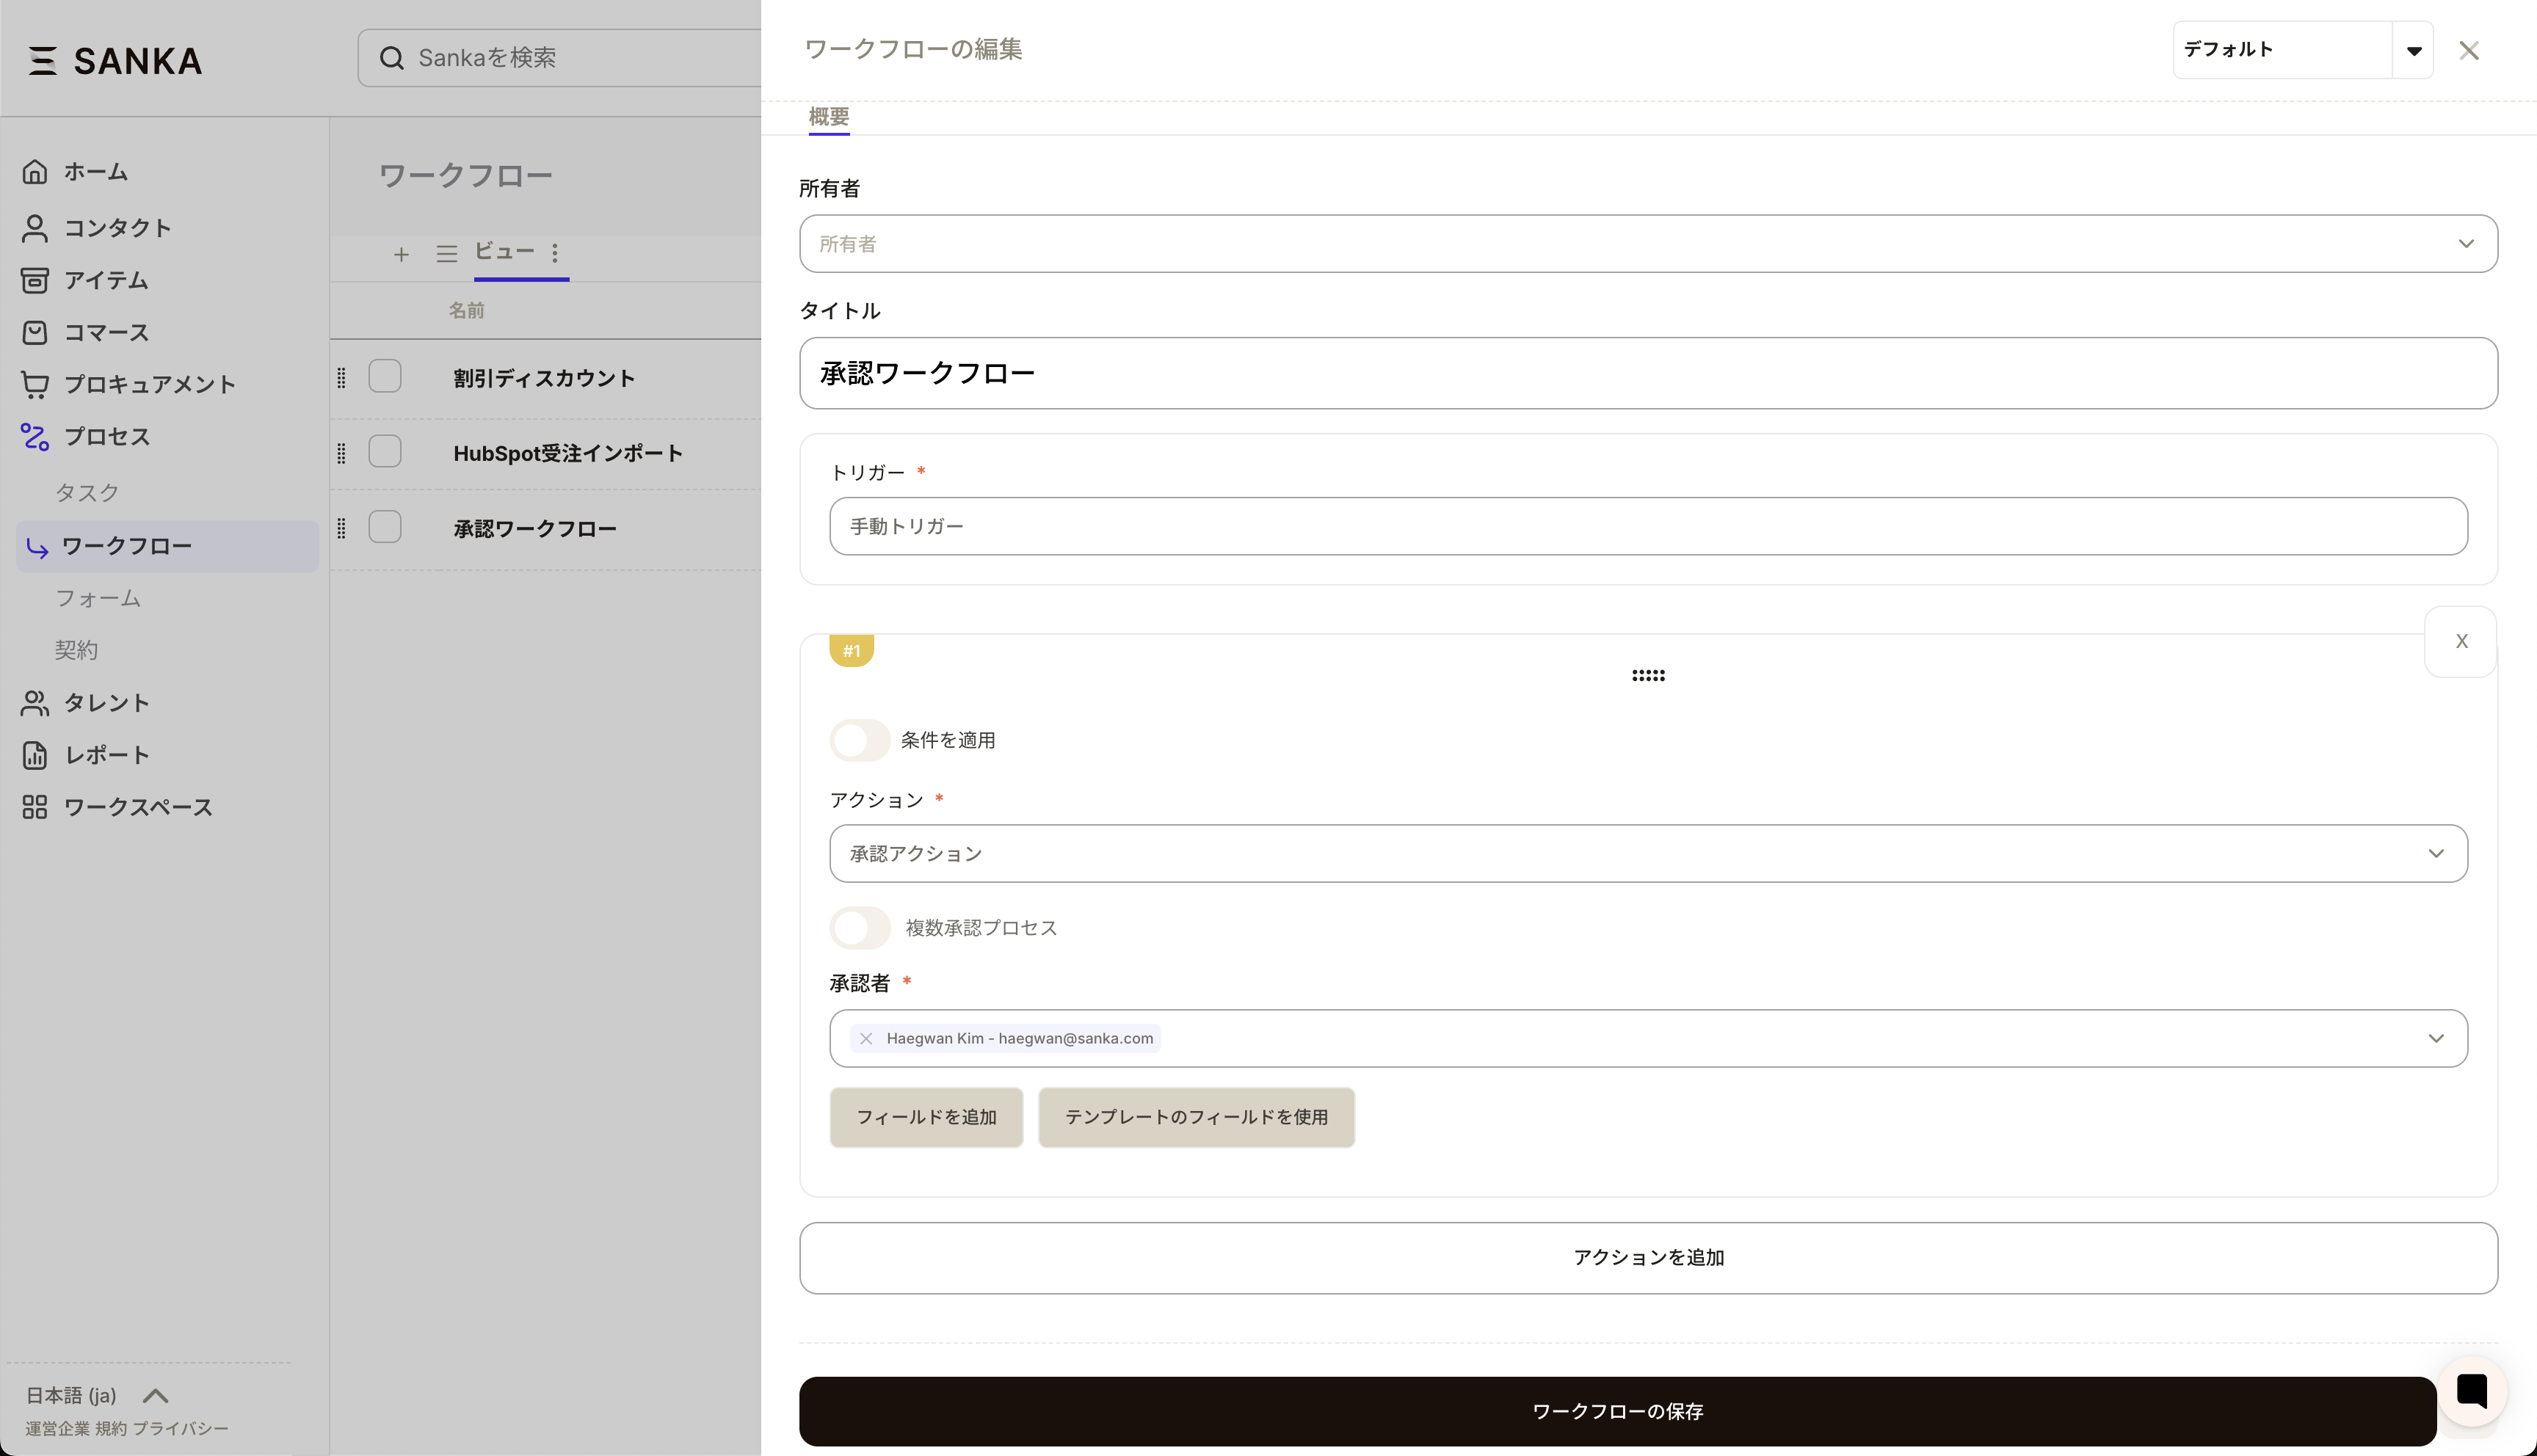
Step 1: Add Approval Action to Workflow
- Open the workflow editing screen
- Click the Add Action button
- Select “Approval Action”
Step 2: Set up approvers
- Specify the approver in the approver selection field Directly select the user
Step 3: Configure custom fields (optional)
- Click the “Add Field” button
- Select field type (text, date, selection, checkbox)
- Set field labels and initial values
- Make required fields if necessary
Step 4: Utilize approval templates (optional)
Commonly used authorization field combinations can be saved as templates:- Click “Select from template”
- Select an existing template or create a new one
- Apply templates for efficient configuration
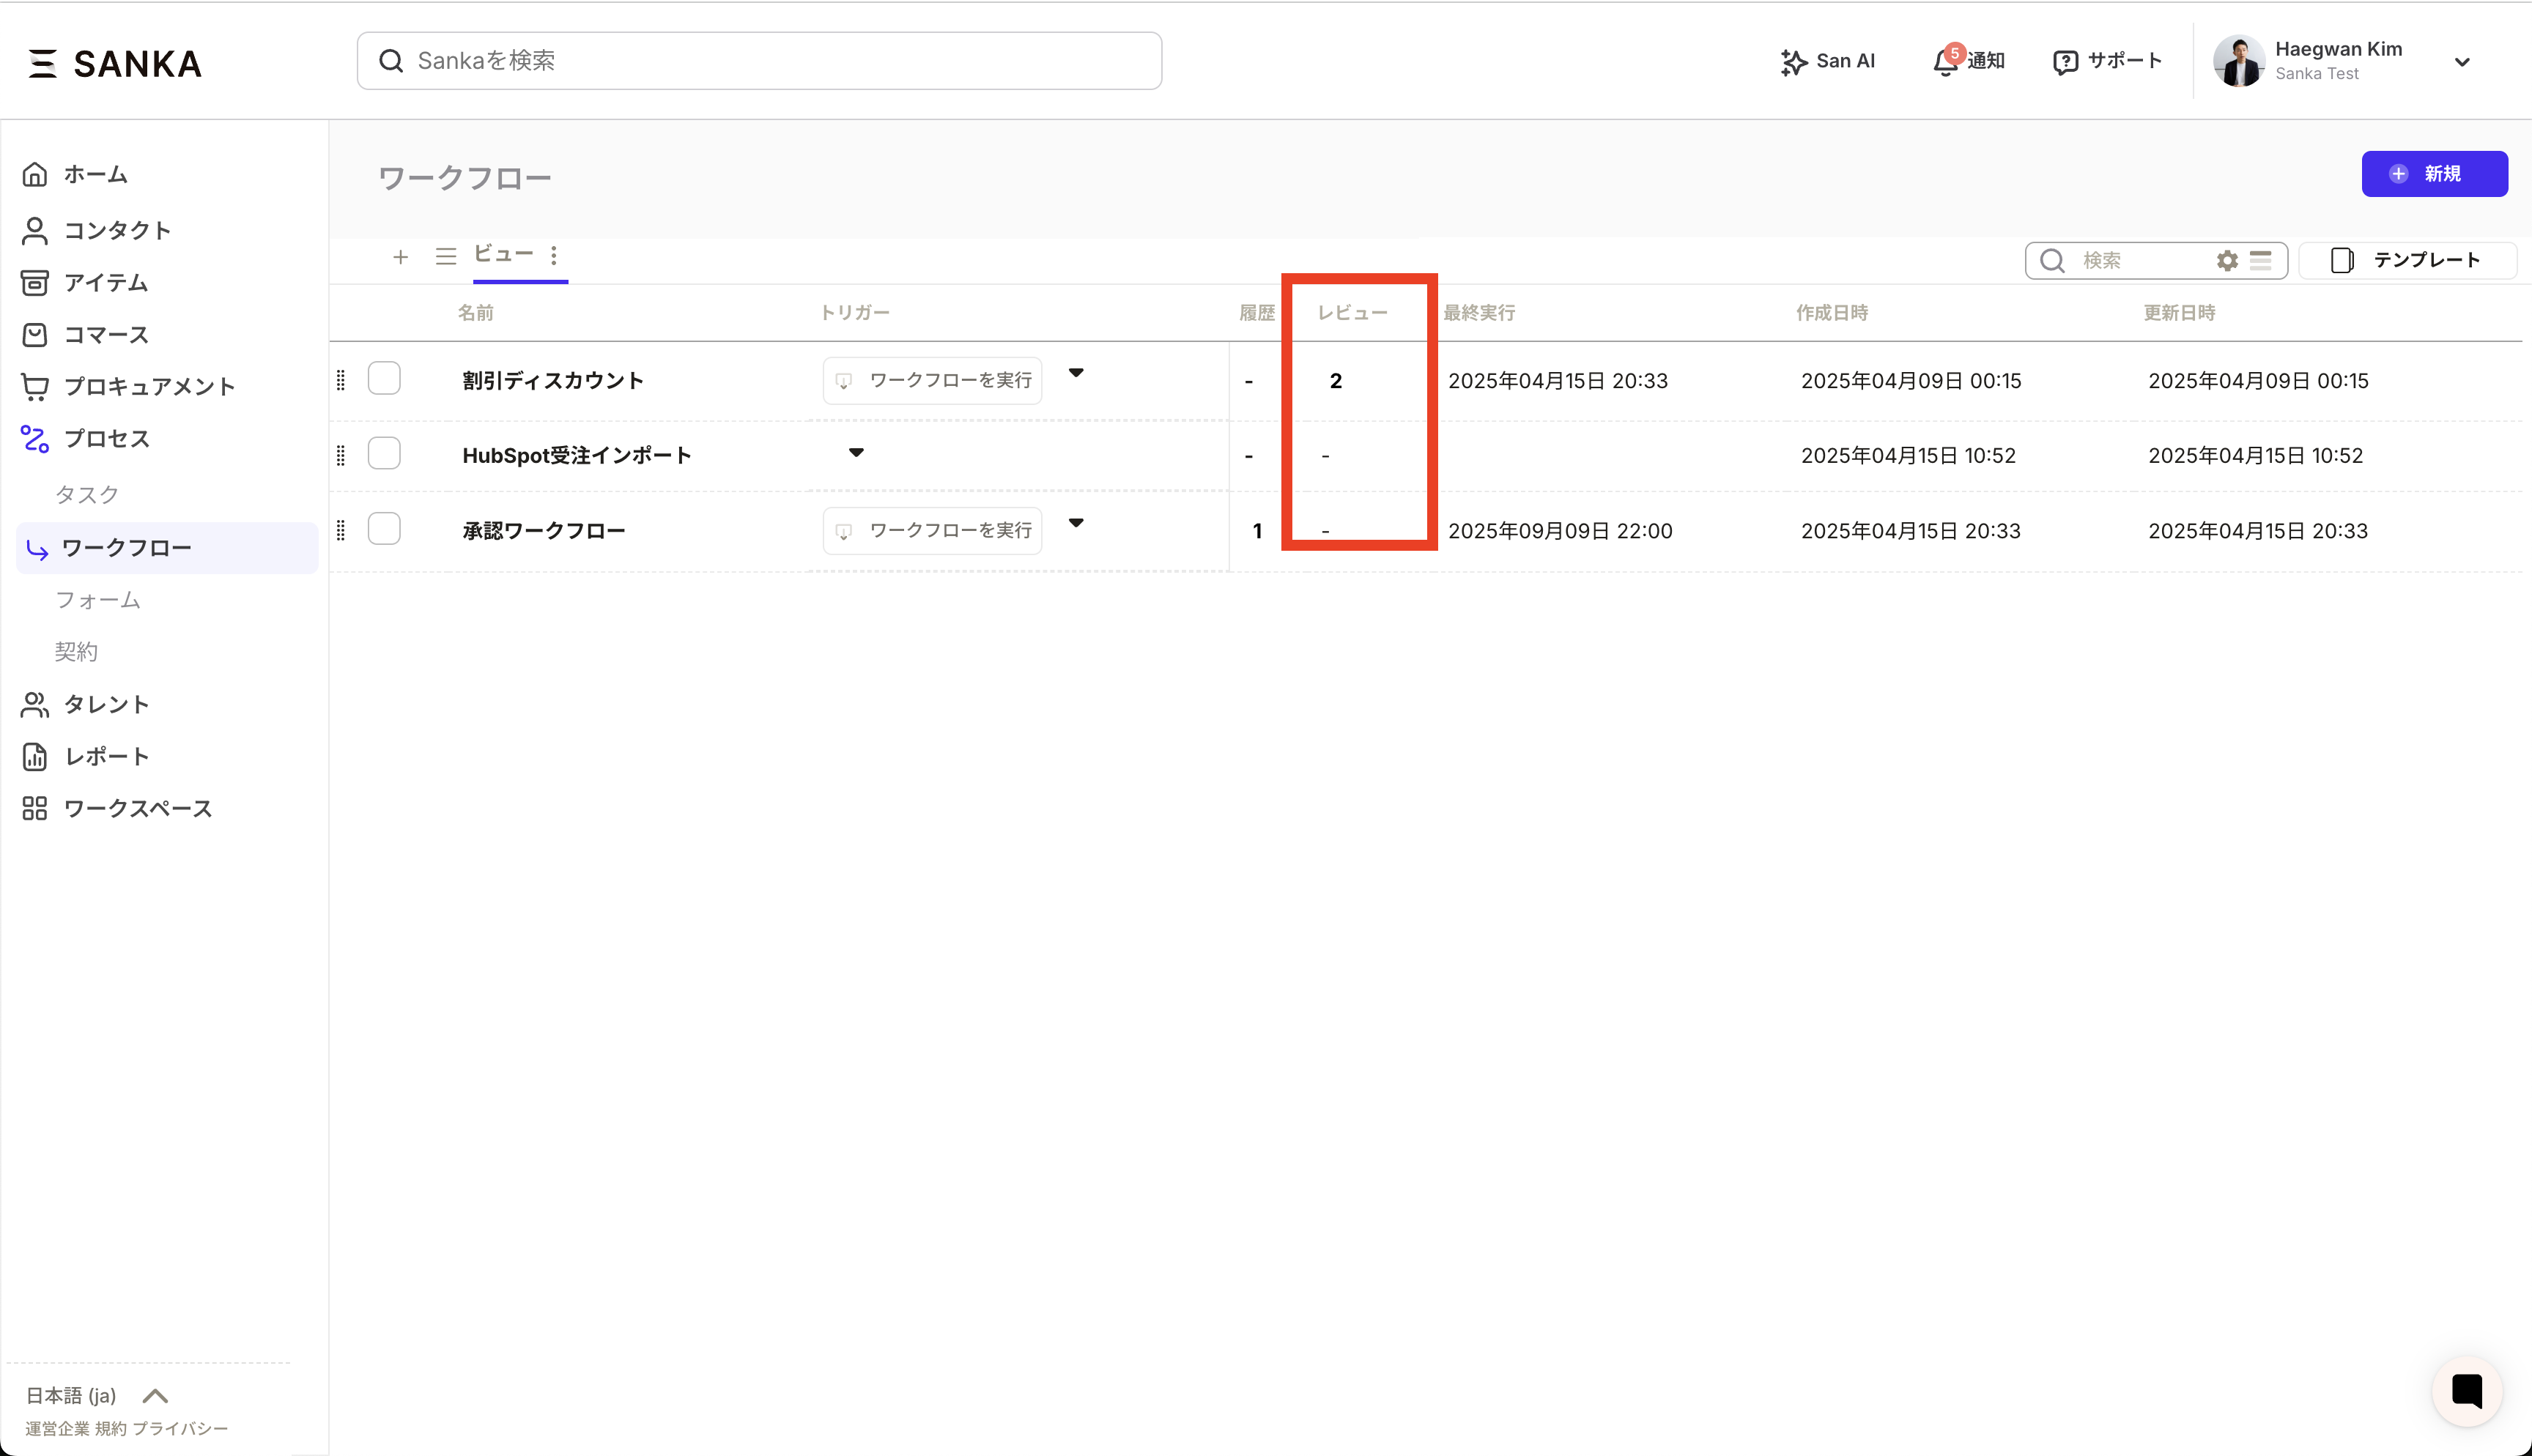
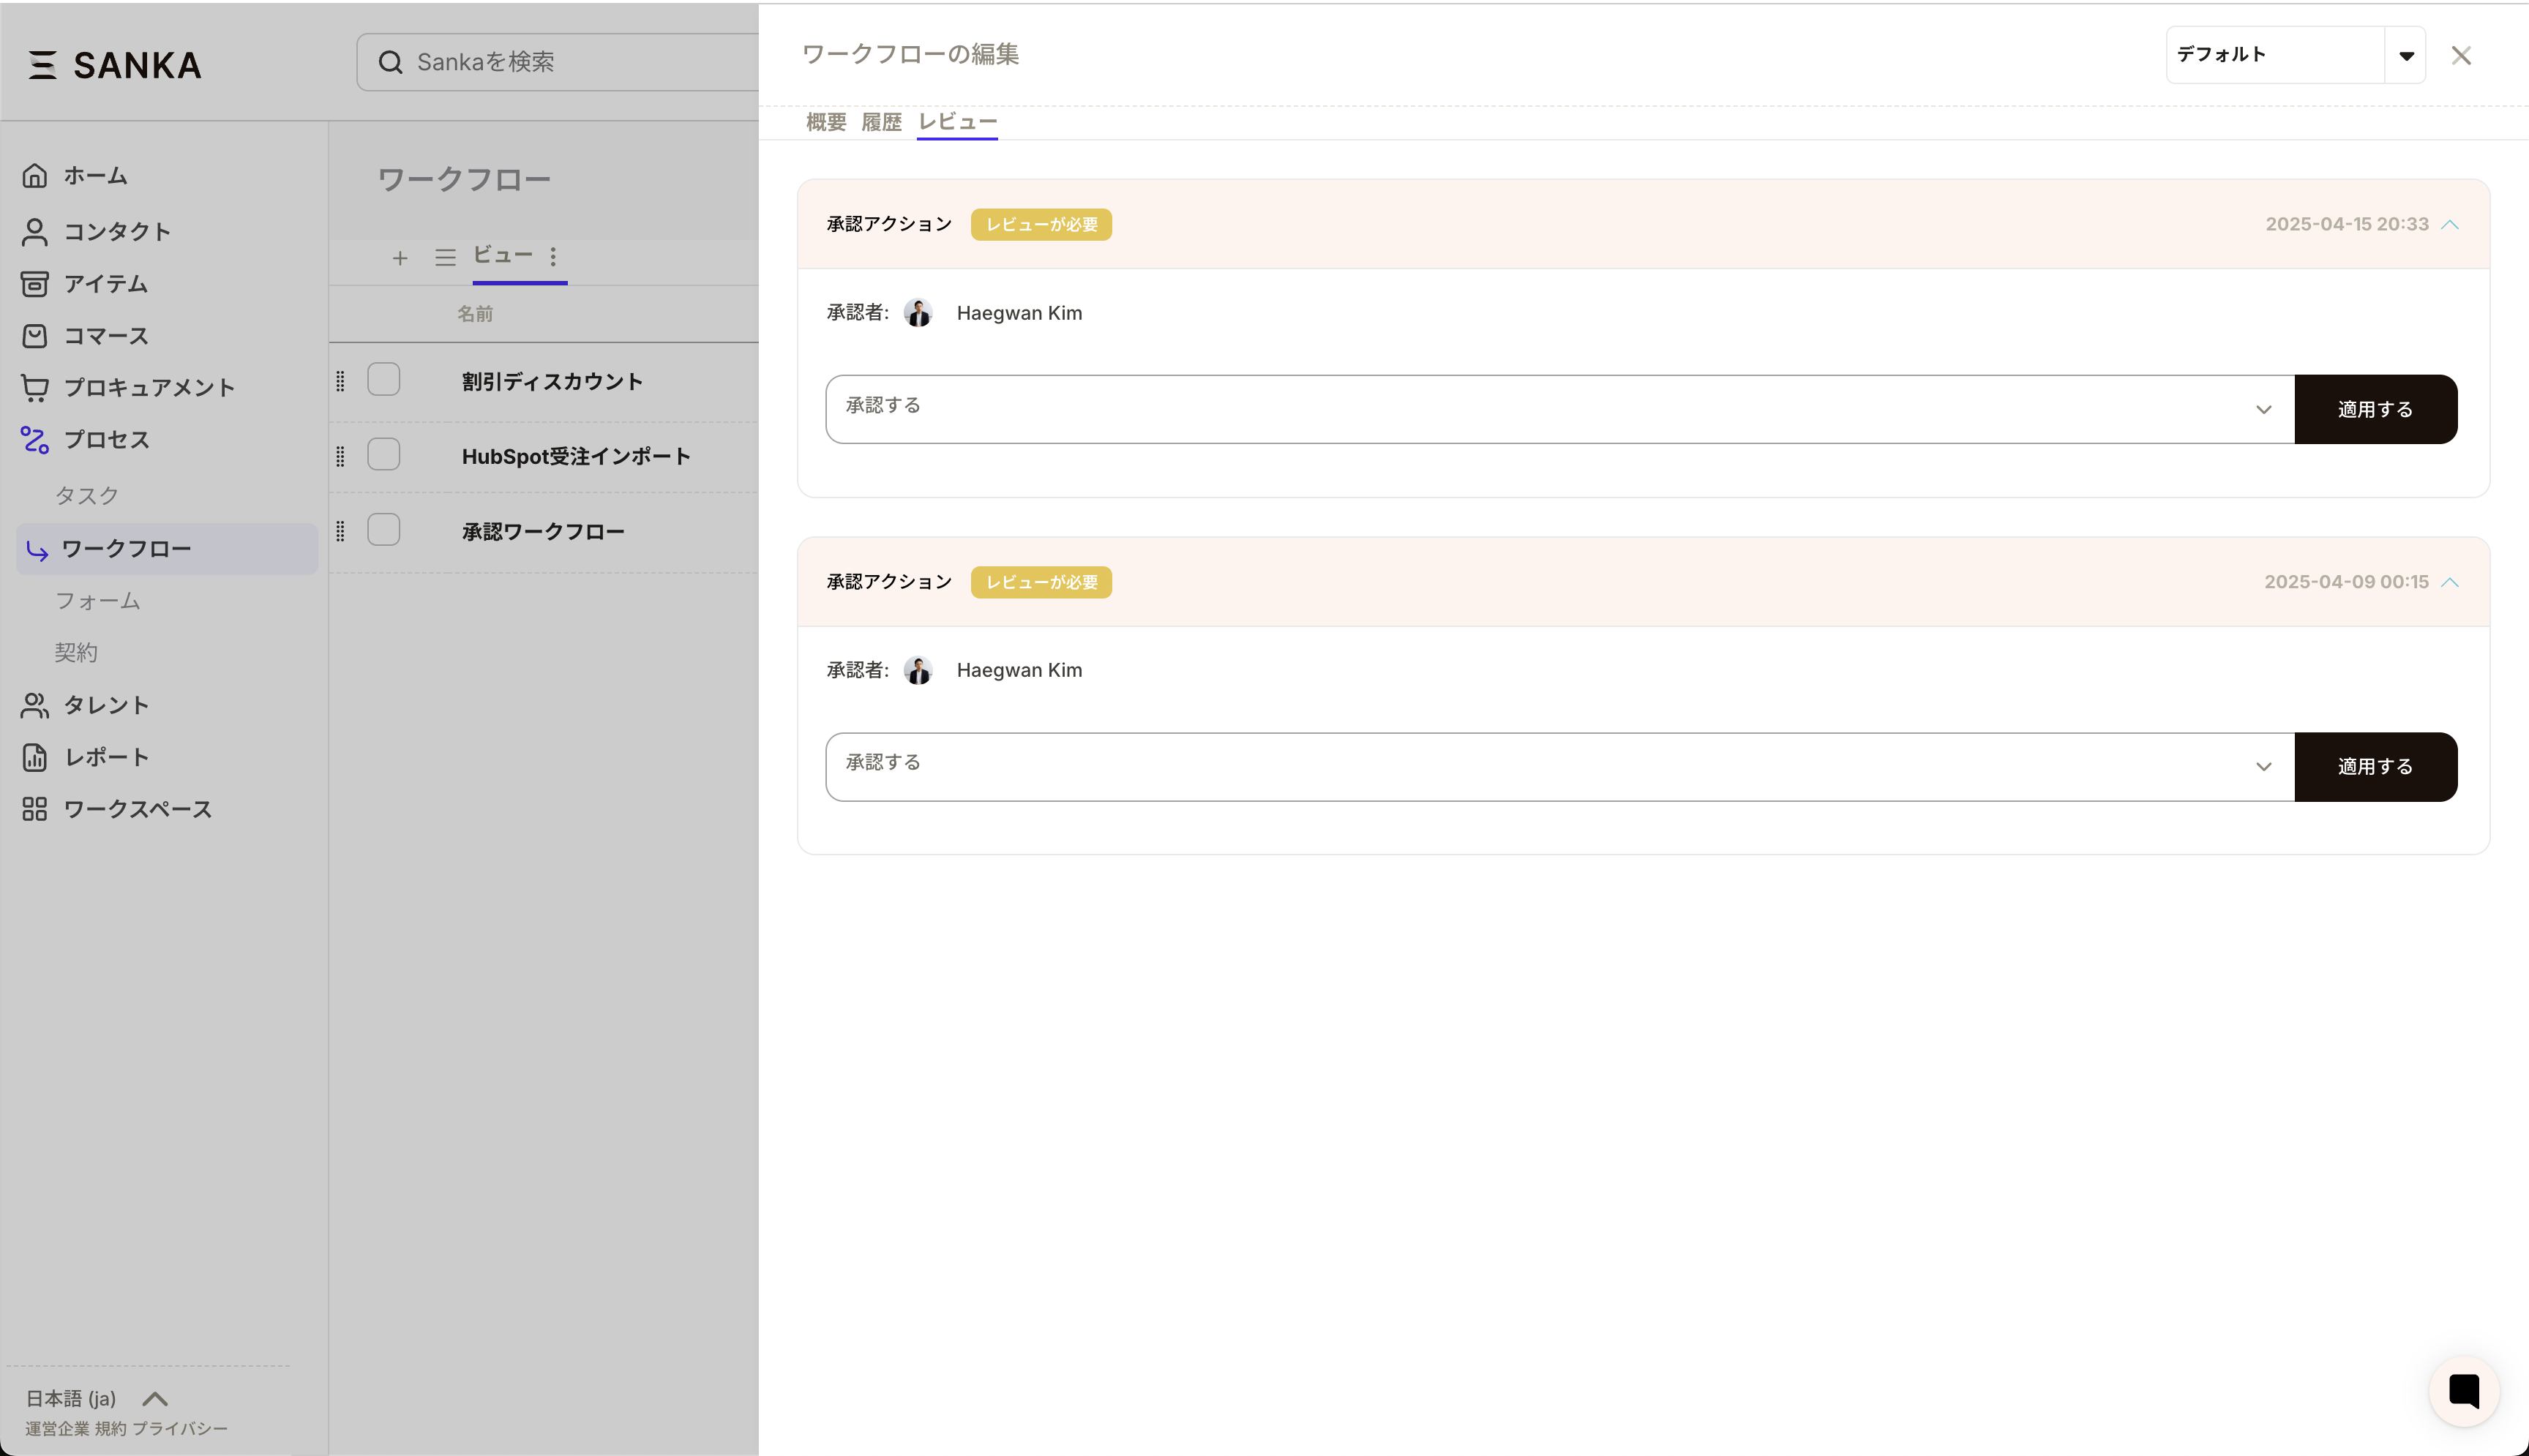
Runtime behavior
Approver’s perspective
- Receive approval request notification
- Check the content to be approved on the workflow details screen (click the review column)
- Enter the required information if there are custom fields.
- Select Approval/Reject/Remand
- In case of rejection/remand, state the reason
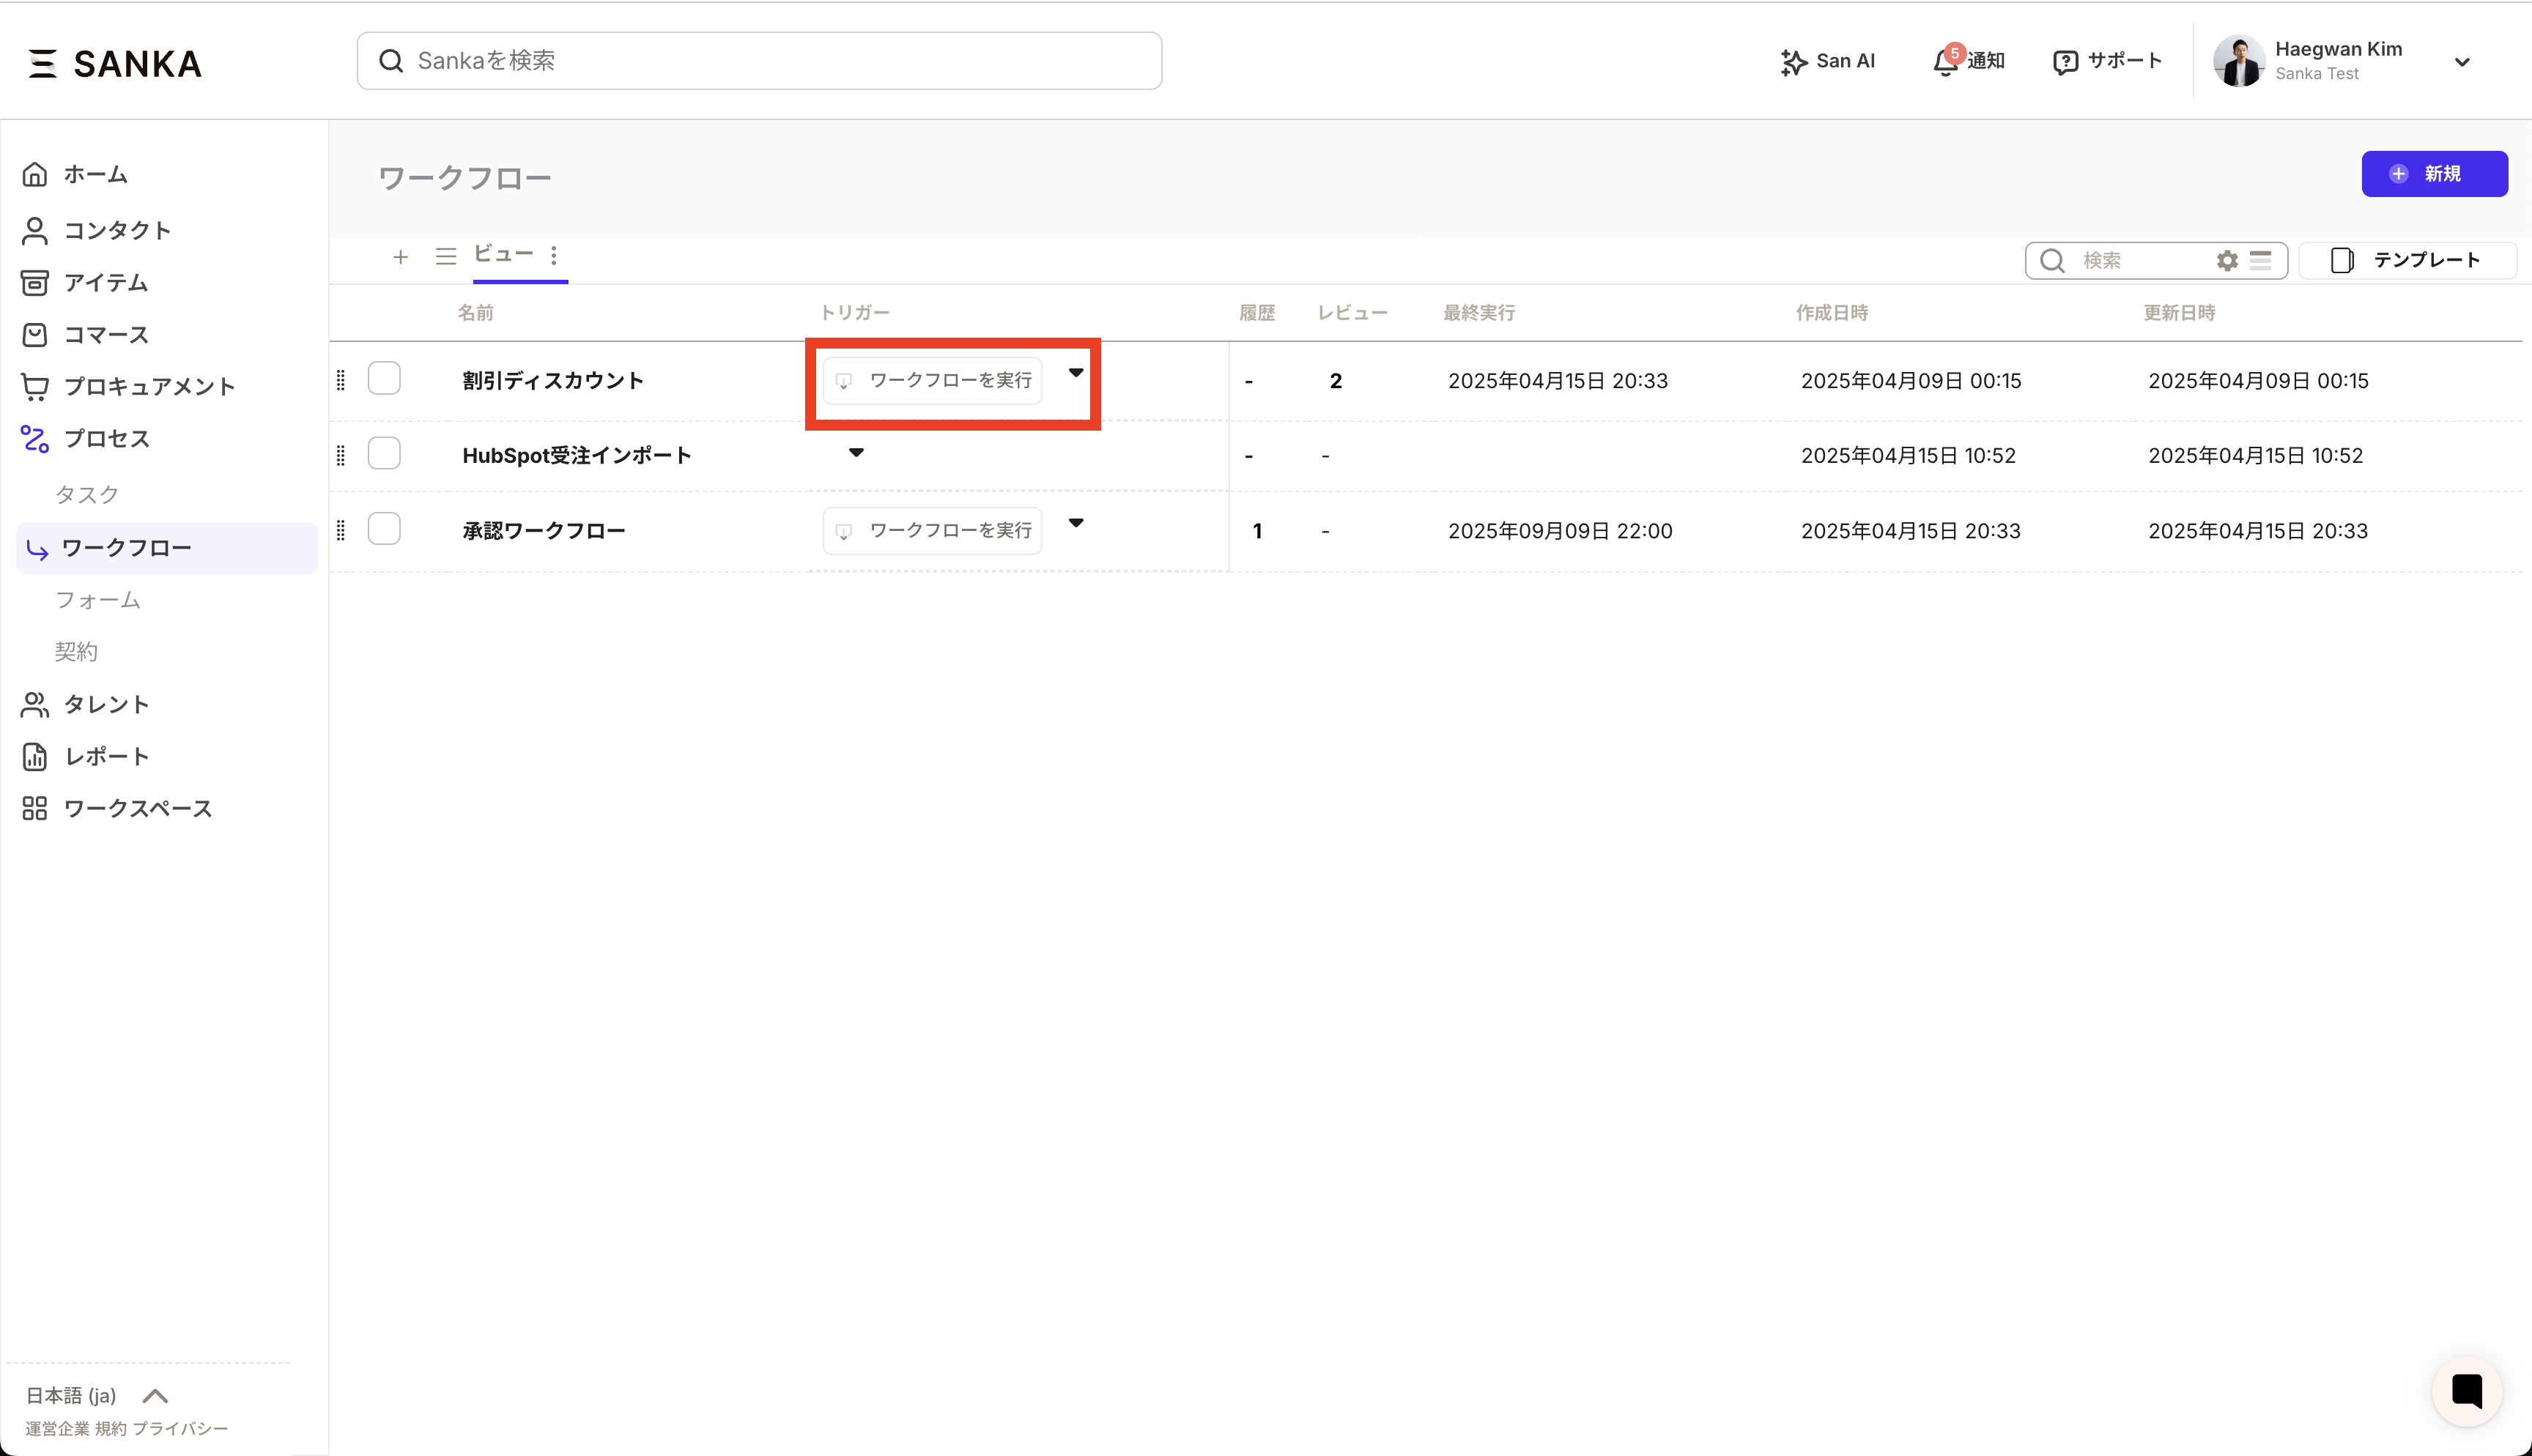
Applicant’s perspective
- Run workflow and request approval
- Wait for approver action
- If approved: automatically proceed to the next step
- If rejected: Workflow stops, reason can be checked
- If sent back: Can be rerun from the specified step
Usage example
Example 1: Approval of purchase requisition
- Change approver depending on amount
- Collect purchase reasons and usage with custom fields
Example 2: Approving a leave request
- Set your immediate superior as the approver
- Enter the vacation period in the date field
- Specify leave type in selection field
Example 3: Approving the estimated amount
- Requires approval from both sales and finance managers
- Enter date and amount in the fields
FAQ
**Q: Can I check my approval history? ** A: Yes, you can check who approved it, when it was approved, and what the reason was on the workflow history screen. **Q: Can I set an approval deadline? ** A: Combined with the overall workflow timeout settings, you can manage approval deadlines. A reminder notification will be sent when the deadline approaches.troubleshooting
Approve button not visible
- Check if you are set correctly as an approver
- Check if the workflow is waiting for approval
- Clear browser cache and reload
Custom field values are not saved
- Make sure all required fields are filled in
- Check that the field format (date format, etc.) is correct
- Check network connection
I didn’t receive the approval notification
- Check if approval notifications are enabled in notification settings
- Check if your email address is registered correctly
- Check your spam folder
Best Practices
- Clear approval criteria: Approval criteria are clearly stated to make it easier for approvers to make decisions.
- Appropriate number of approvers: Too many approvers will slow down the process, so keep them to the minimum necessary.
- Escalation settings: Escalation to higher level if not approved for a certain period of time
- Template utilization: Make frequently used approval patterns into templates to improve efficiency.
- Regular review: Regularly check and improve whether the approval flow matches the actual situation.