Guide Overview
In this article, we will explain the action function. With actions, you can perform a variety of processes based on record information, such as creating records in other objects, summing records, creating forms, and sending emails.This guide summarizes the flow of creating records, migrating properties, issuing forms, sending forms by email, and setting message templates.
Advance preparation
- Must have permission to create and edit records for the target object
- The source and destination objects must be linked.
- If you want to send a form, please register your email address in your company or contact record.
What you can do with actions
- Create a record of another object by inheriting the record information
- Add up records and issue a form
- Send all form files by email
Create record
You can create a record in one object by inheriting its contents from another object. The objects that are linked to each object are determined, but the basic method is the same.When creating a record with a record action
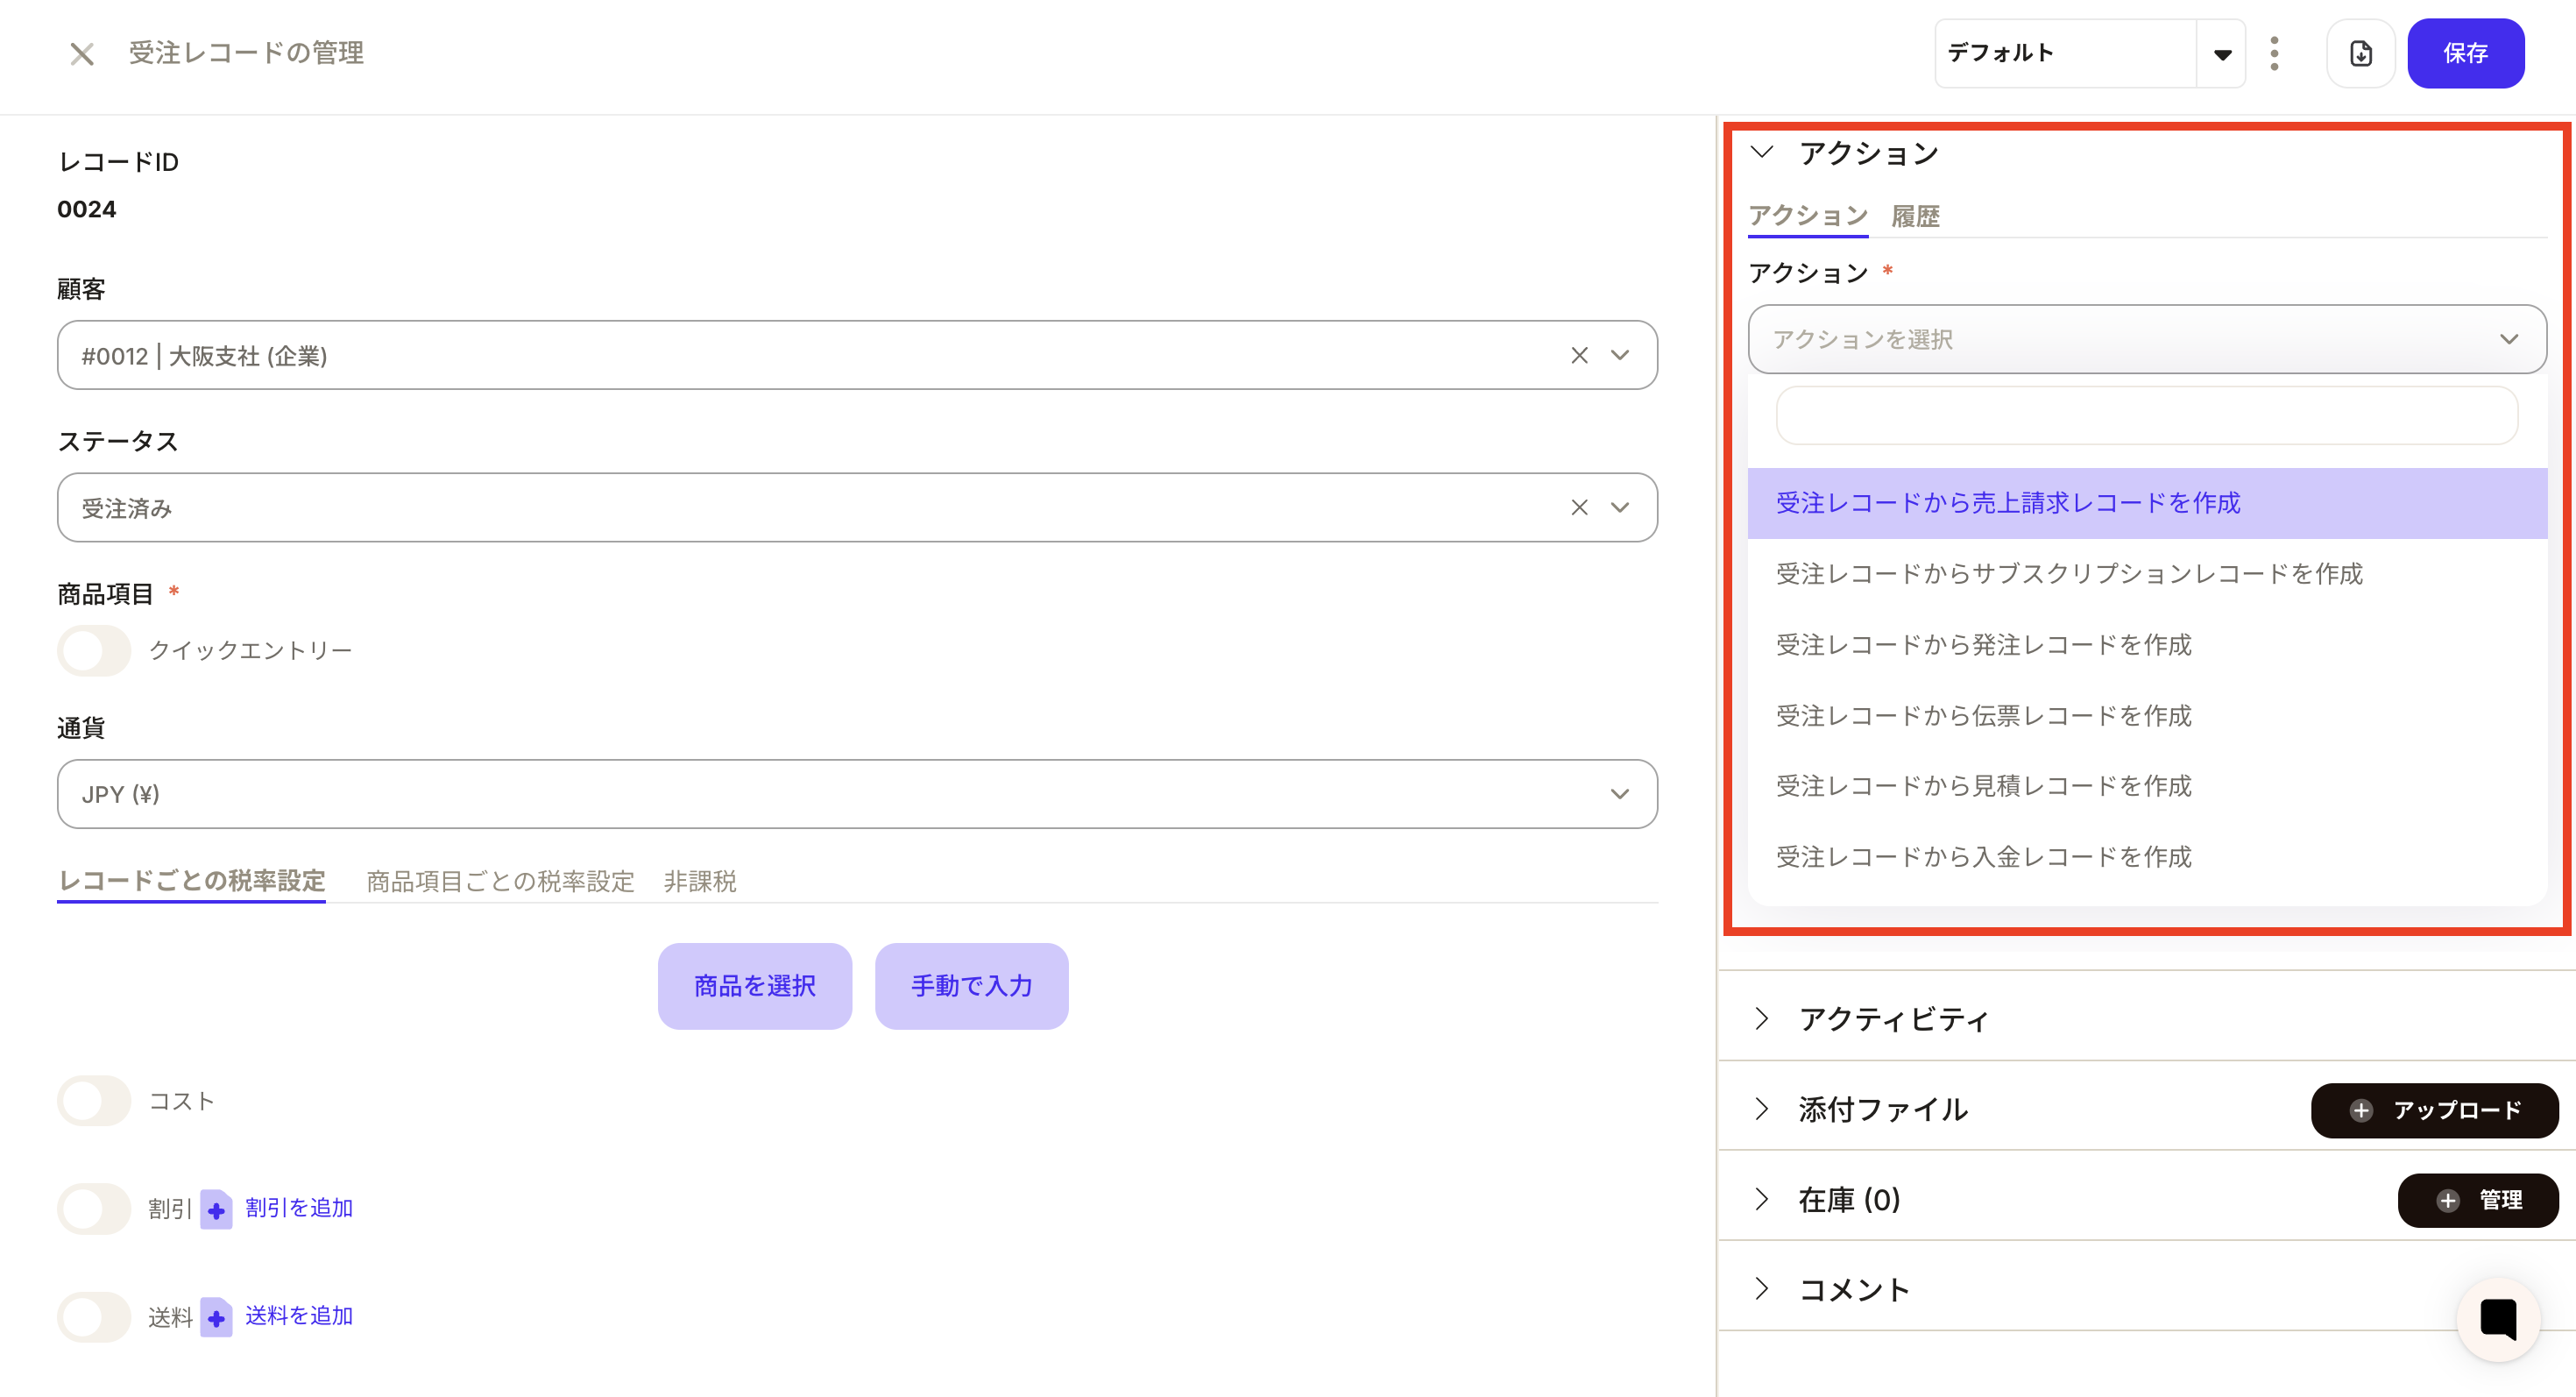
Perform this action from the action to the right of the record information. This is useful when you want to create using only one record, or when you want to create while checking the record contents.Example: Creating a sales billing record based on an order record- Press the action button on the top right of the order record information.

- Select “Create Sales Billing Record” from “Select Action”.
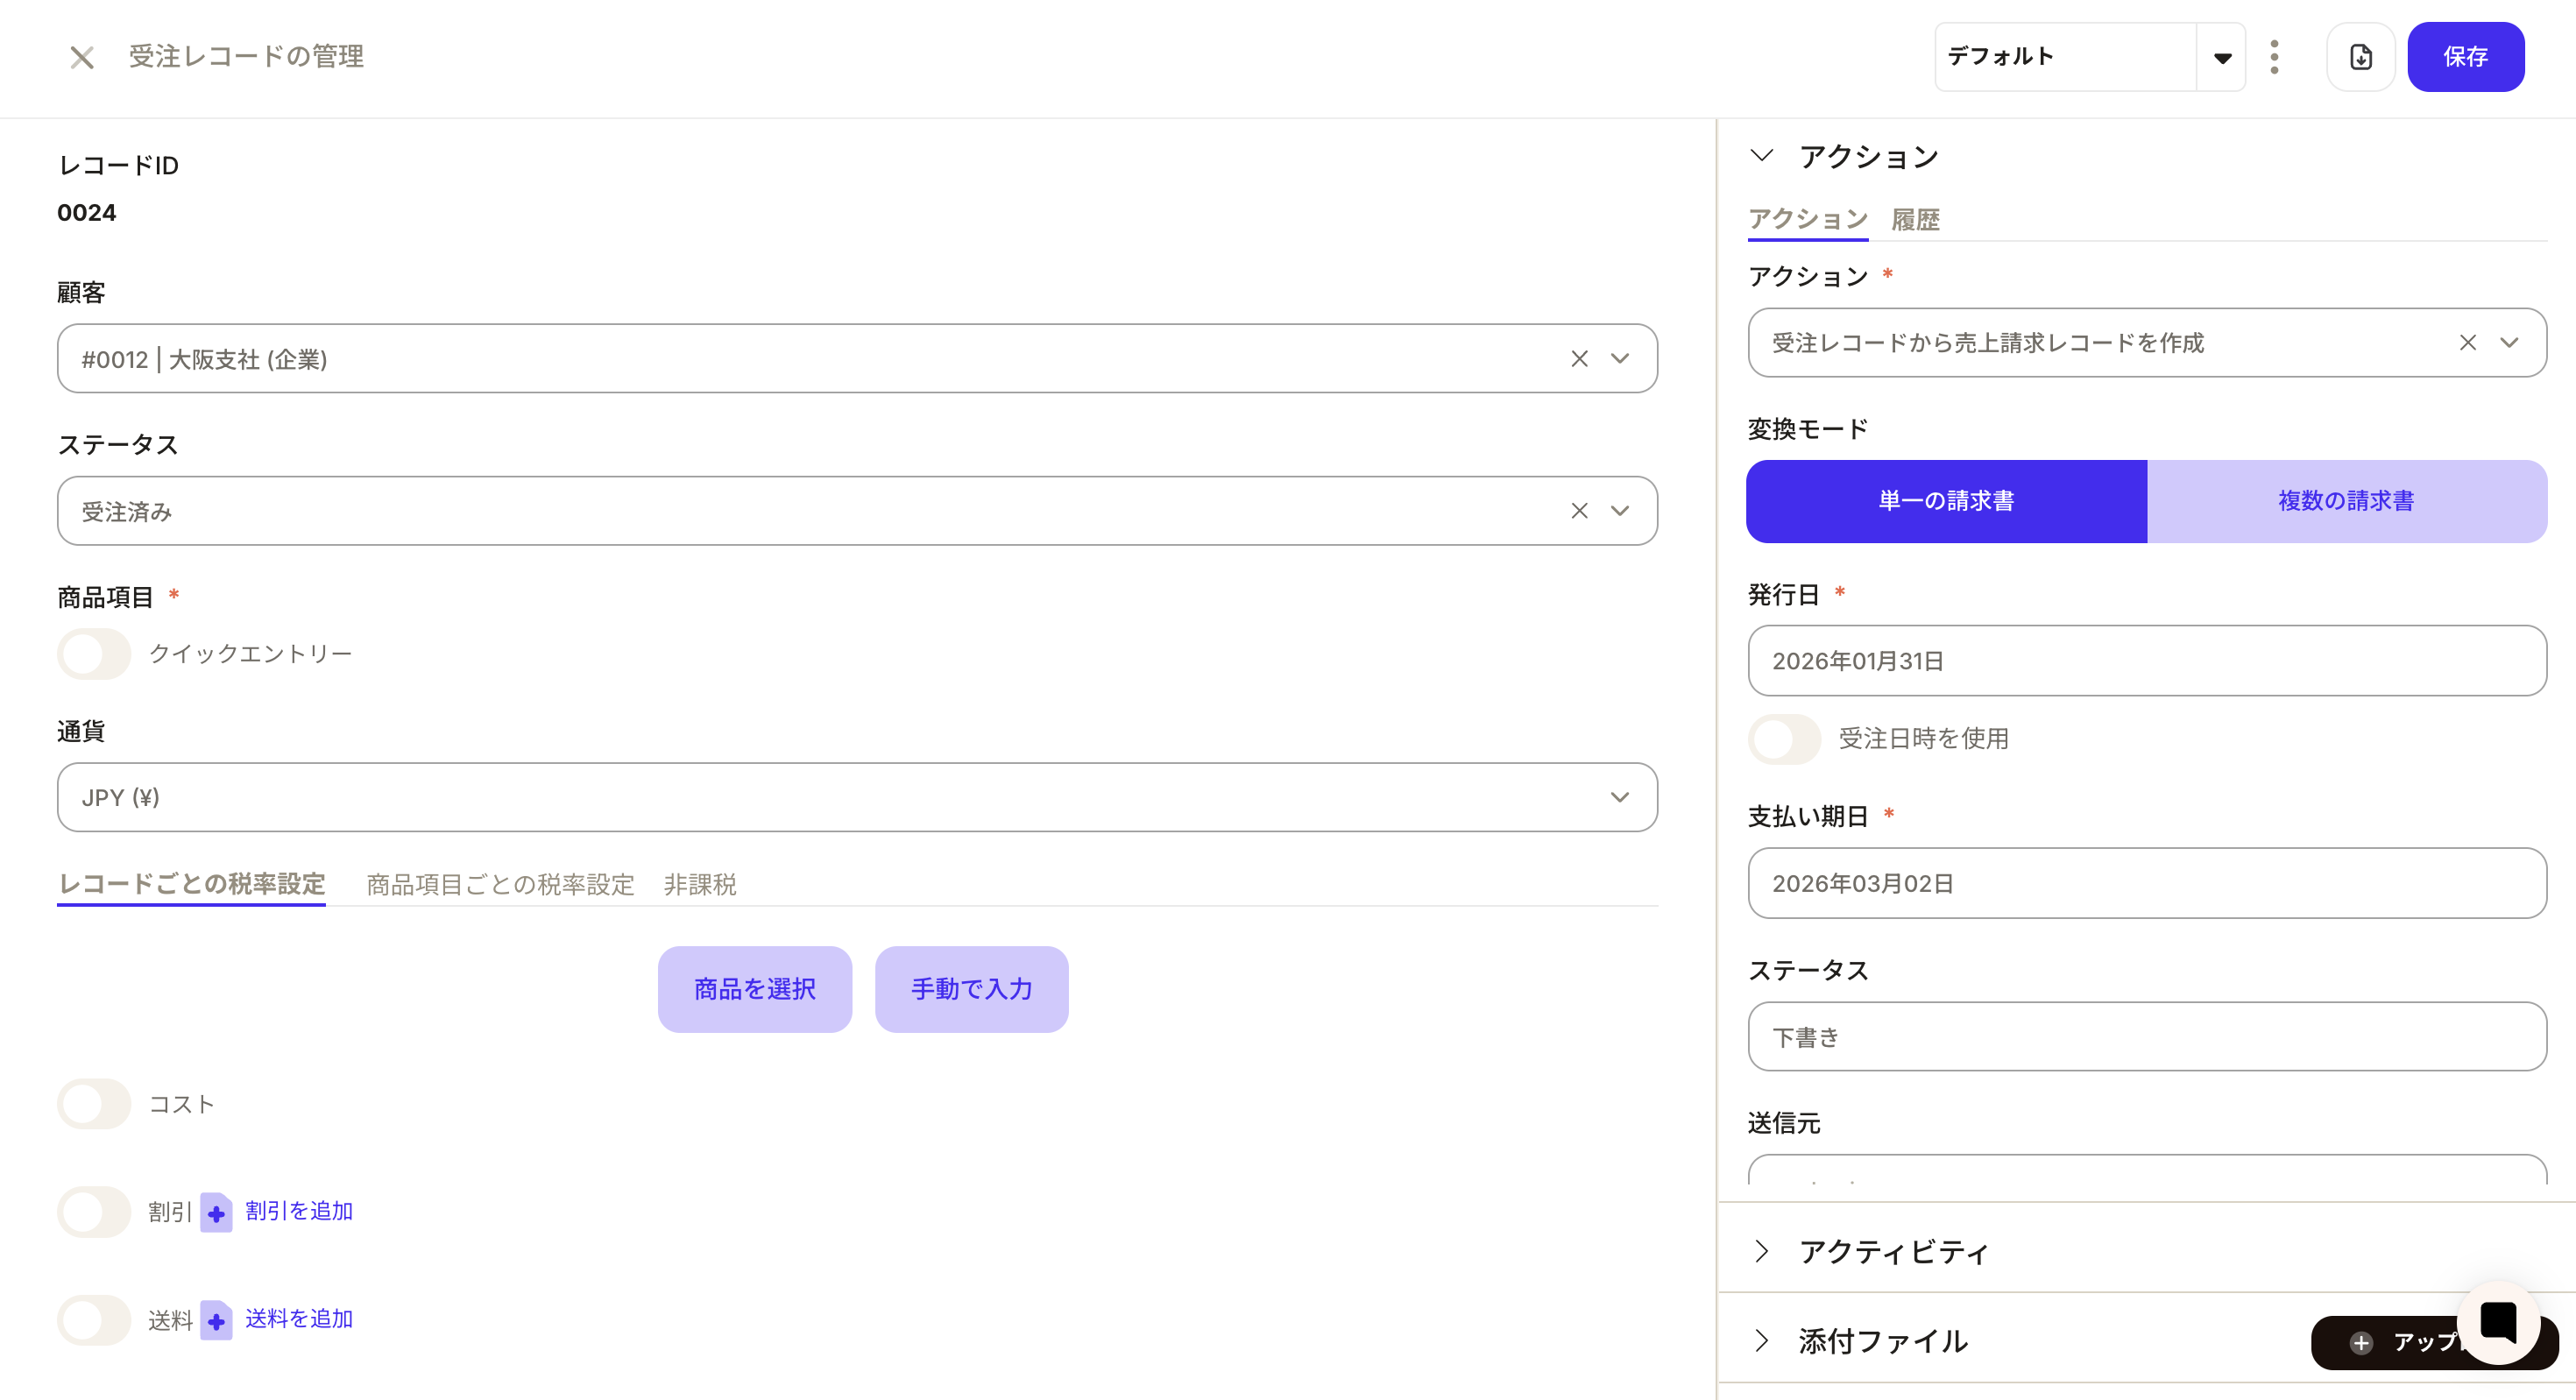
- Enter the required information. Issue date and payment date are required fields.
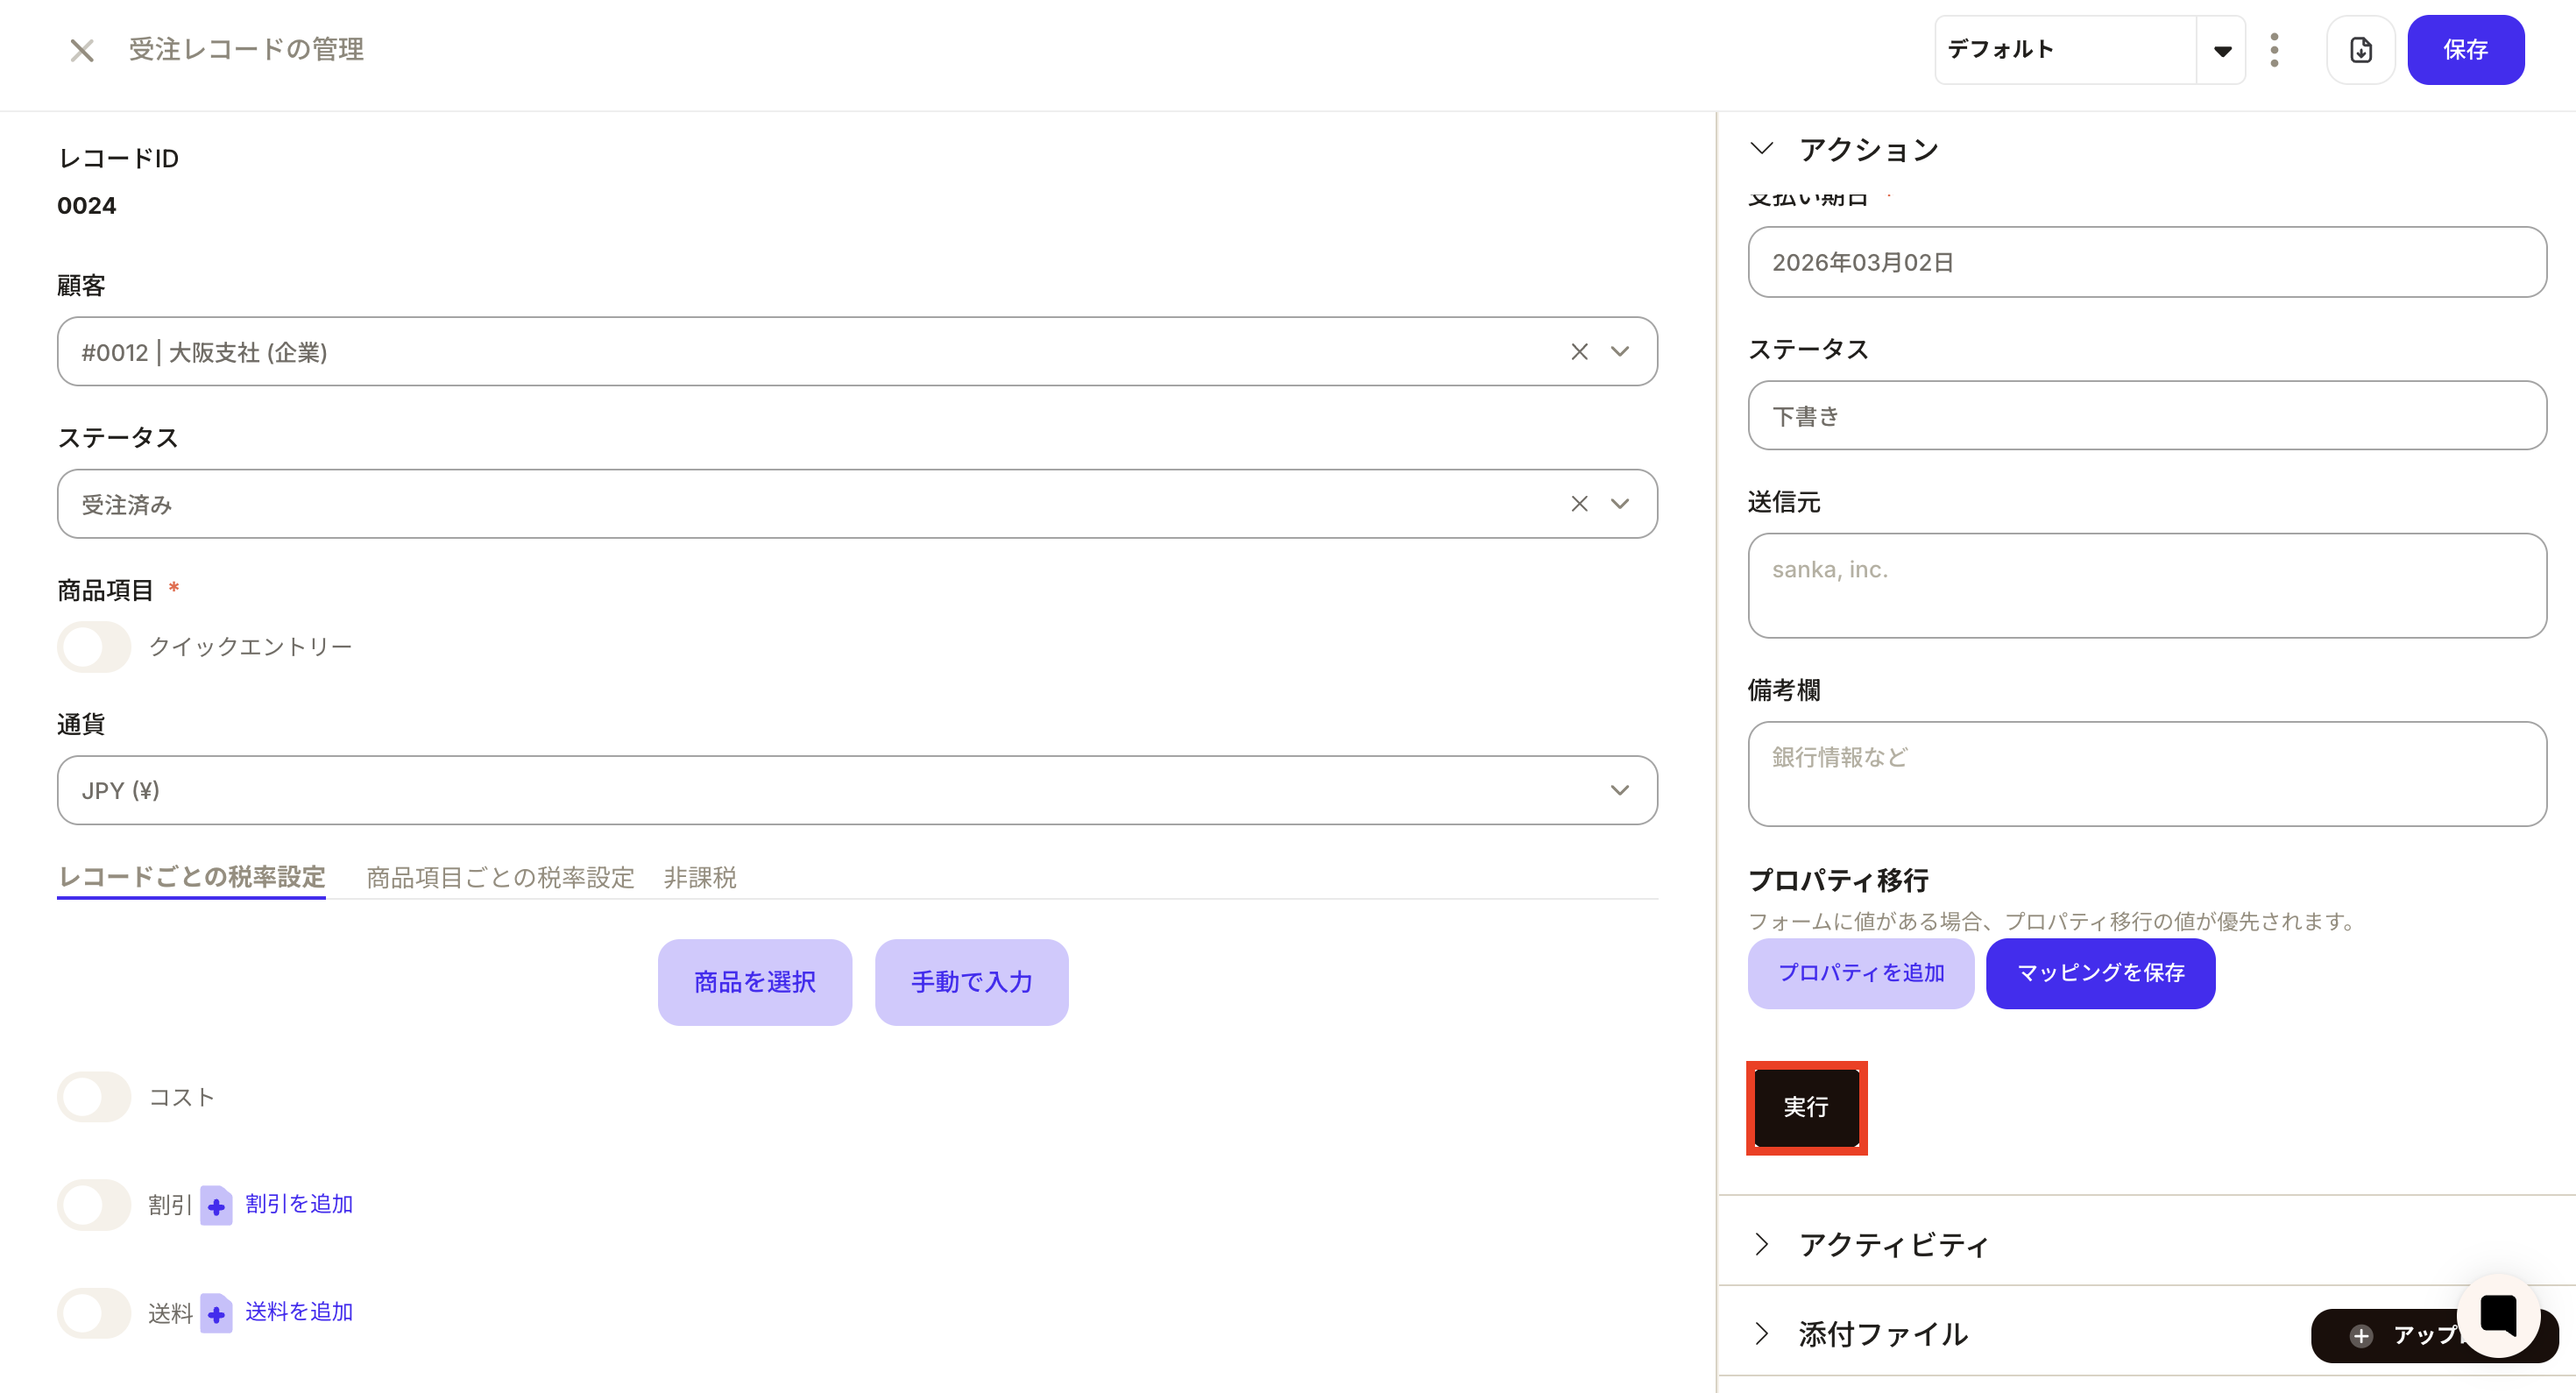
- Press the Run button.
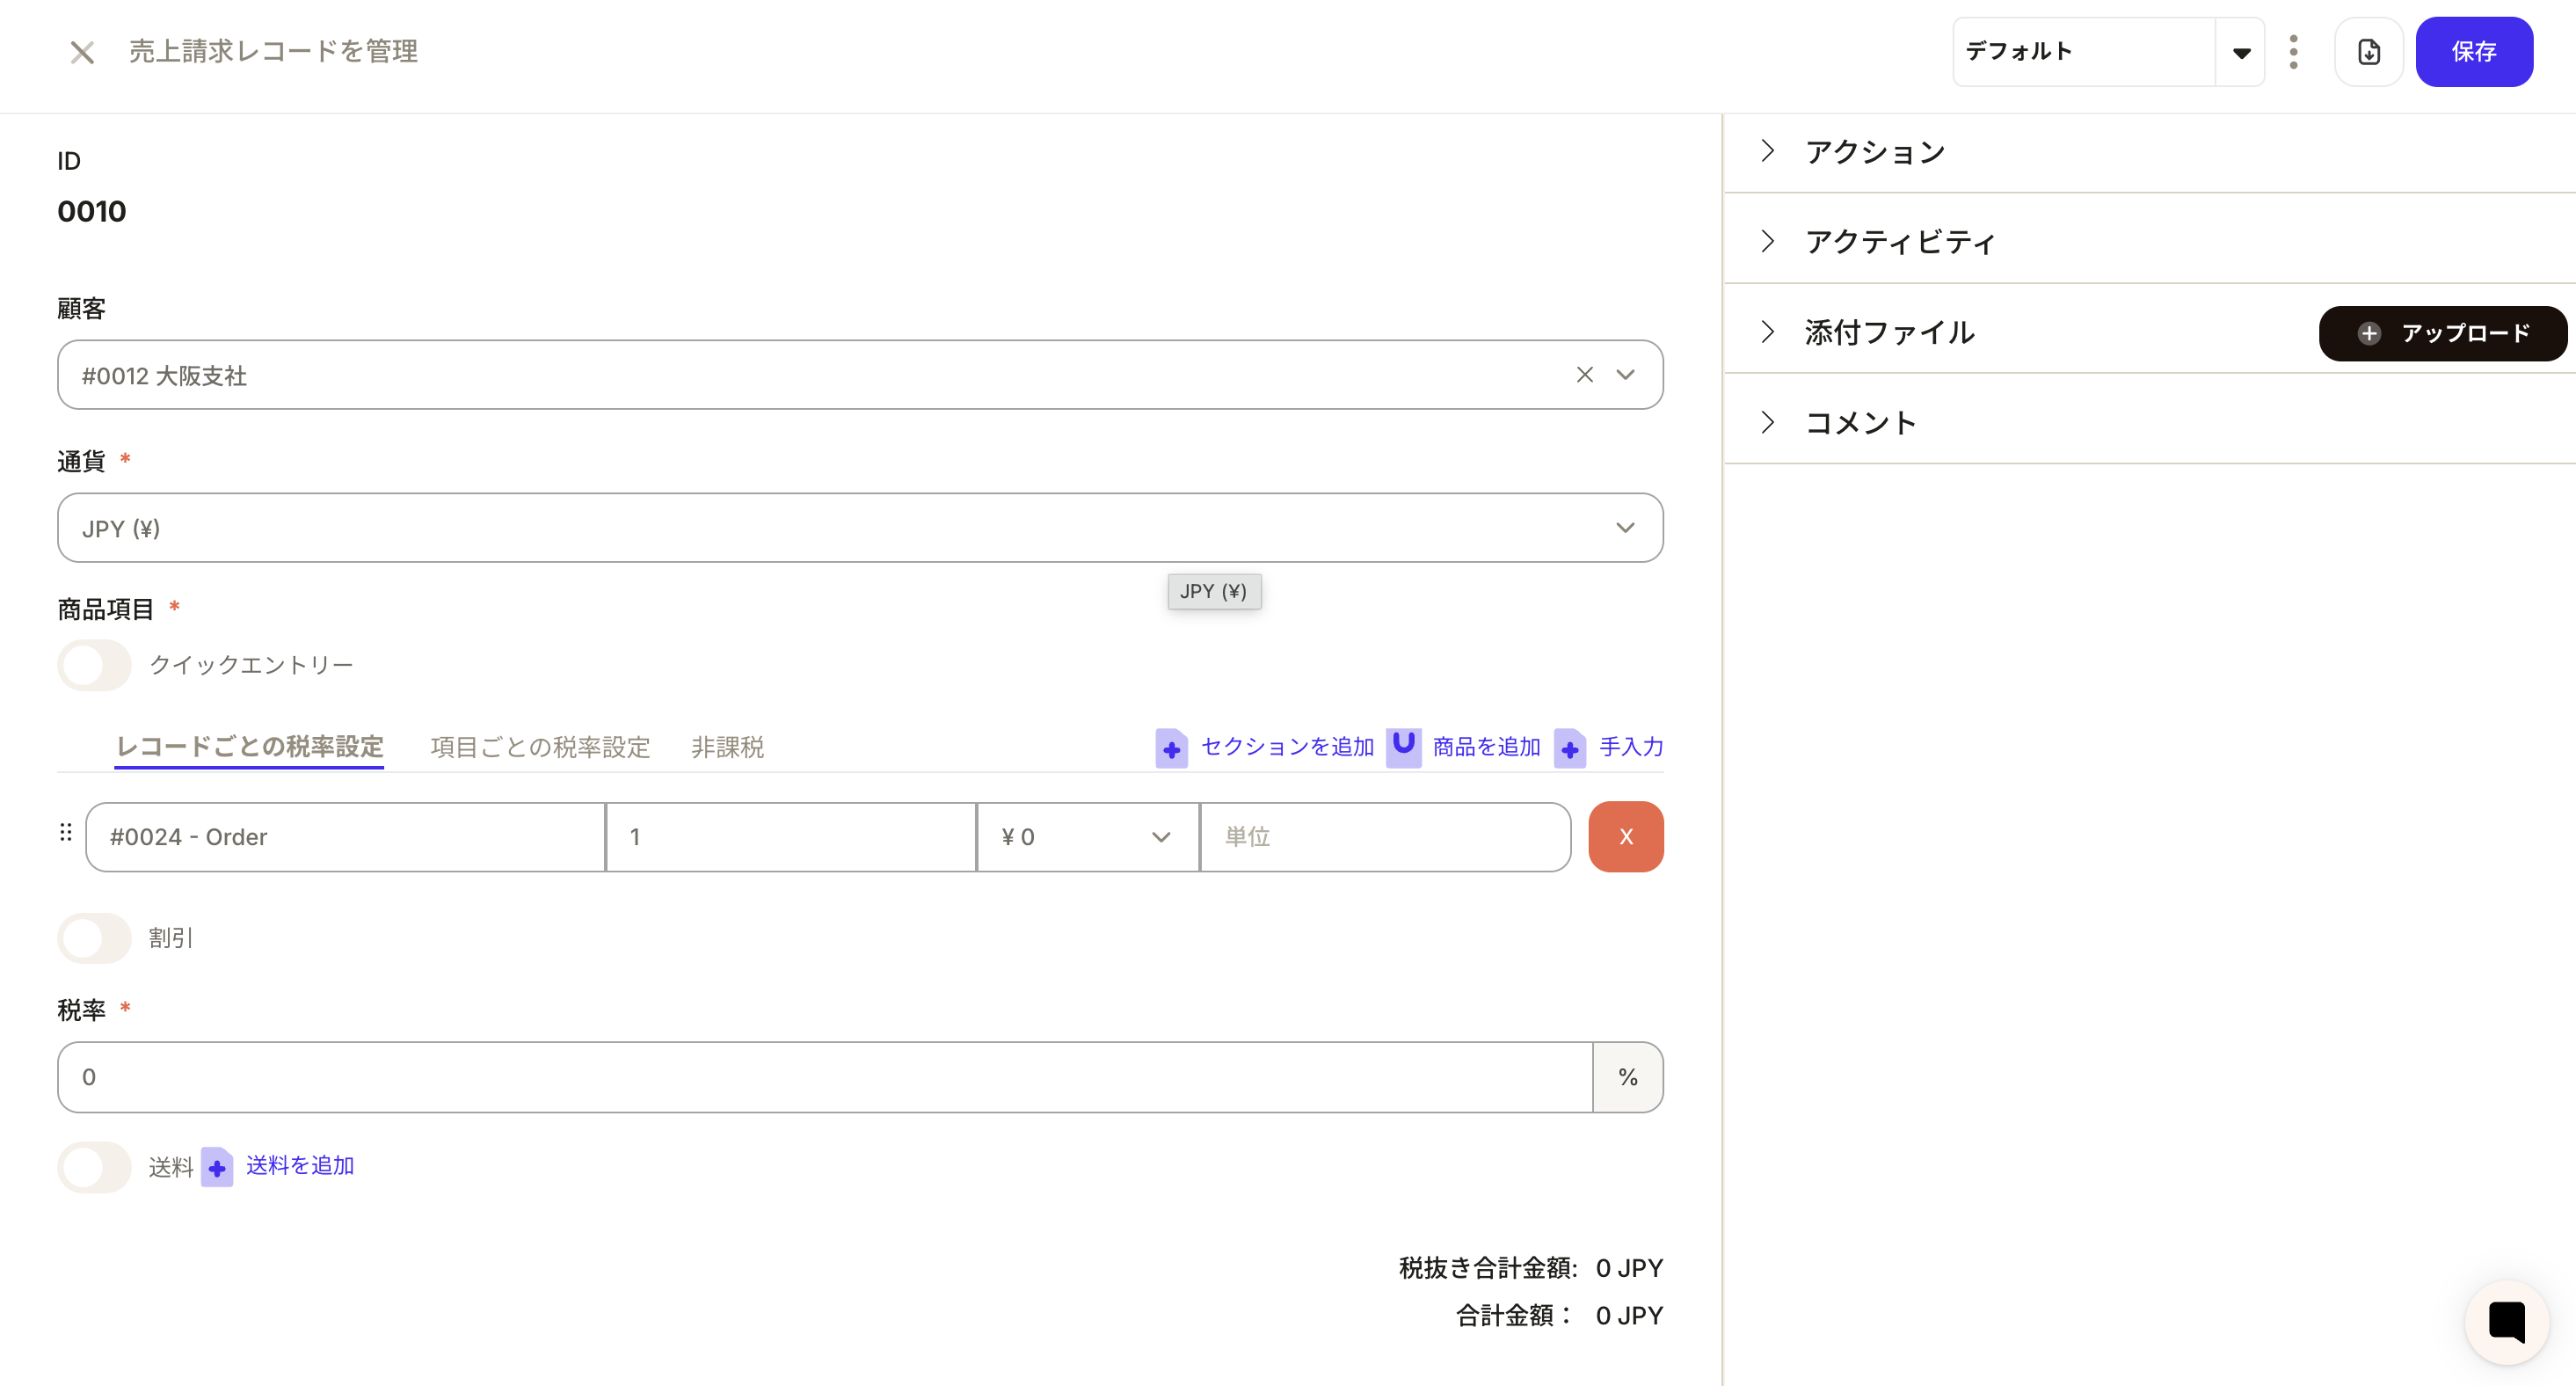
- A sales billing record is created from the sales order record.
When creating a record with an object action
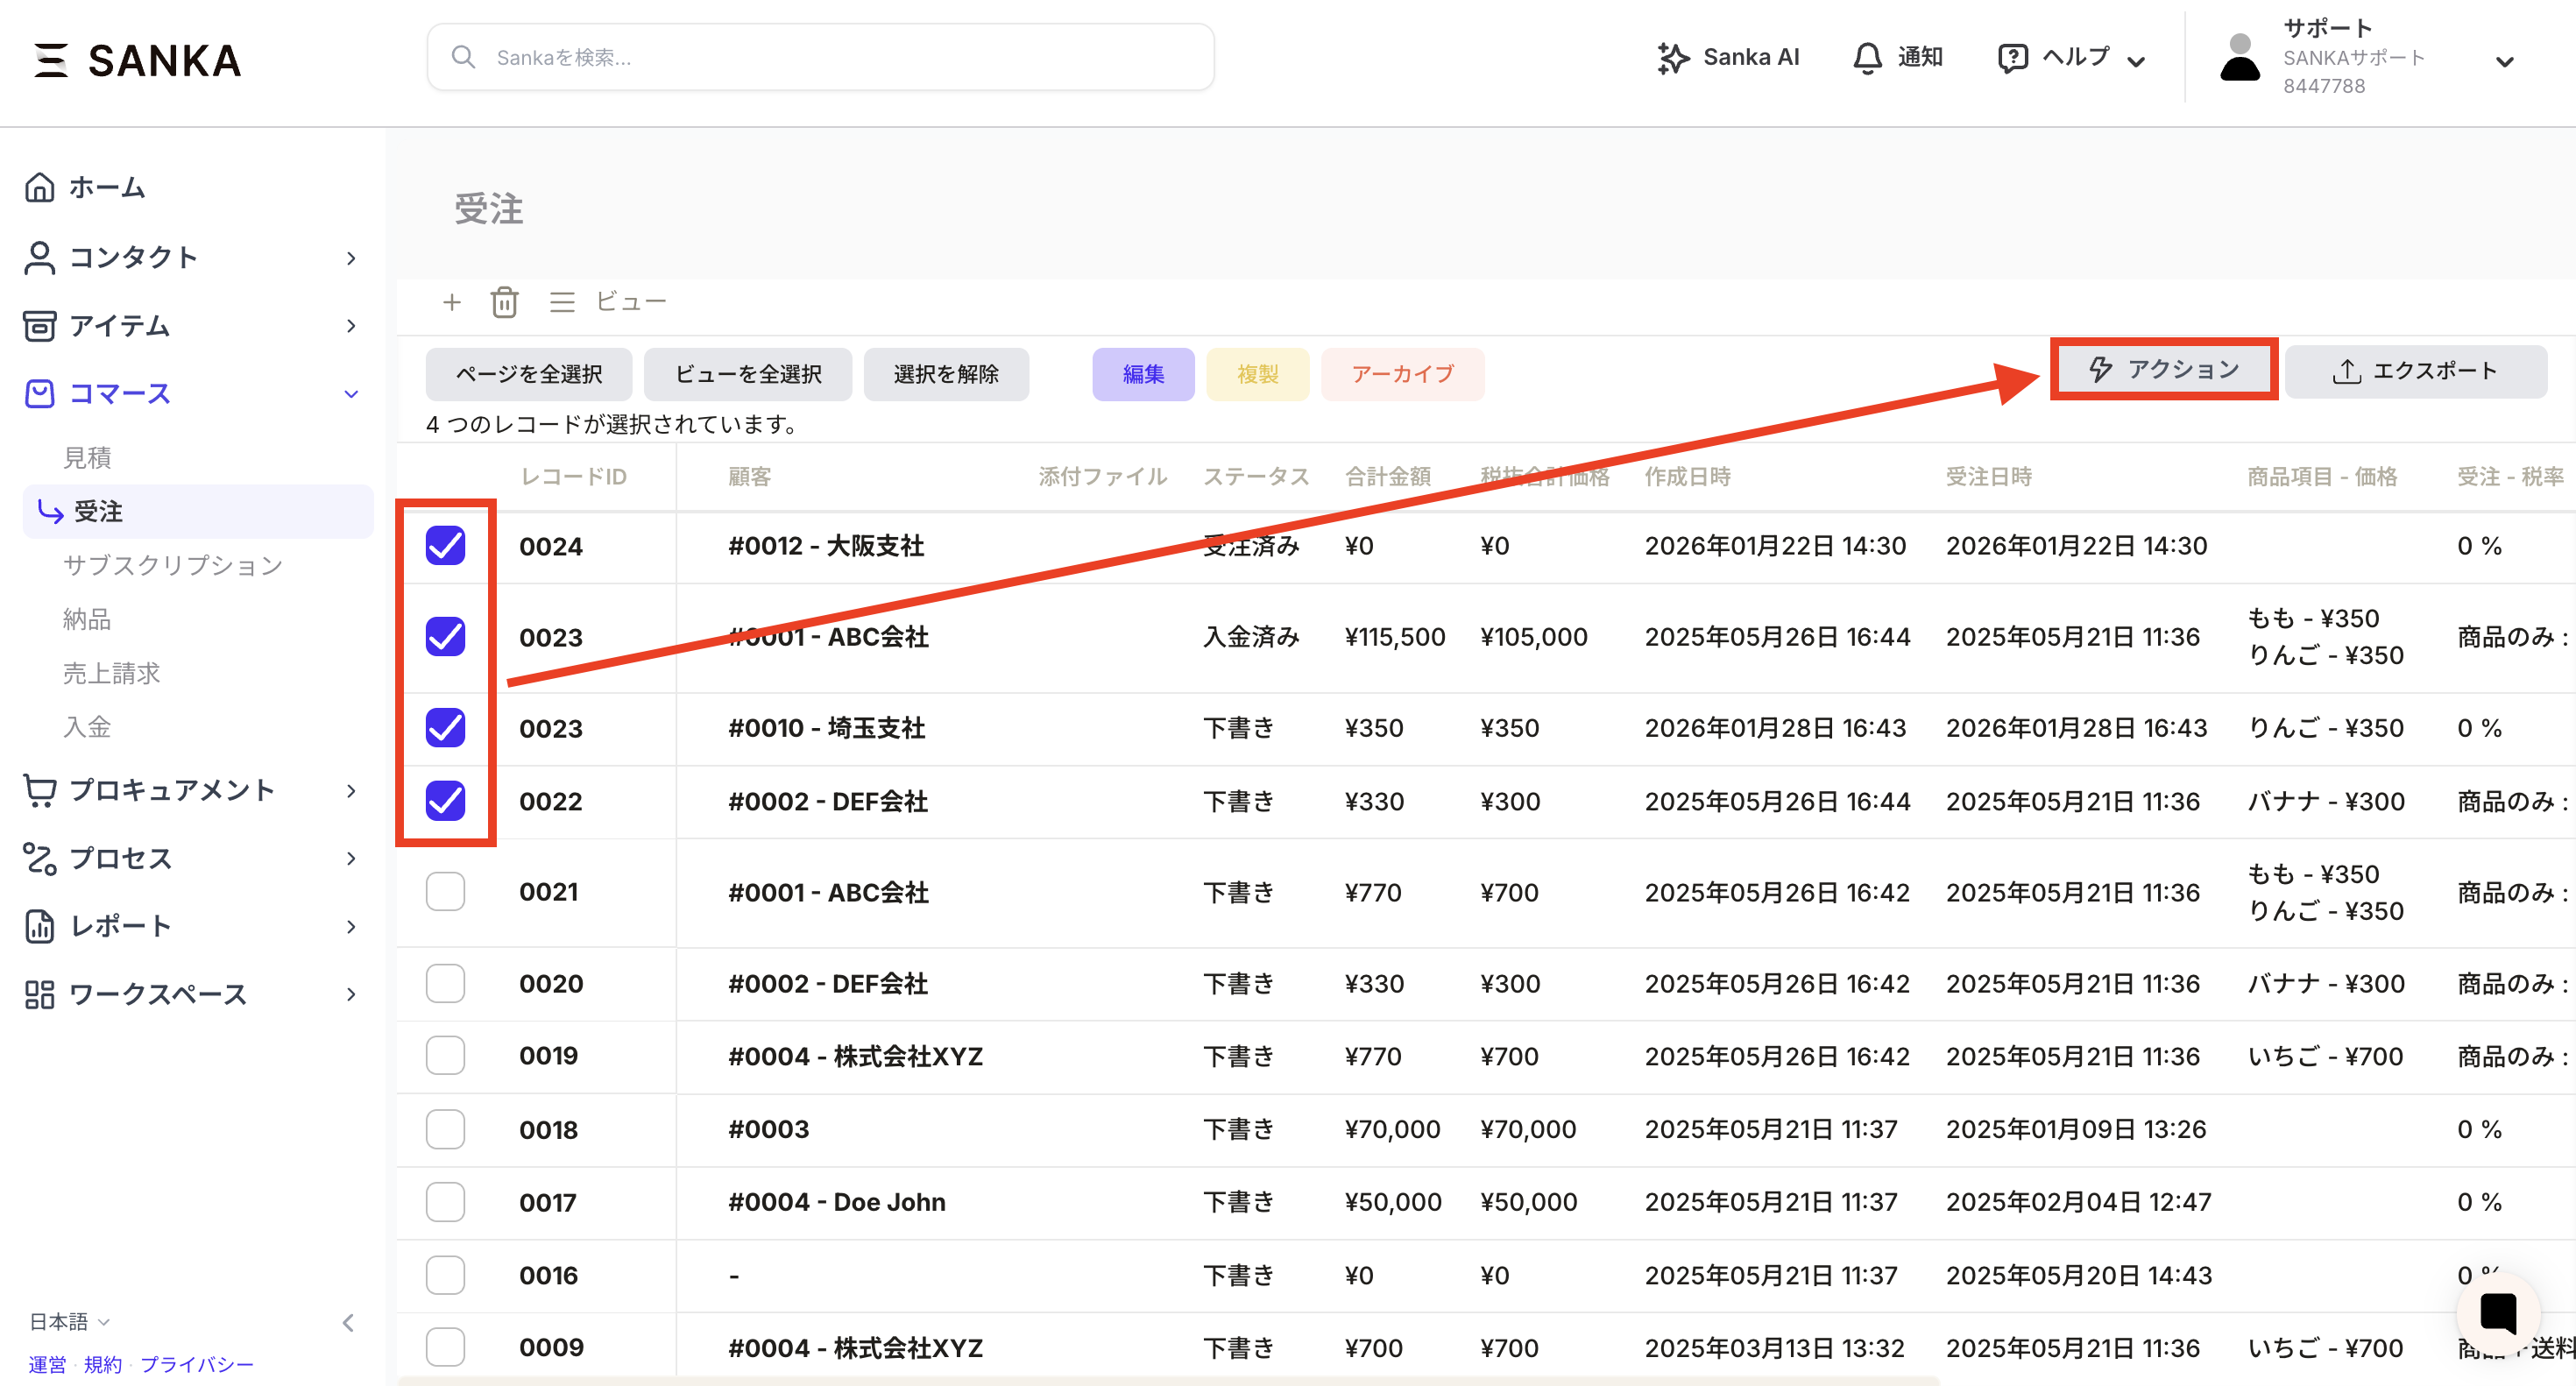
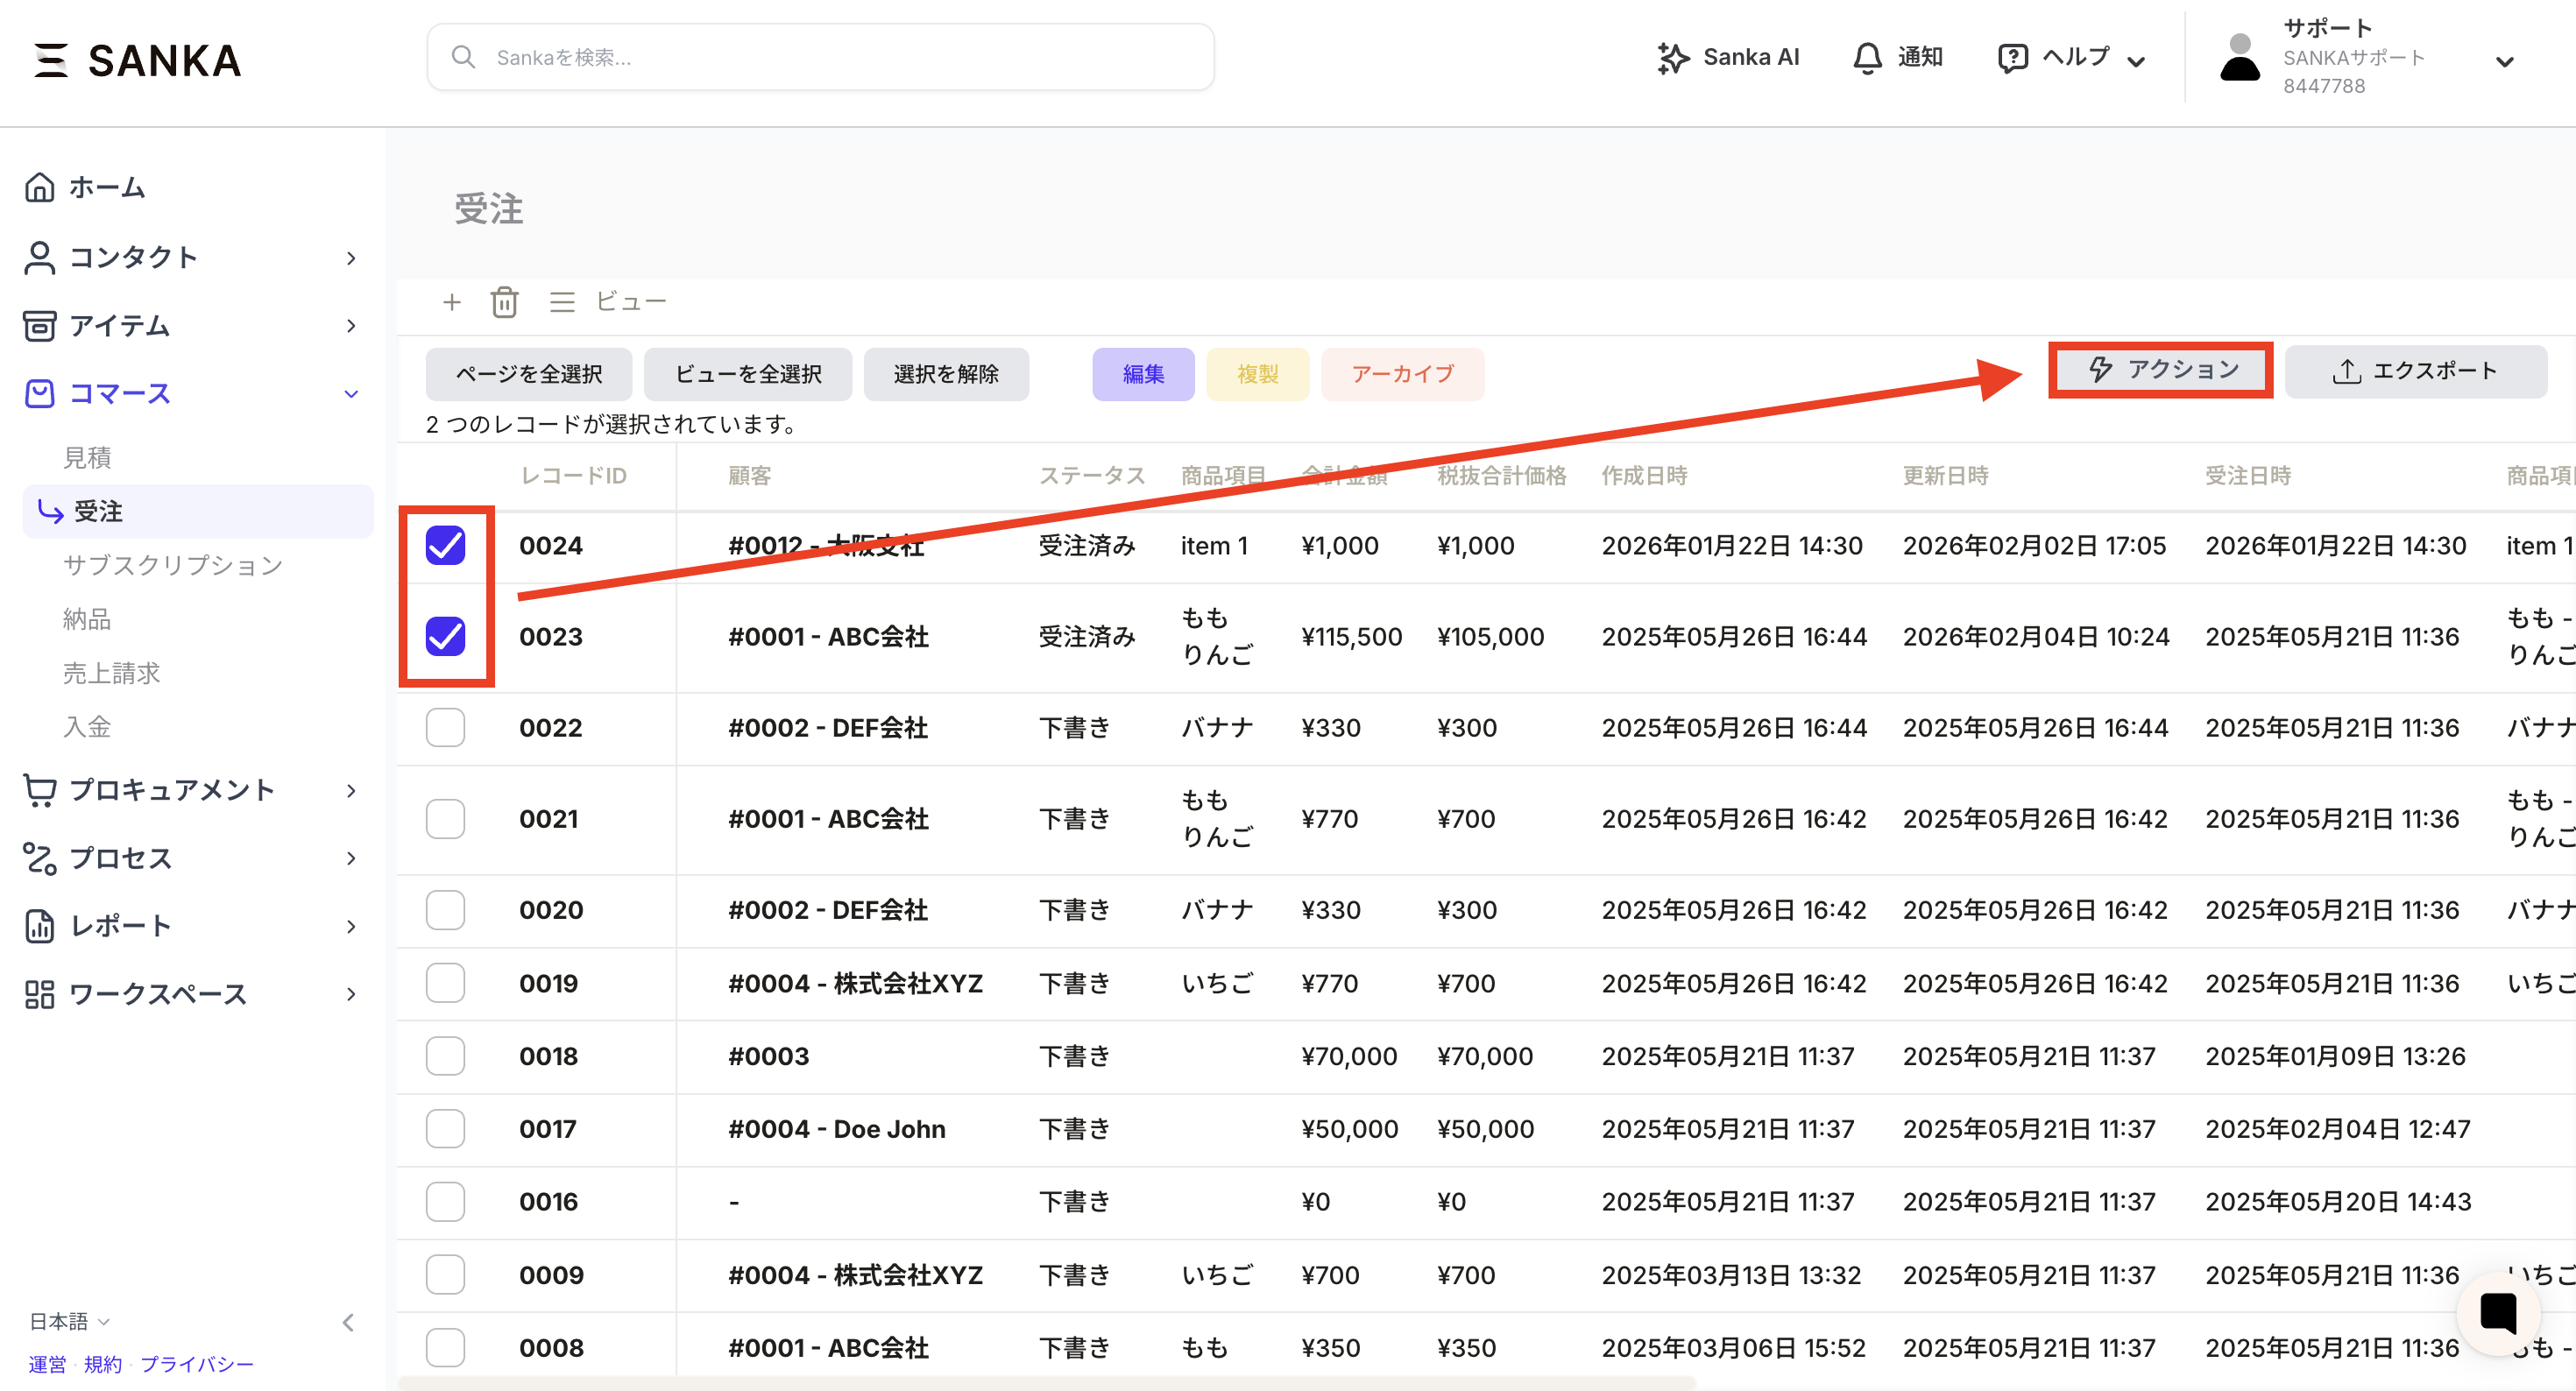
This is done from the object’s action button. This is useful when you want to create multiple records at once.Example: Creating a sales billing record based on an order record- Check the record for which you want to create a sales billing record and press the action button.
- Select the appropriate action.
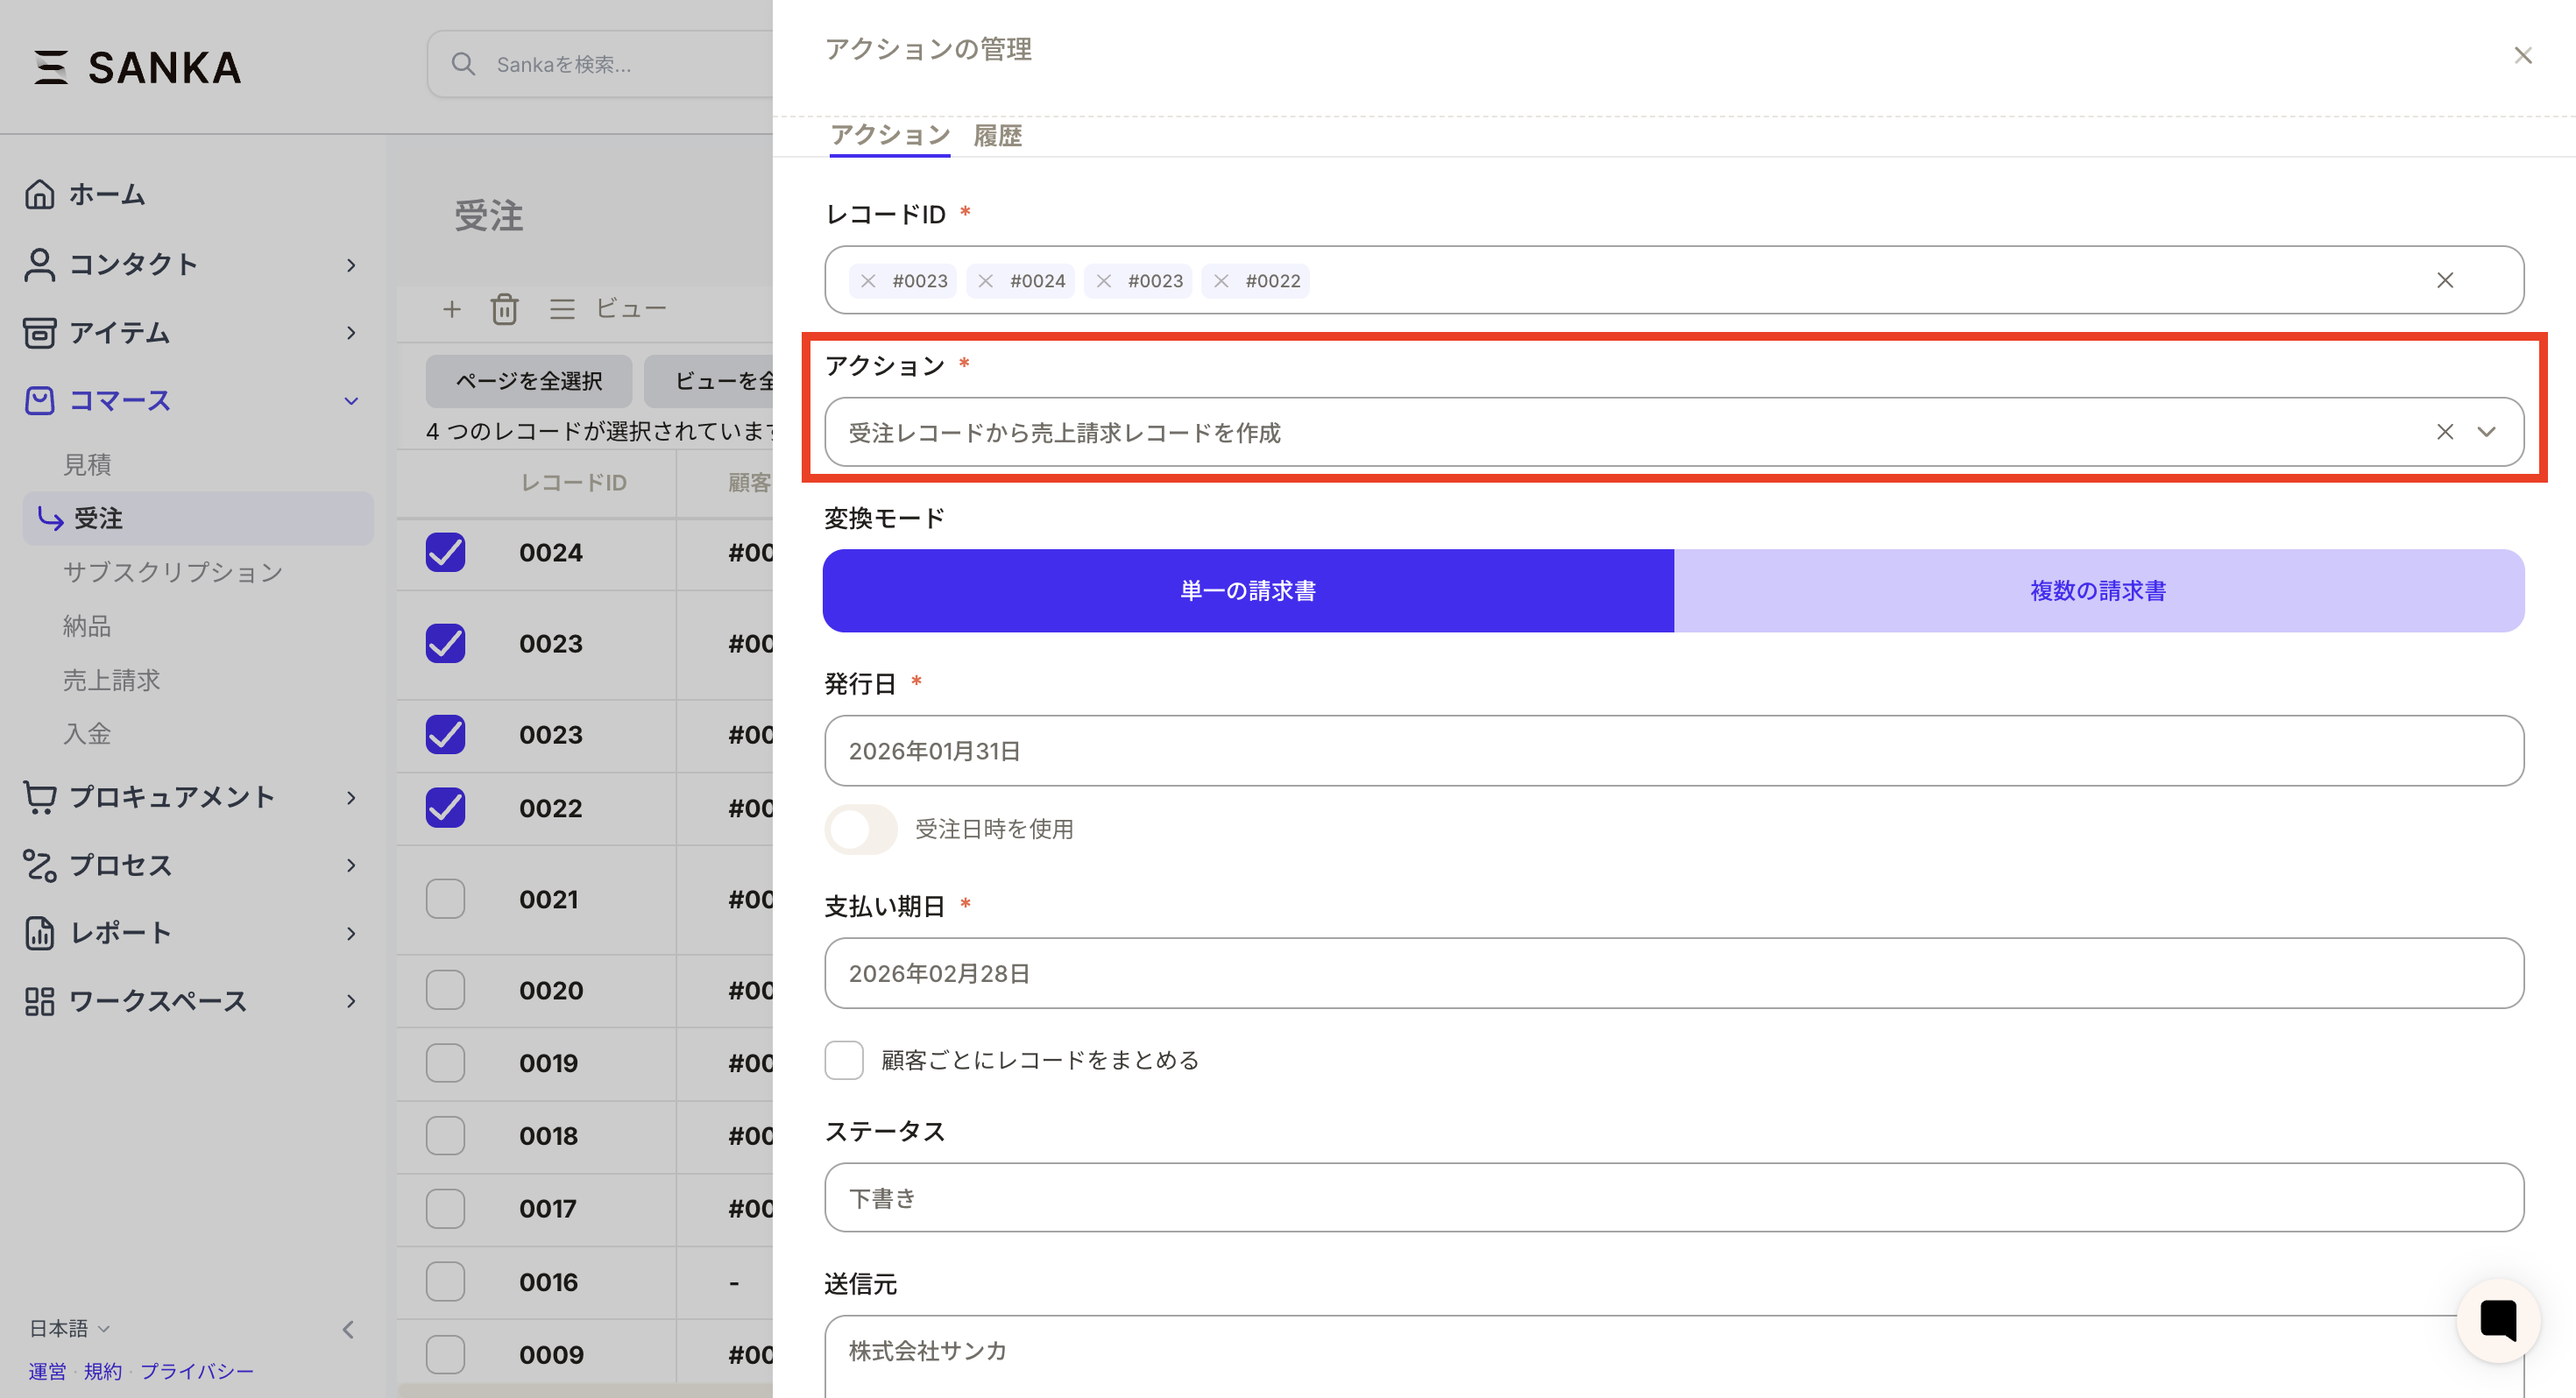
- After entering the required information, press the execute button.

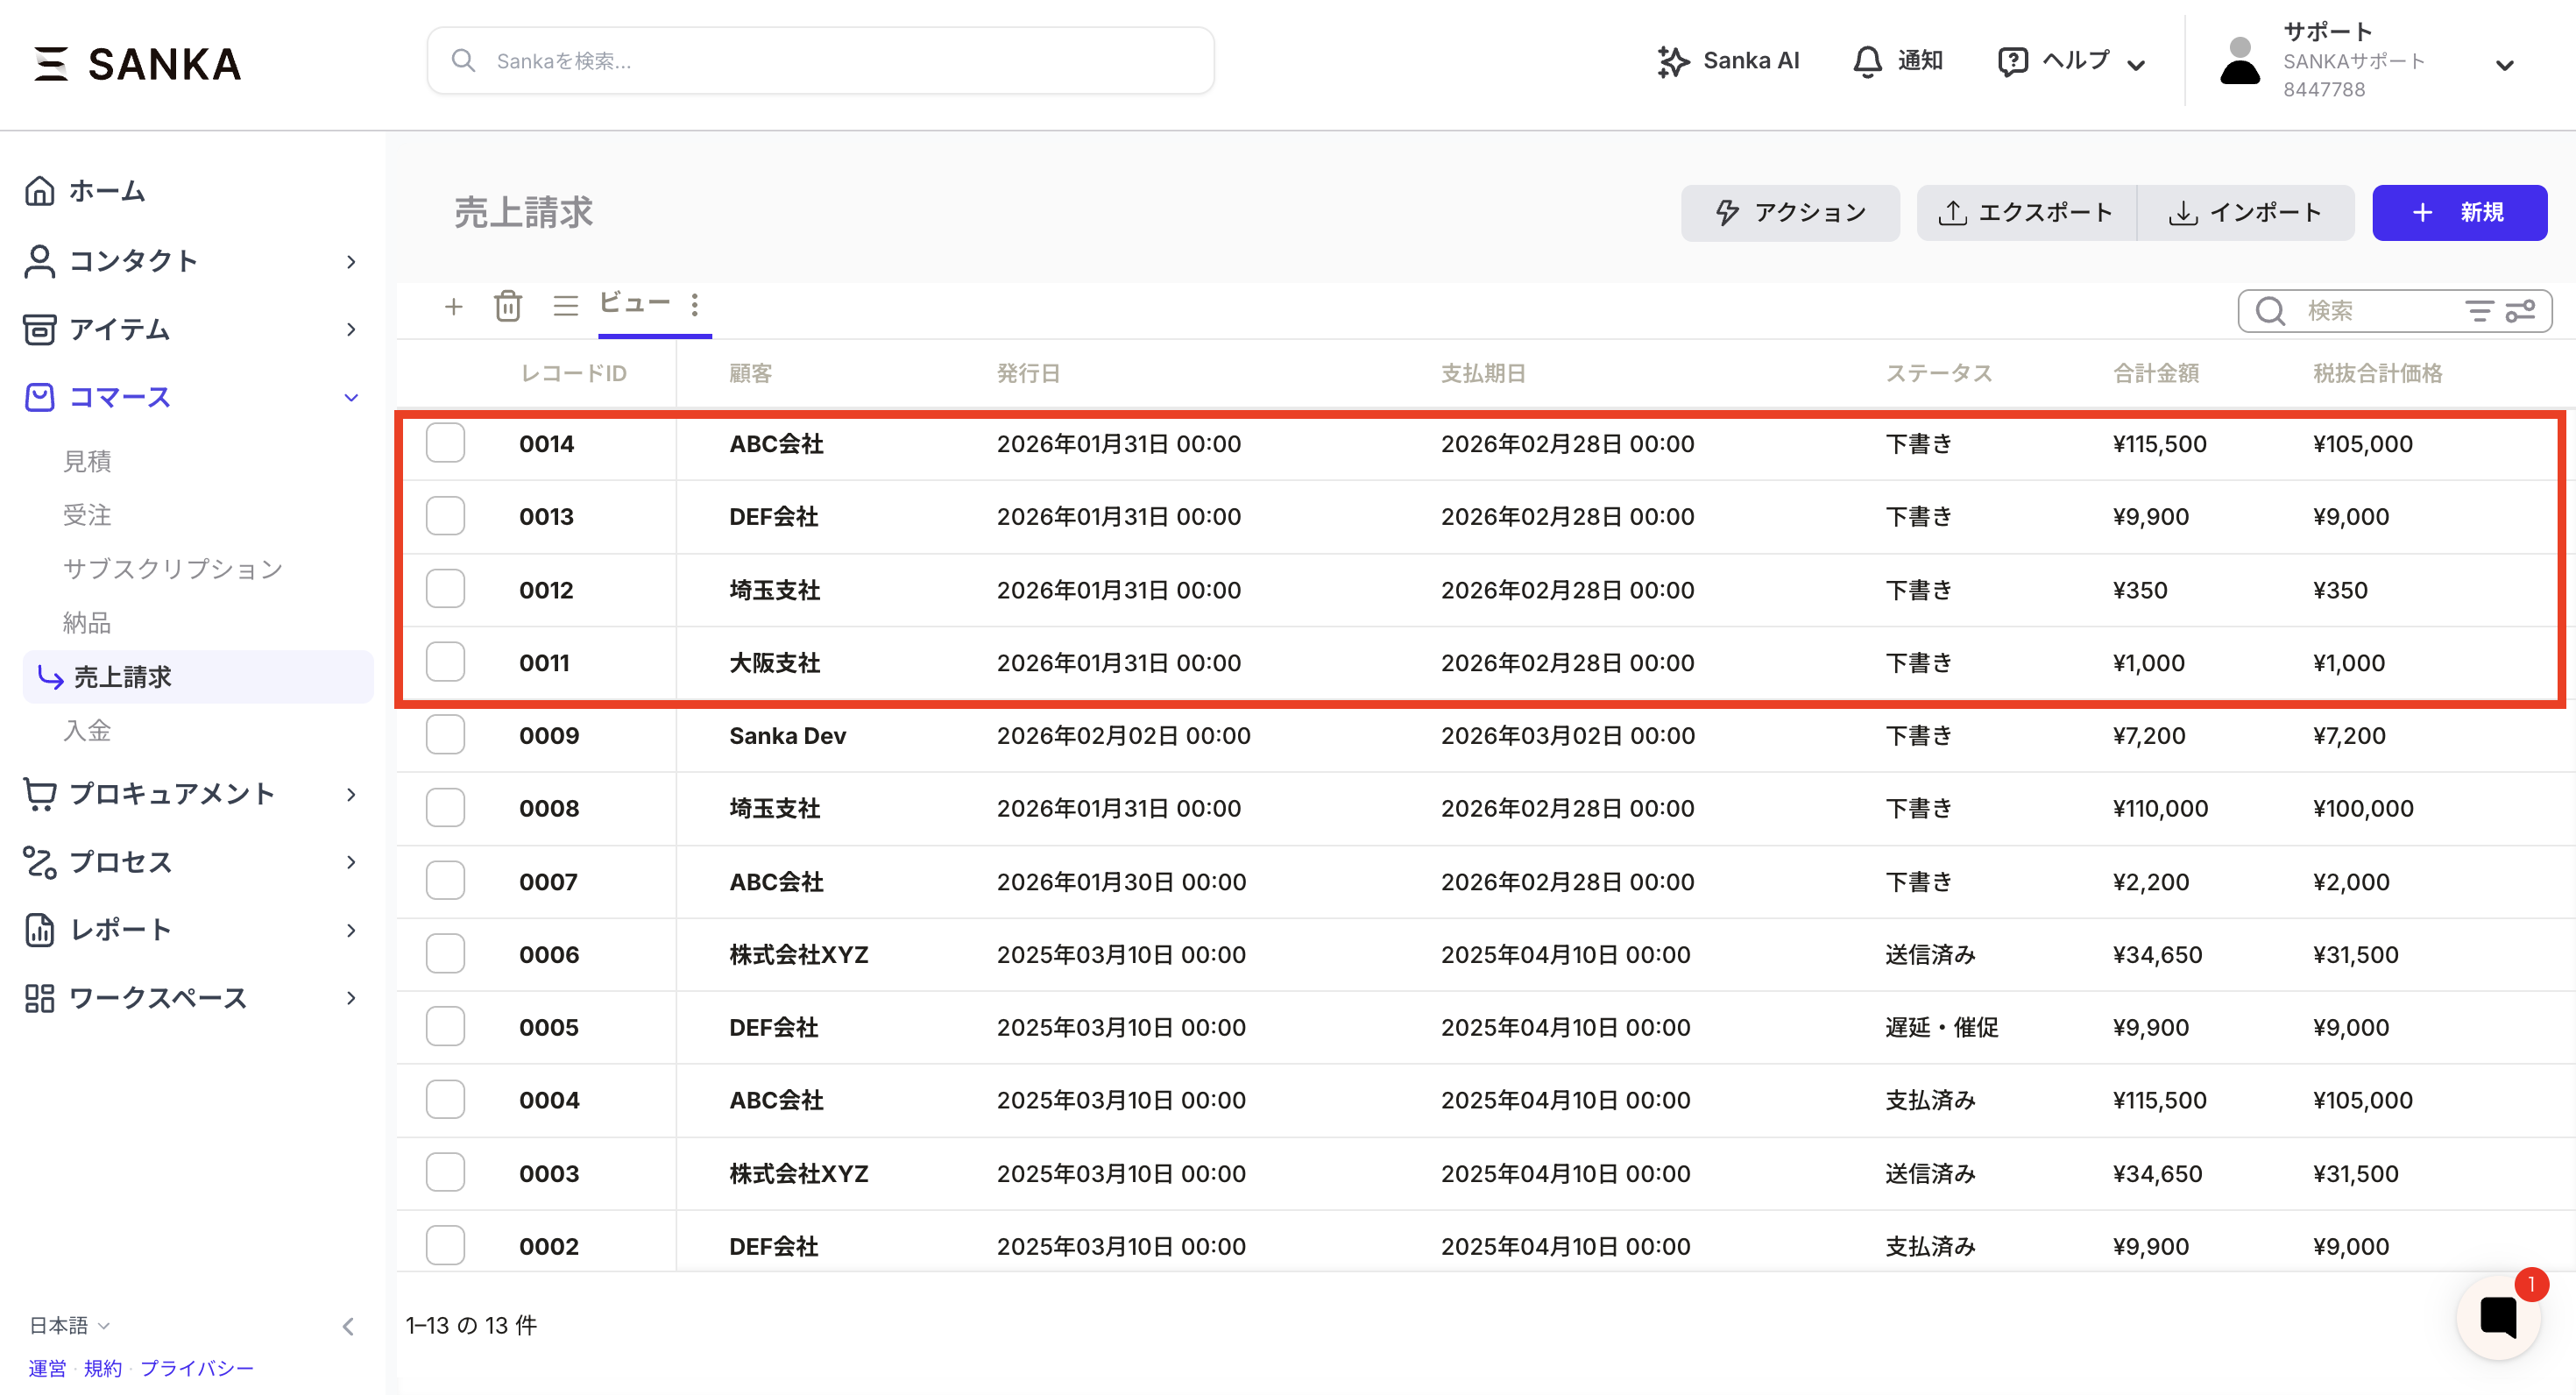
- A record is created from the sales order object to the sales billing object.
Property migration
Property migration is a mechanism that allows property values to be automatically inherited when a record is created from one object to another.
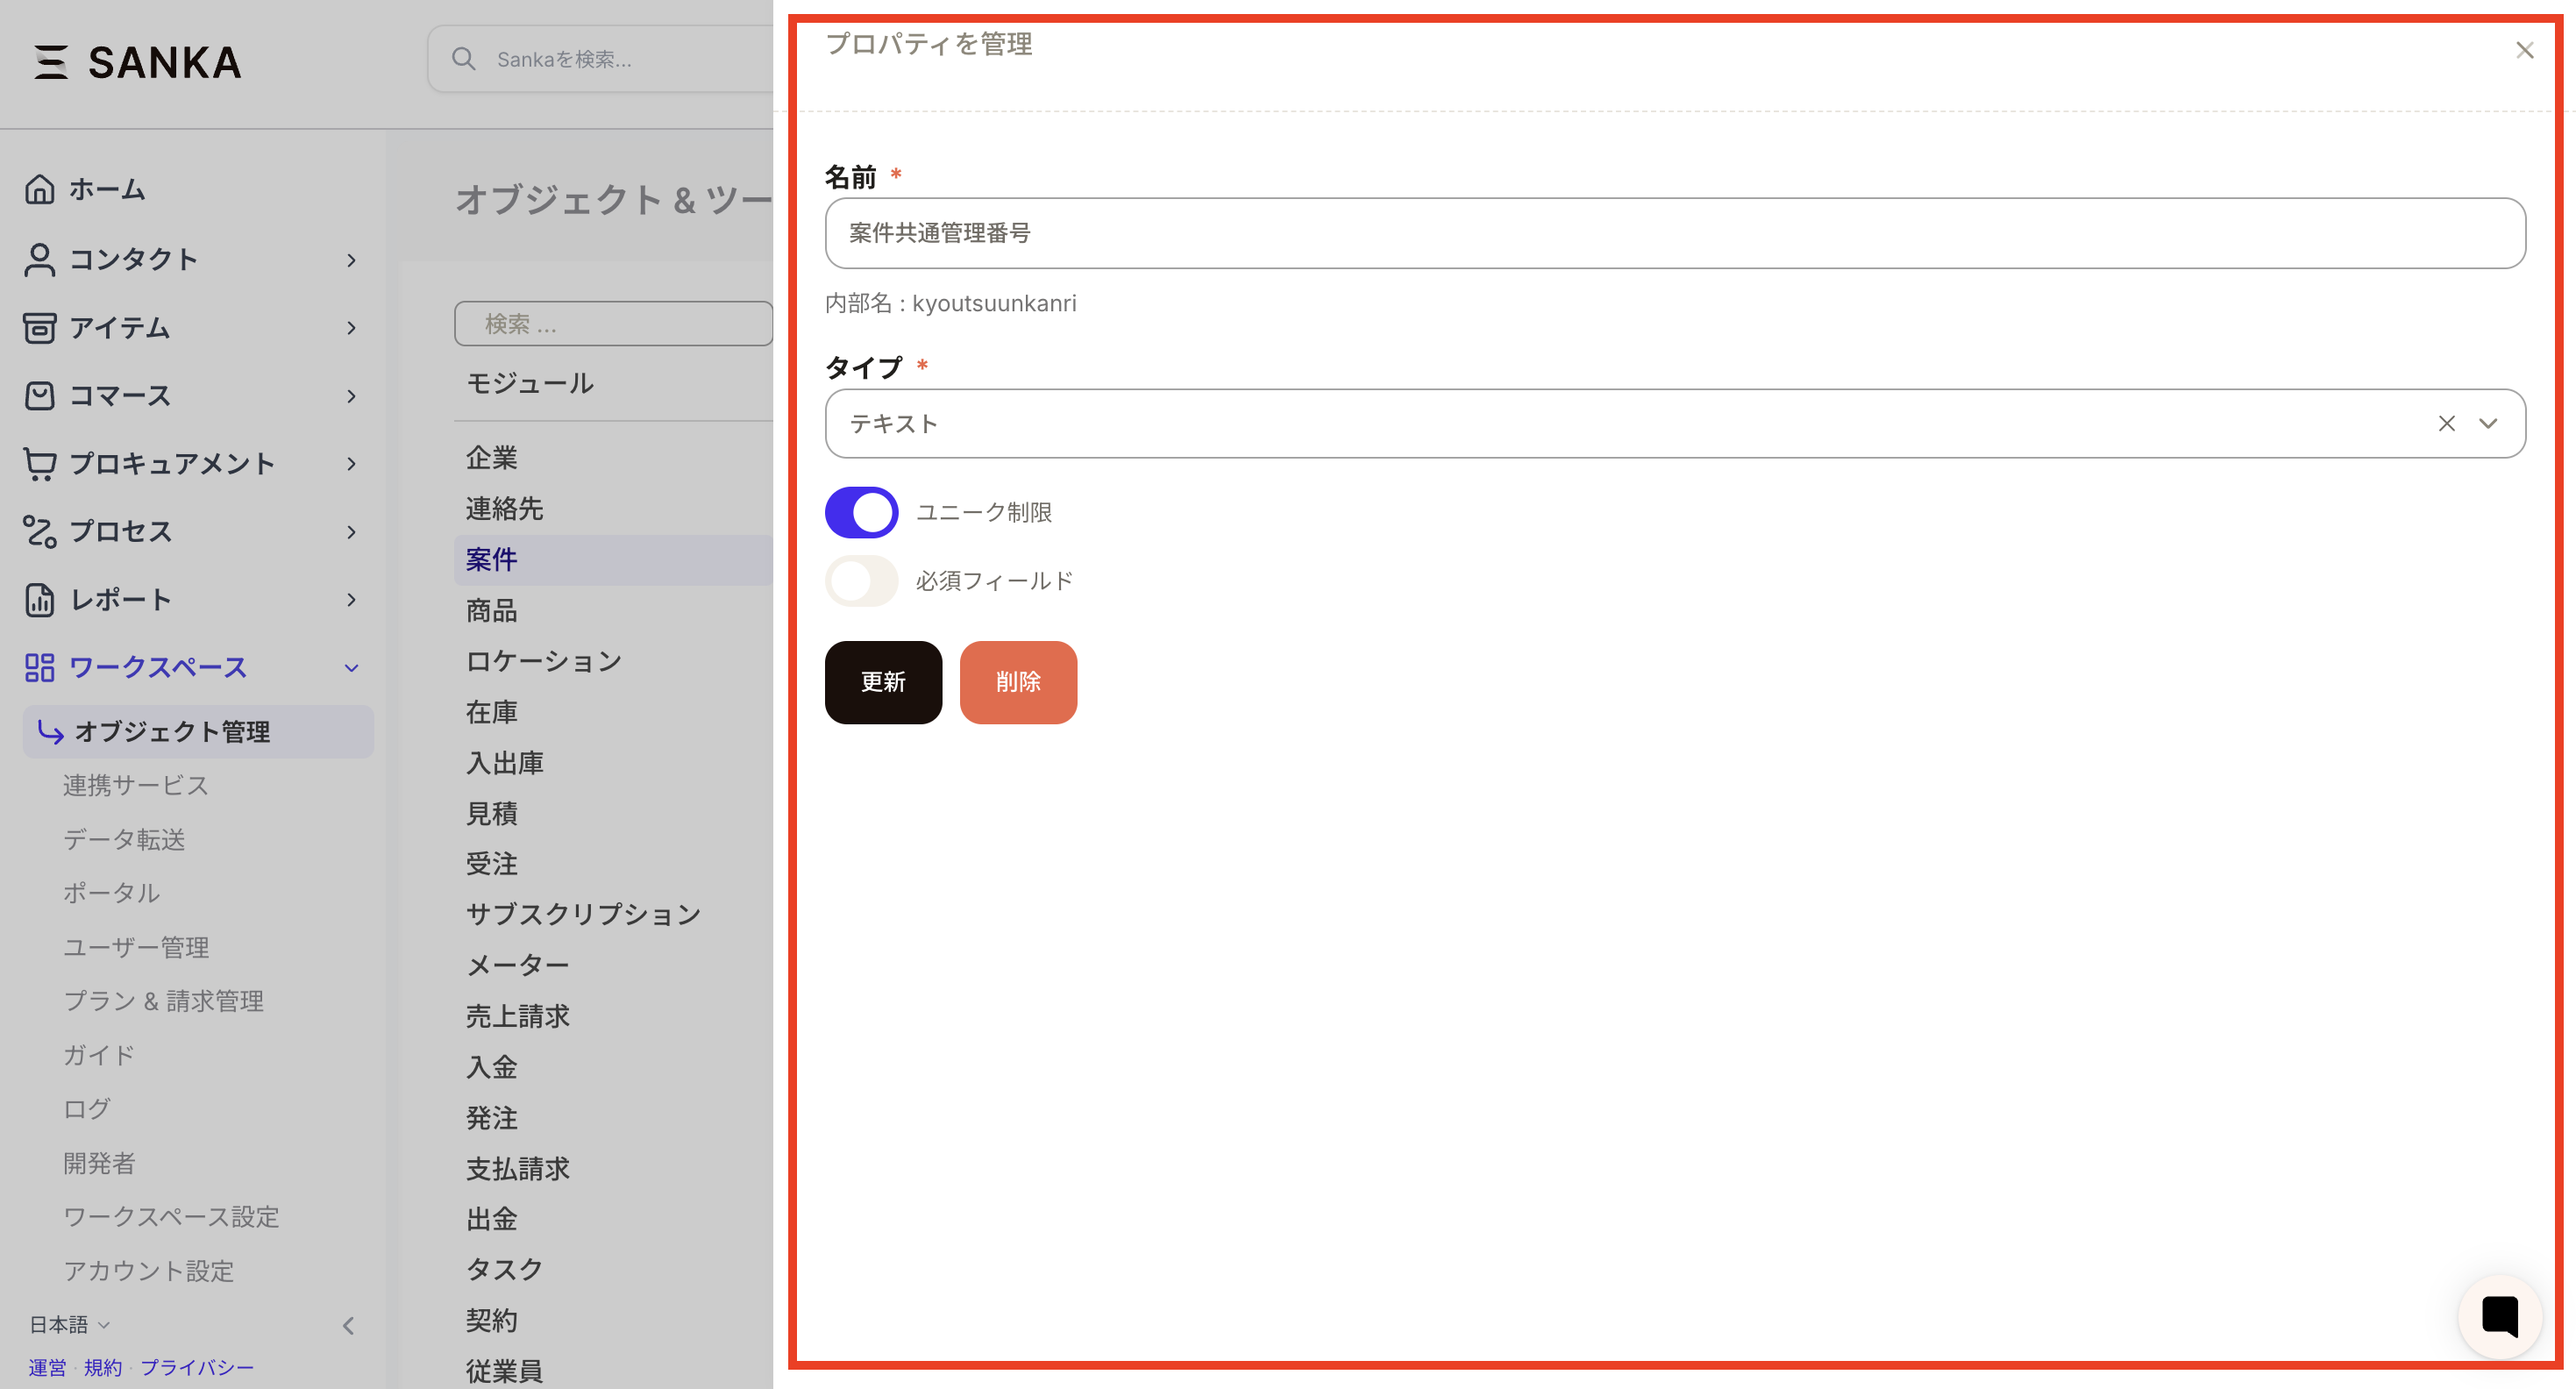
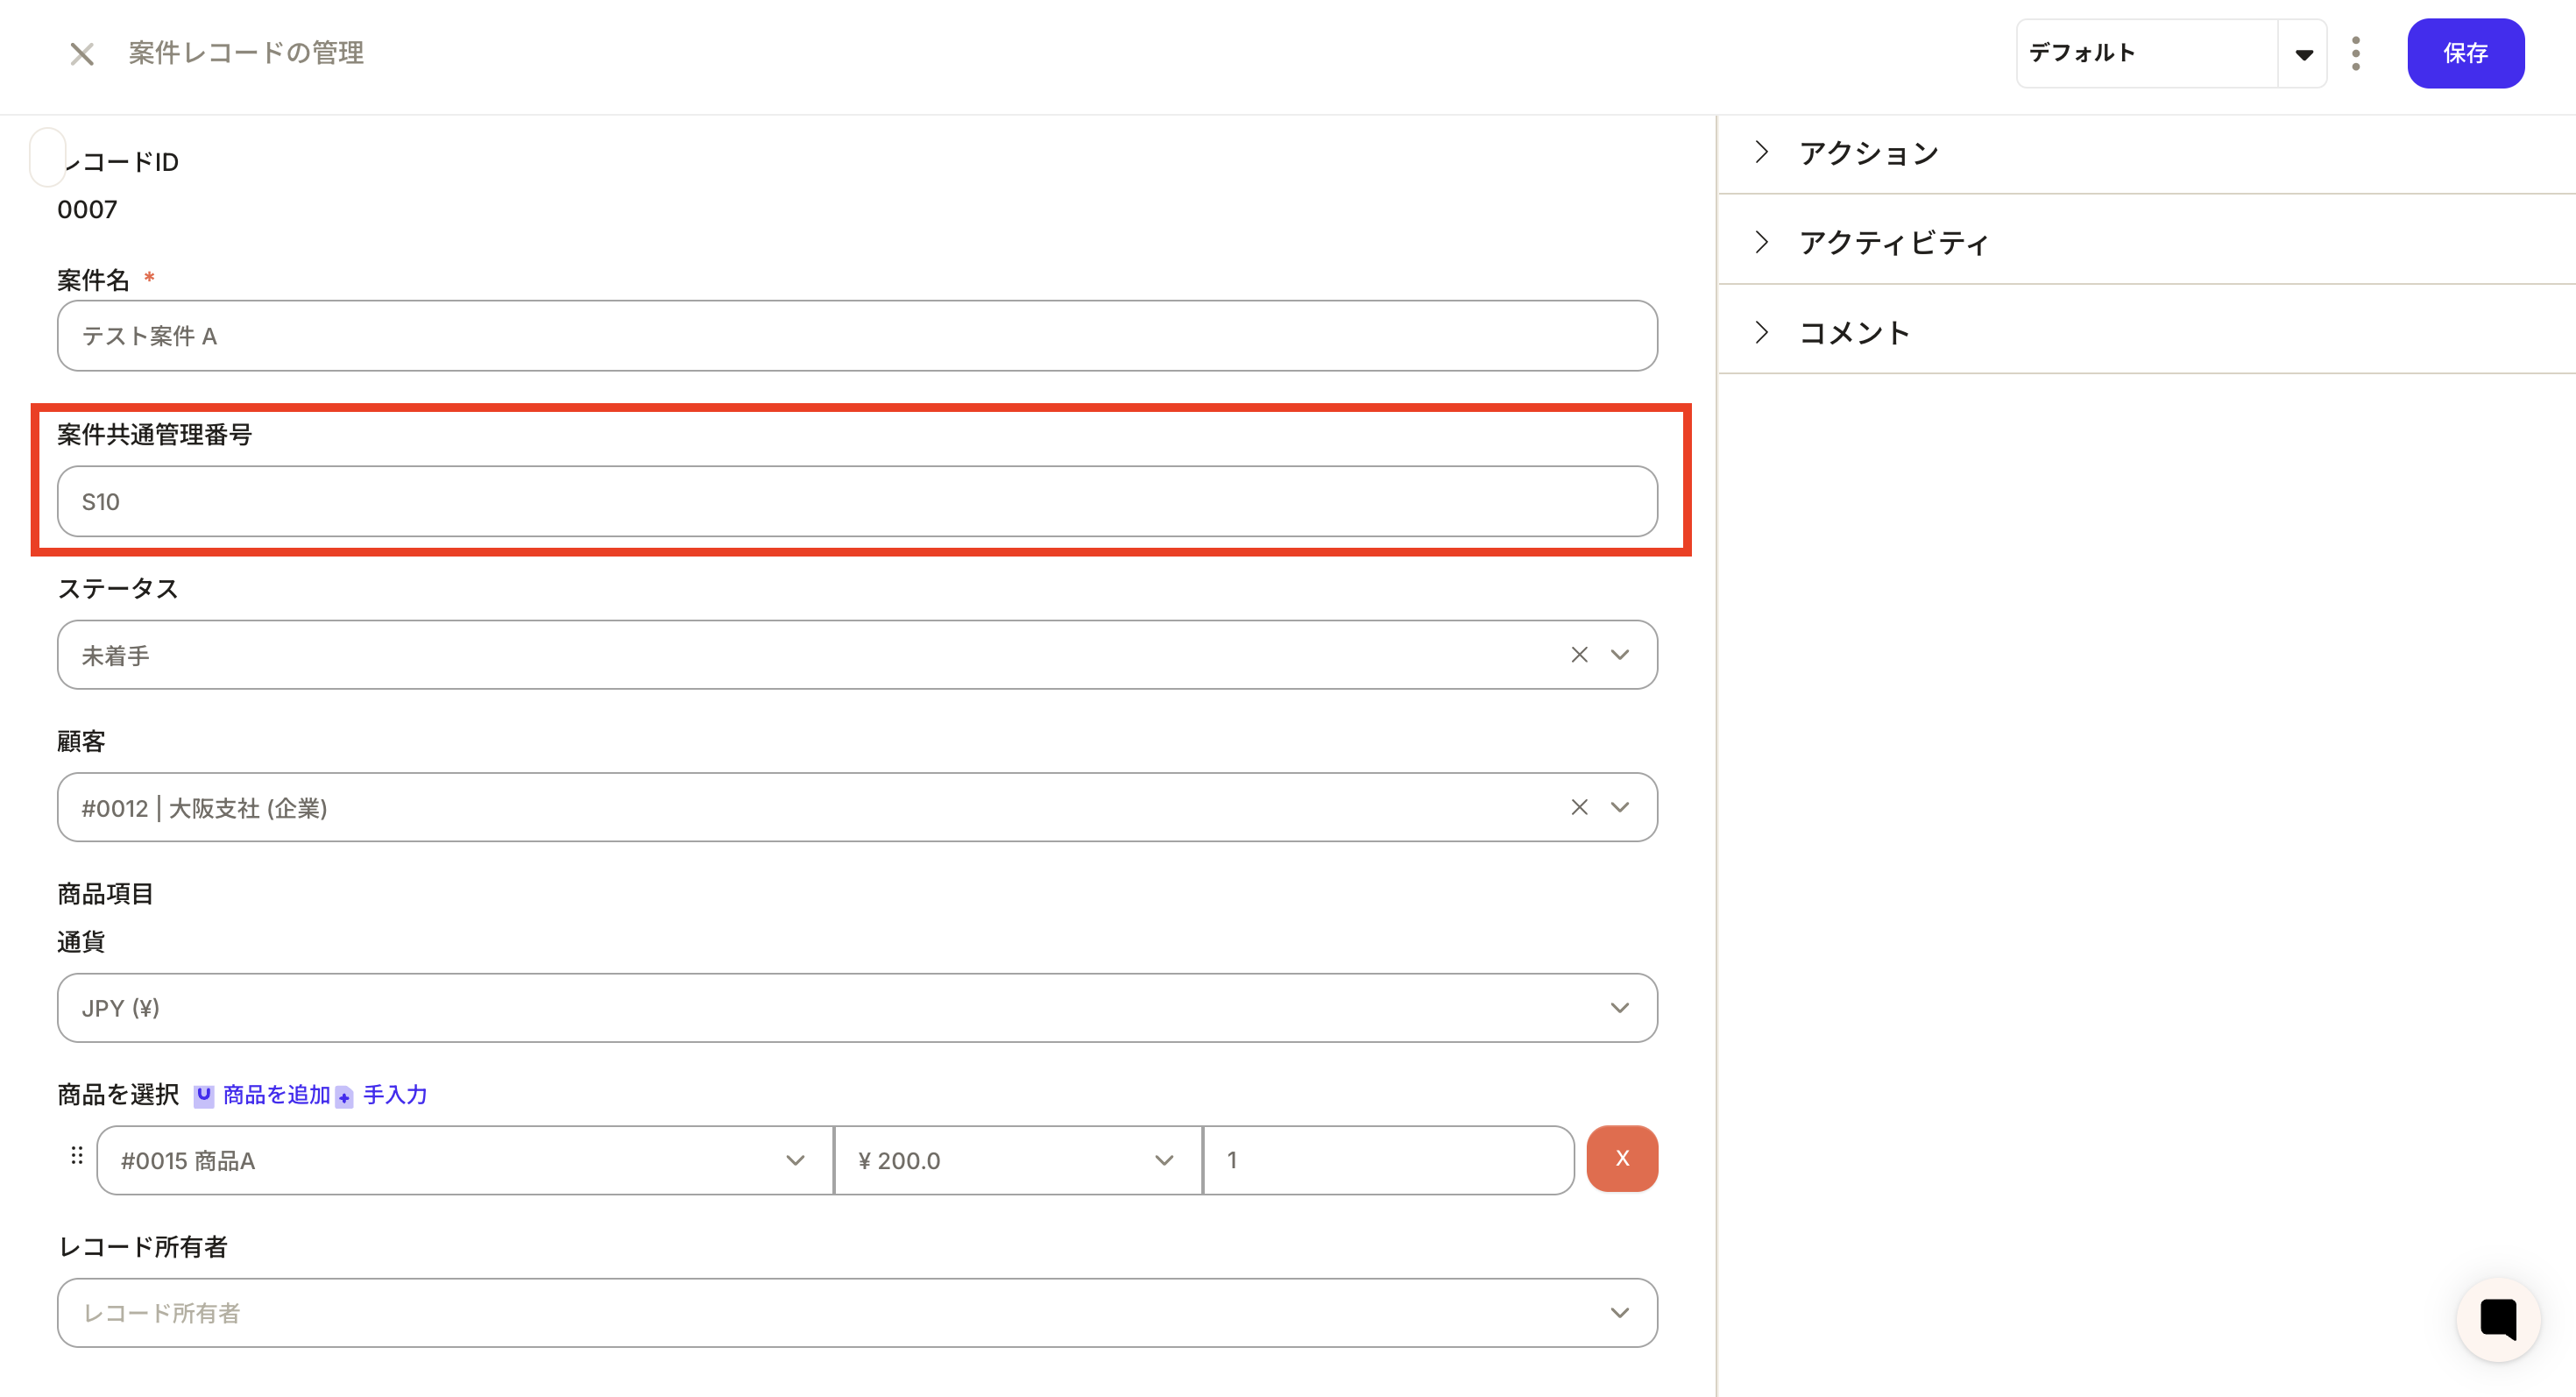
- Create a property with a name such as text type property “Project common management number” for each Item, Estimate, and Order object. By setting it as a required field, you can prevent omissions.
- When creating a new transaction record, enter a number in accordance with company rules in the property of the control number you created.
- Select Convert Transaction Record to Quote Record from Actions. Next, select the corresponding common property from the “Add property” button in Property Migration. Press the Run button.
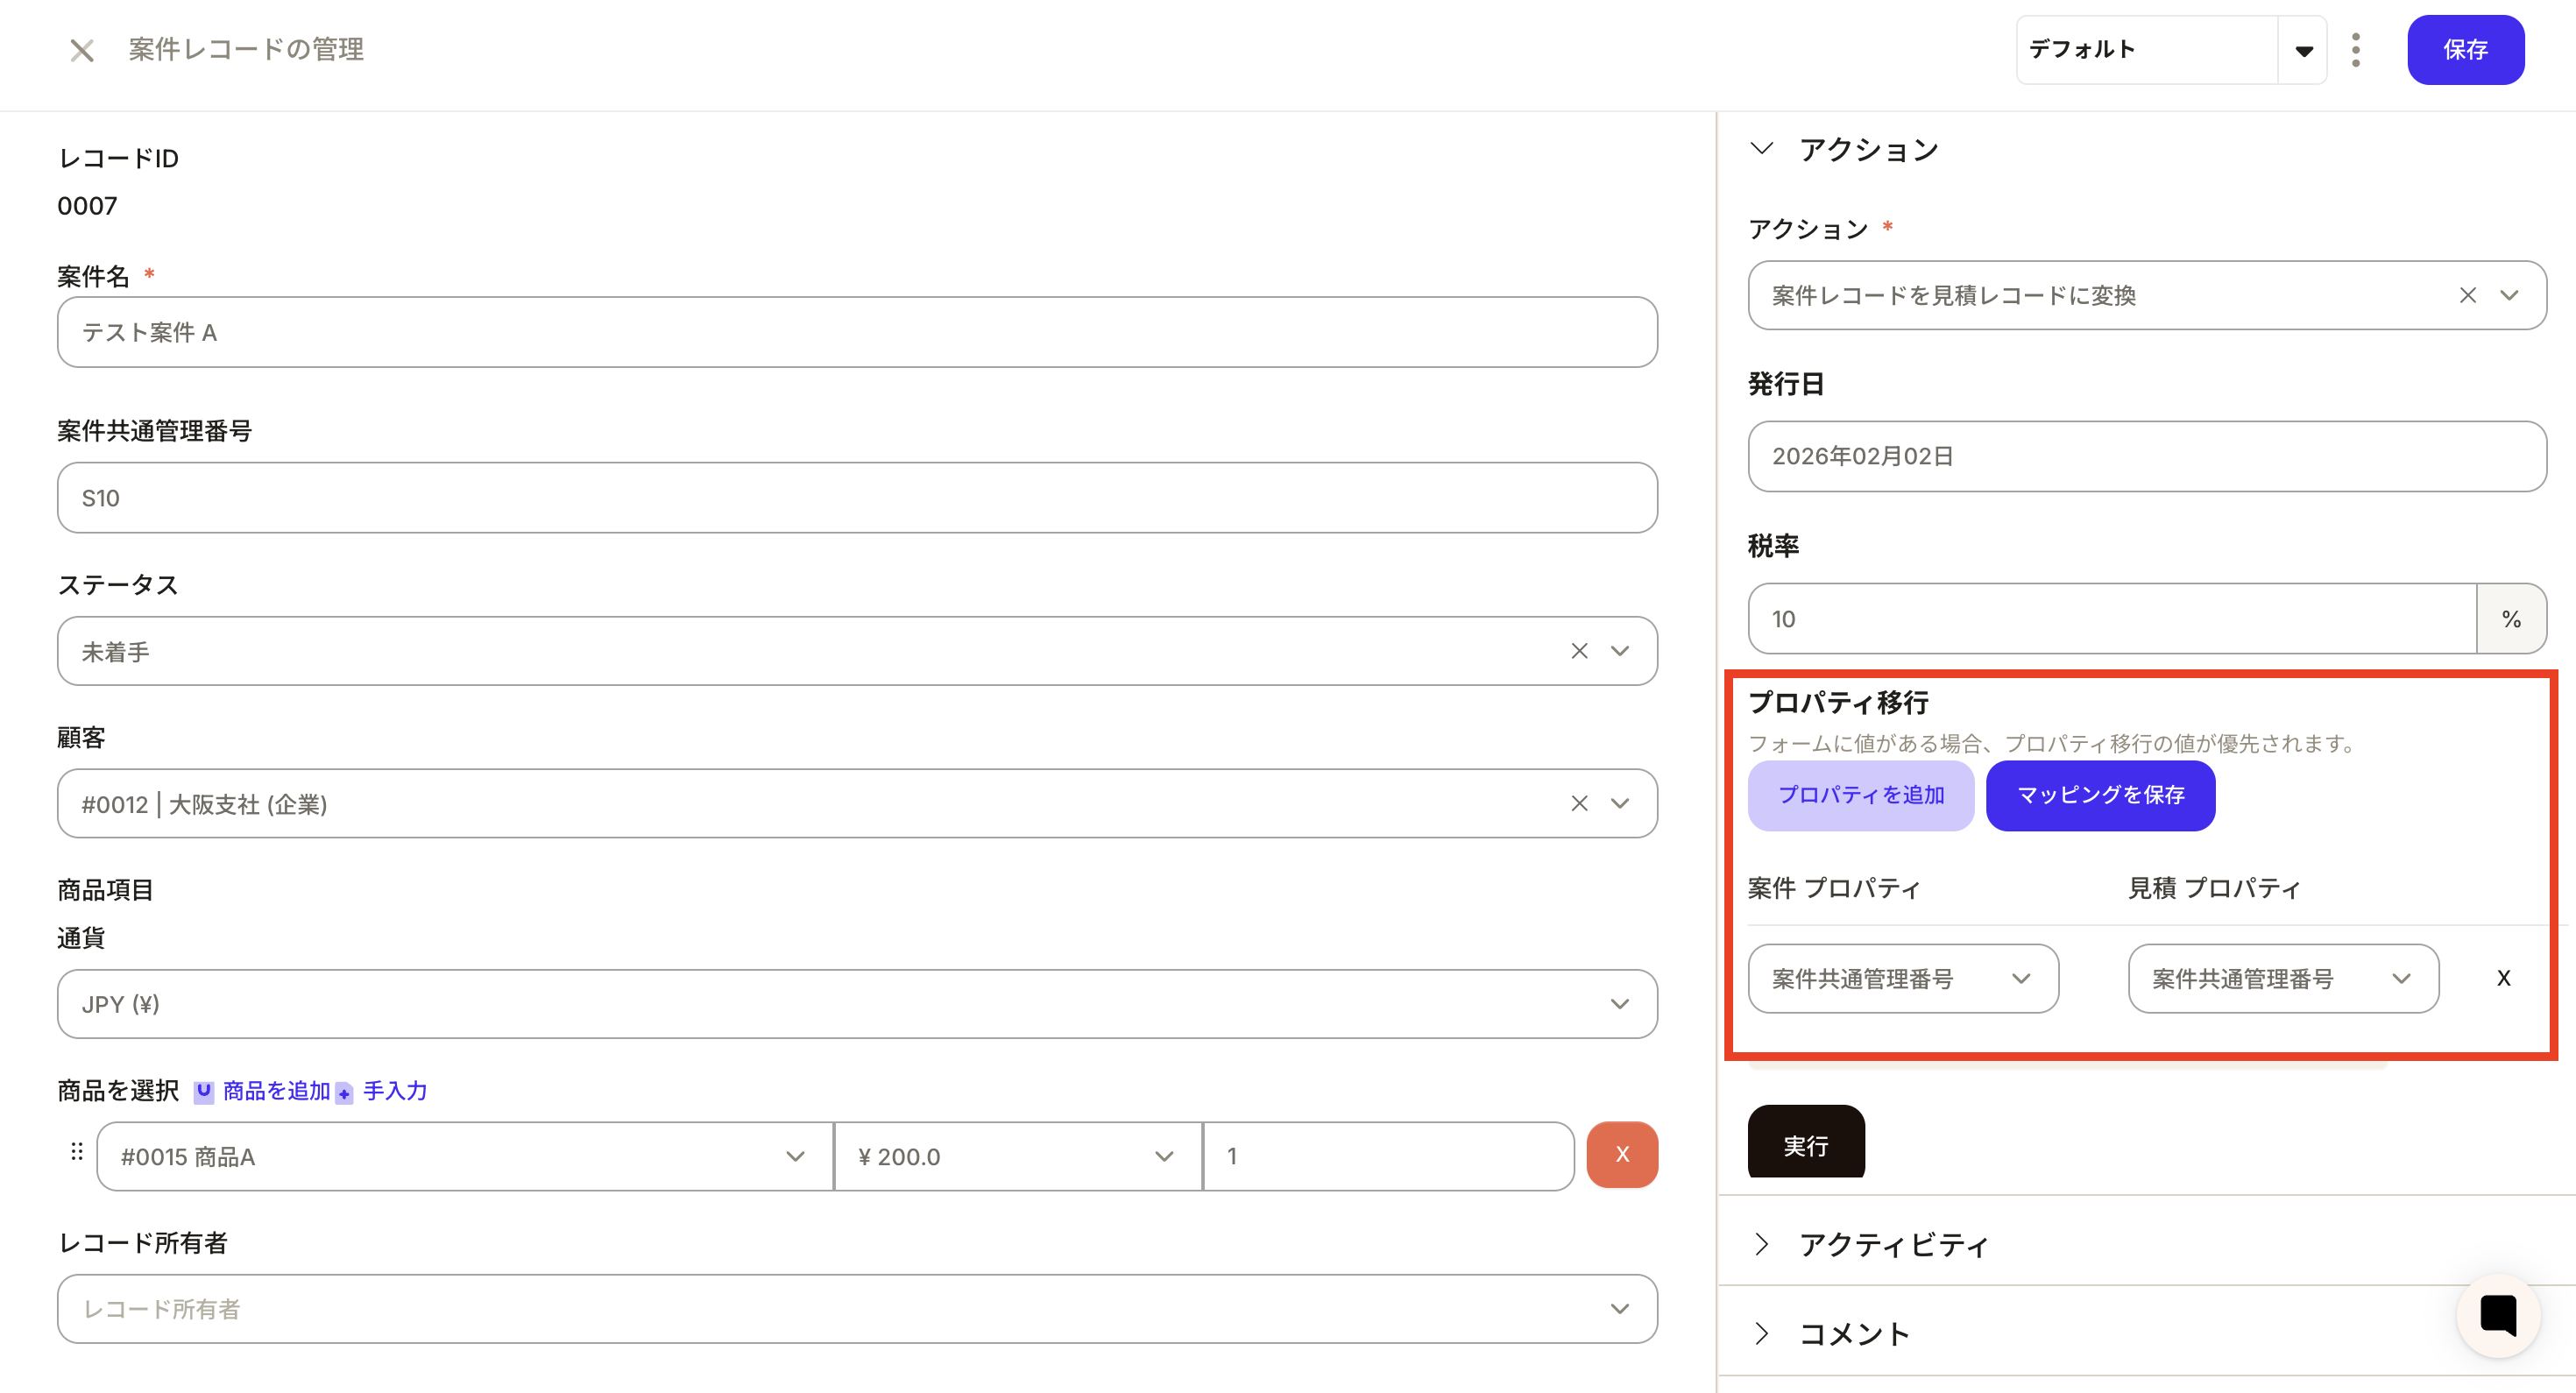
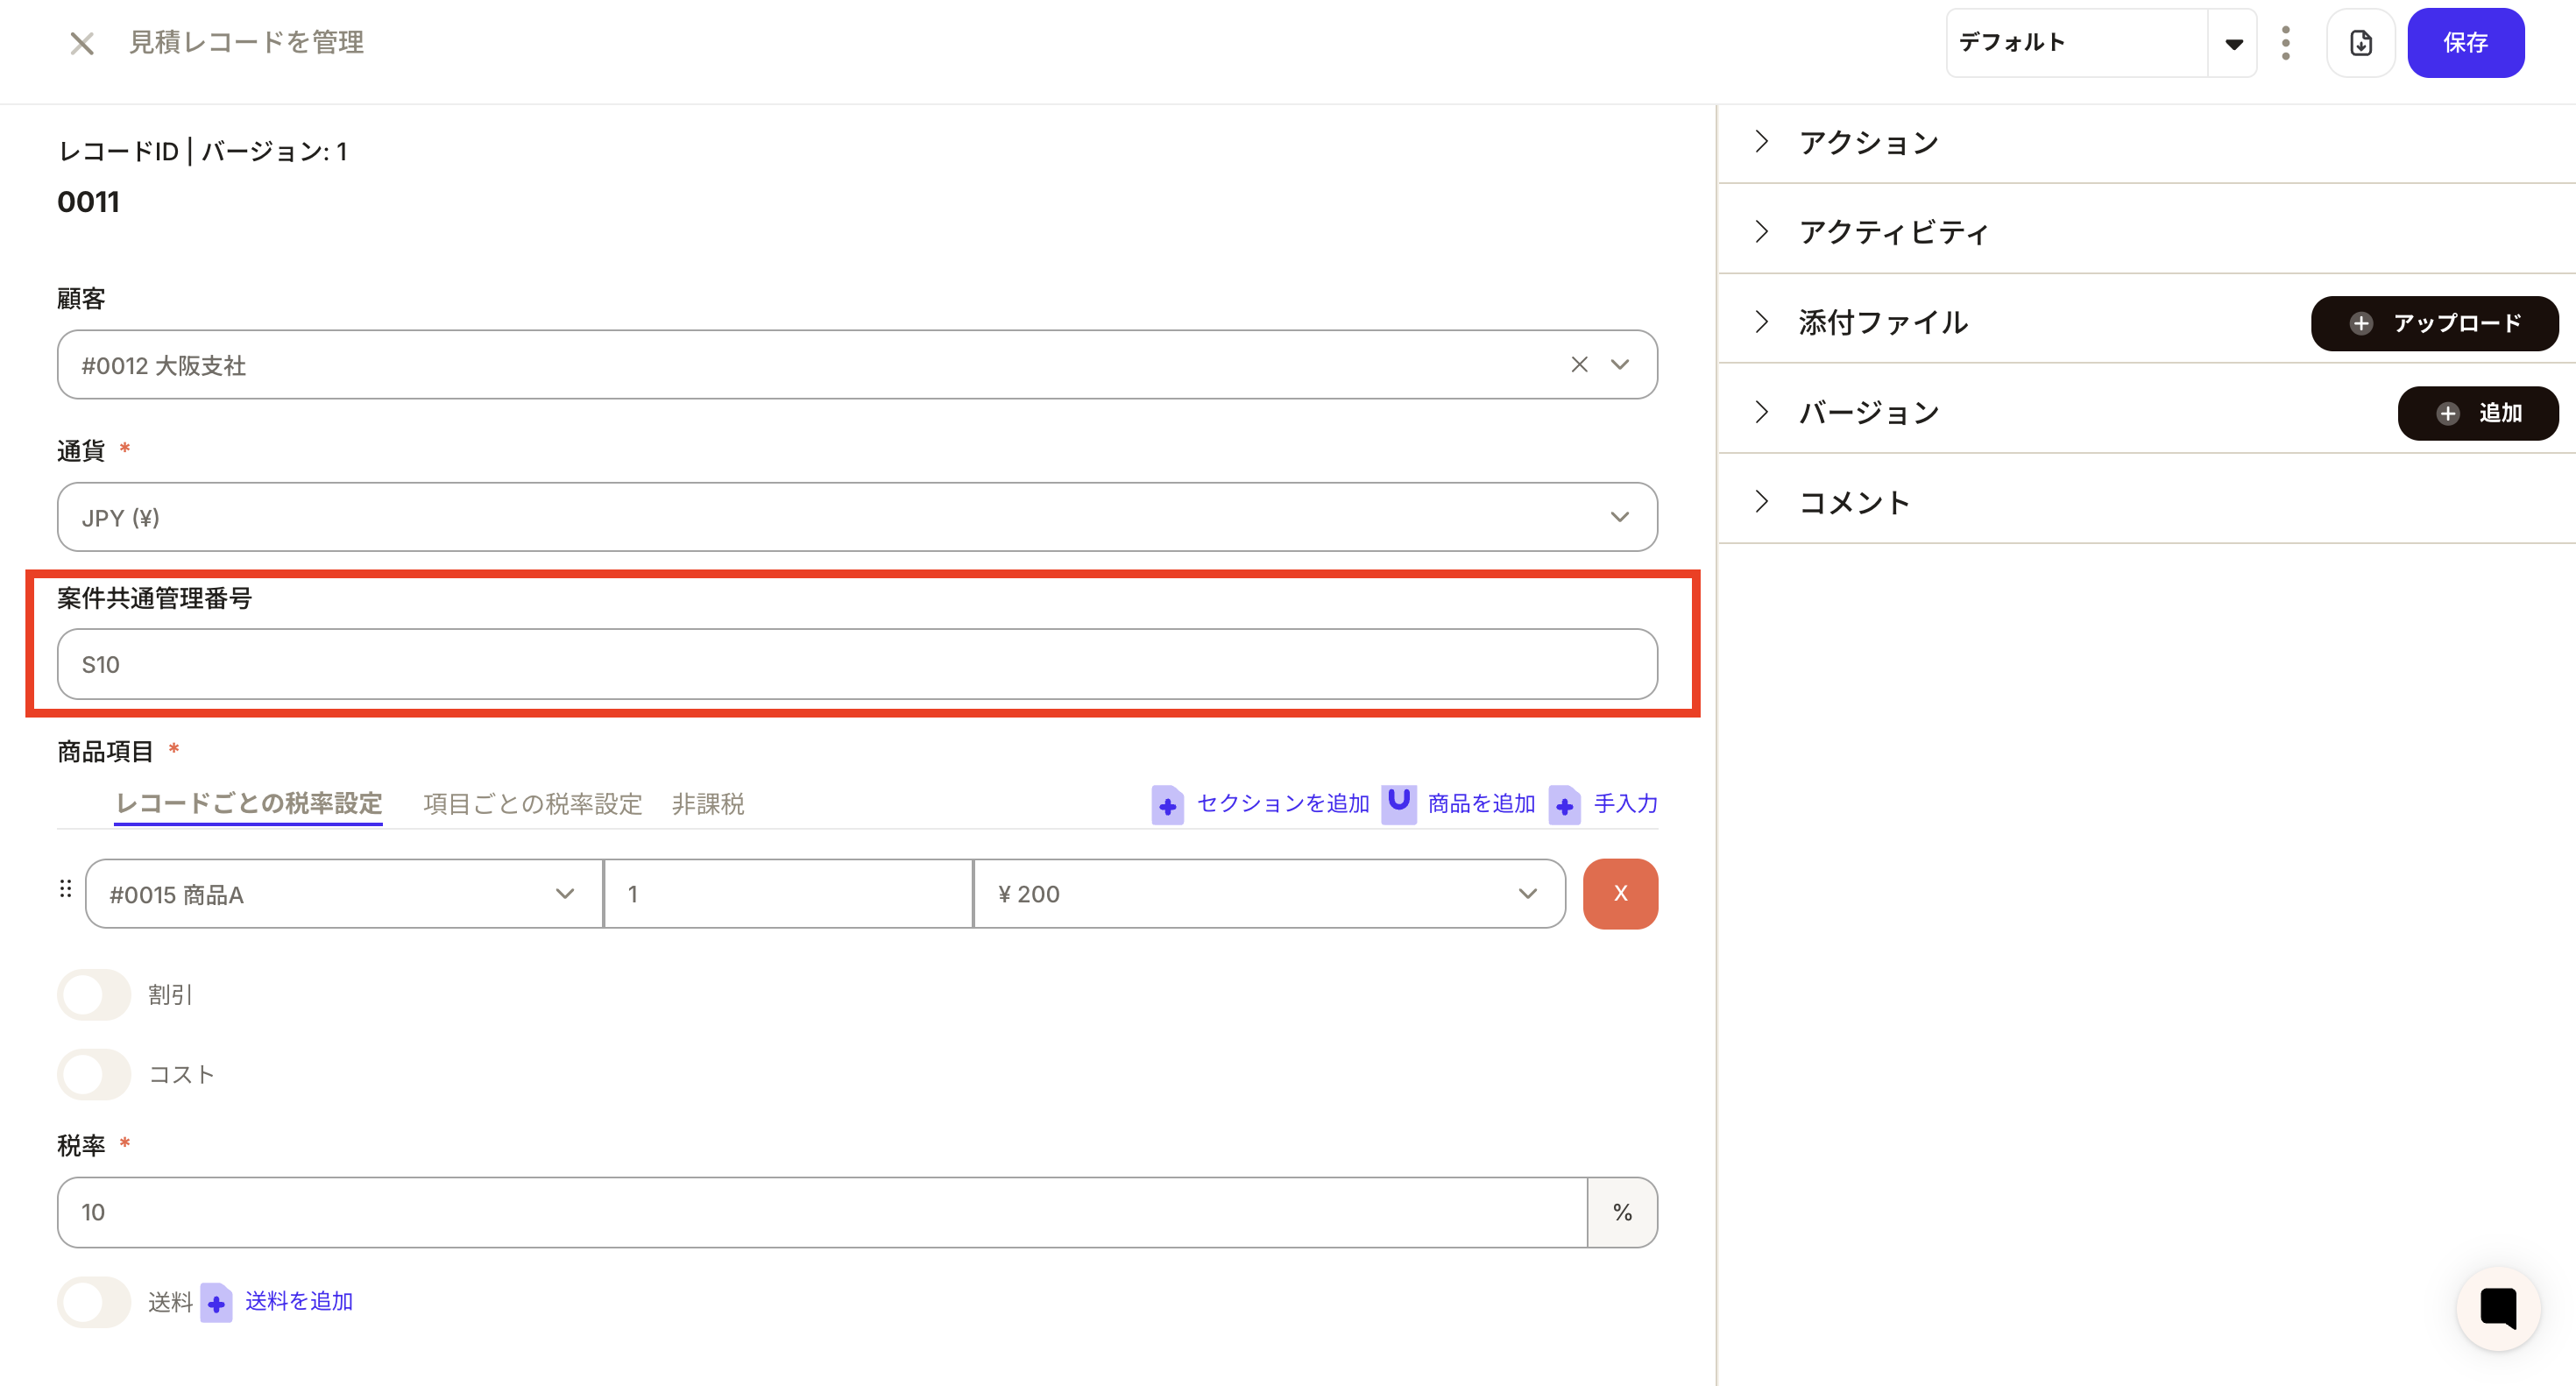
- You can see that a quotation record is created from the matter and that the information of the matter common management number property for which action property migration was set has been carried over. The same applies when converting from quotation to sales order.
Issue form from record
You can download forms from records all at once. This is a convenient function when you want to download a picking list.When issuing a form from an order record
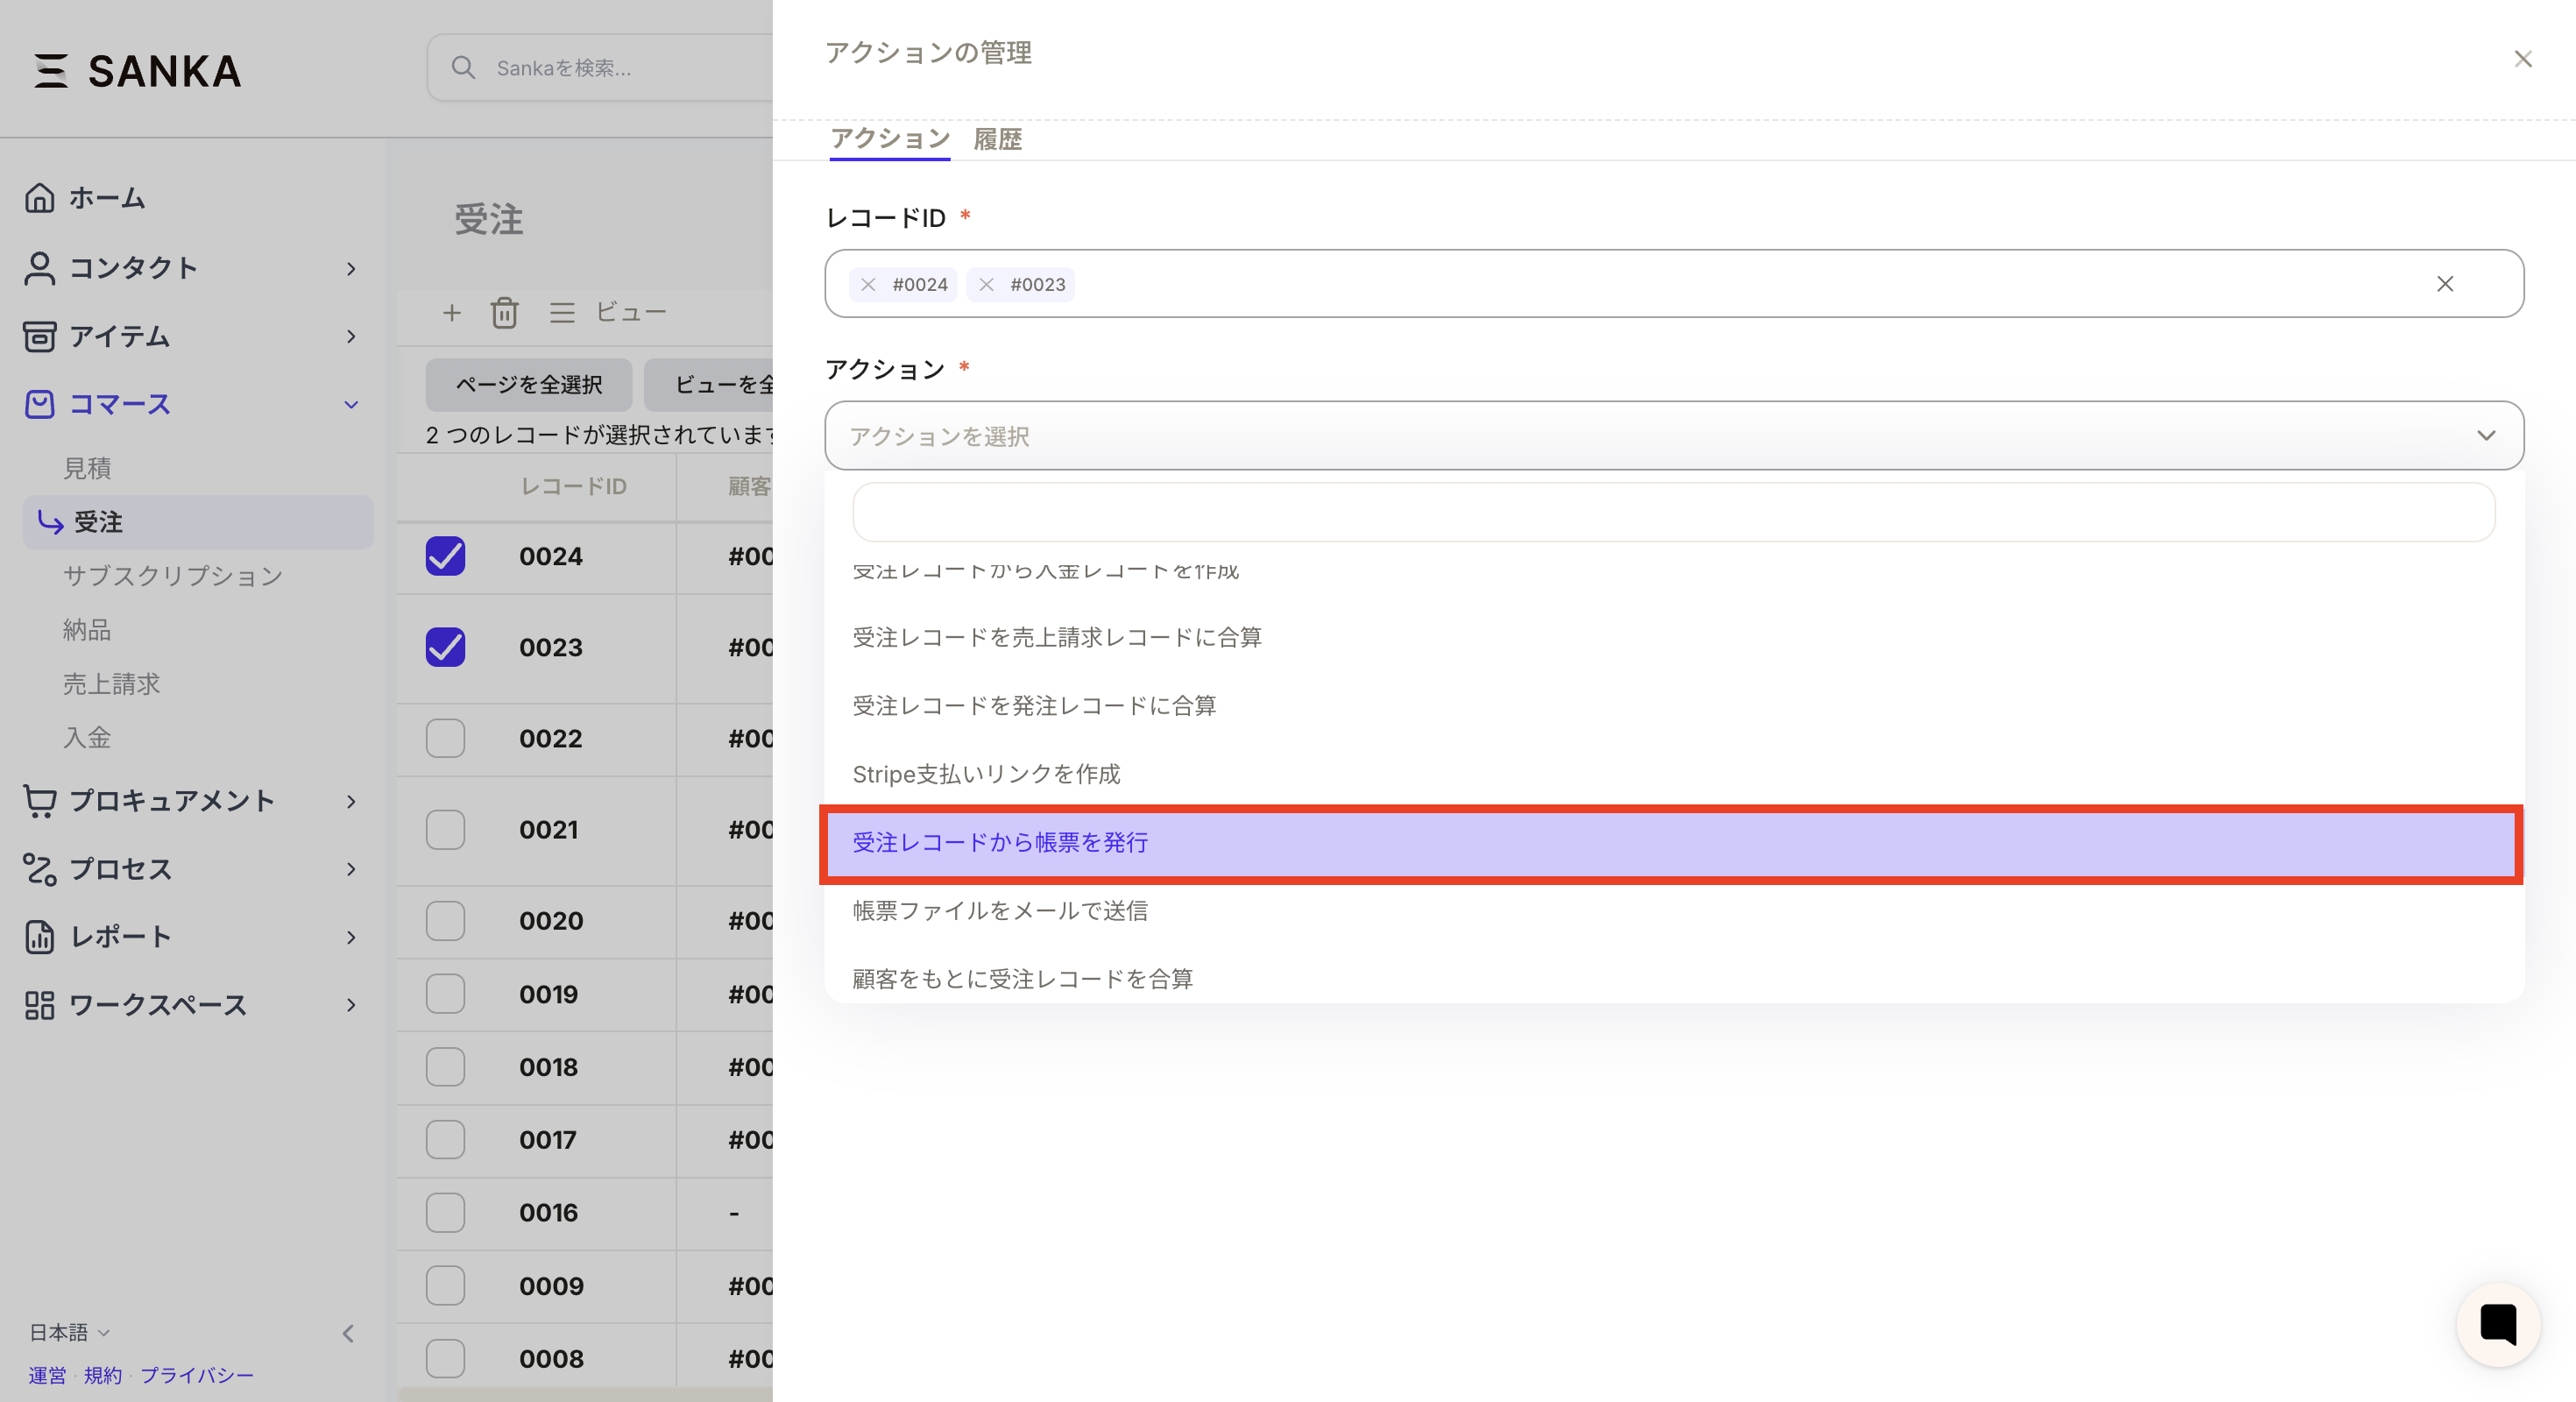
- After selecting the record for which you want to issue a form, press the “Action button”.
- Select Issue Invoice from Order Record.
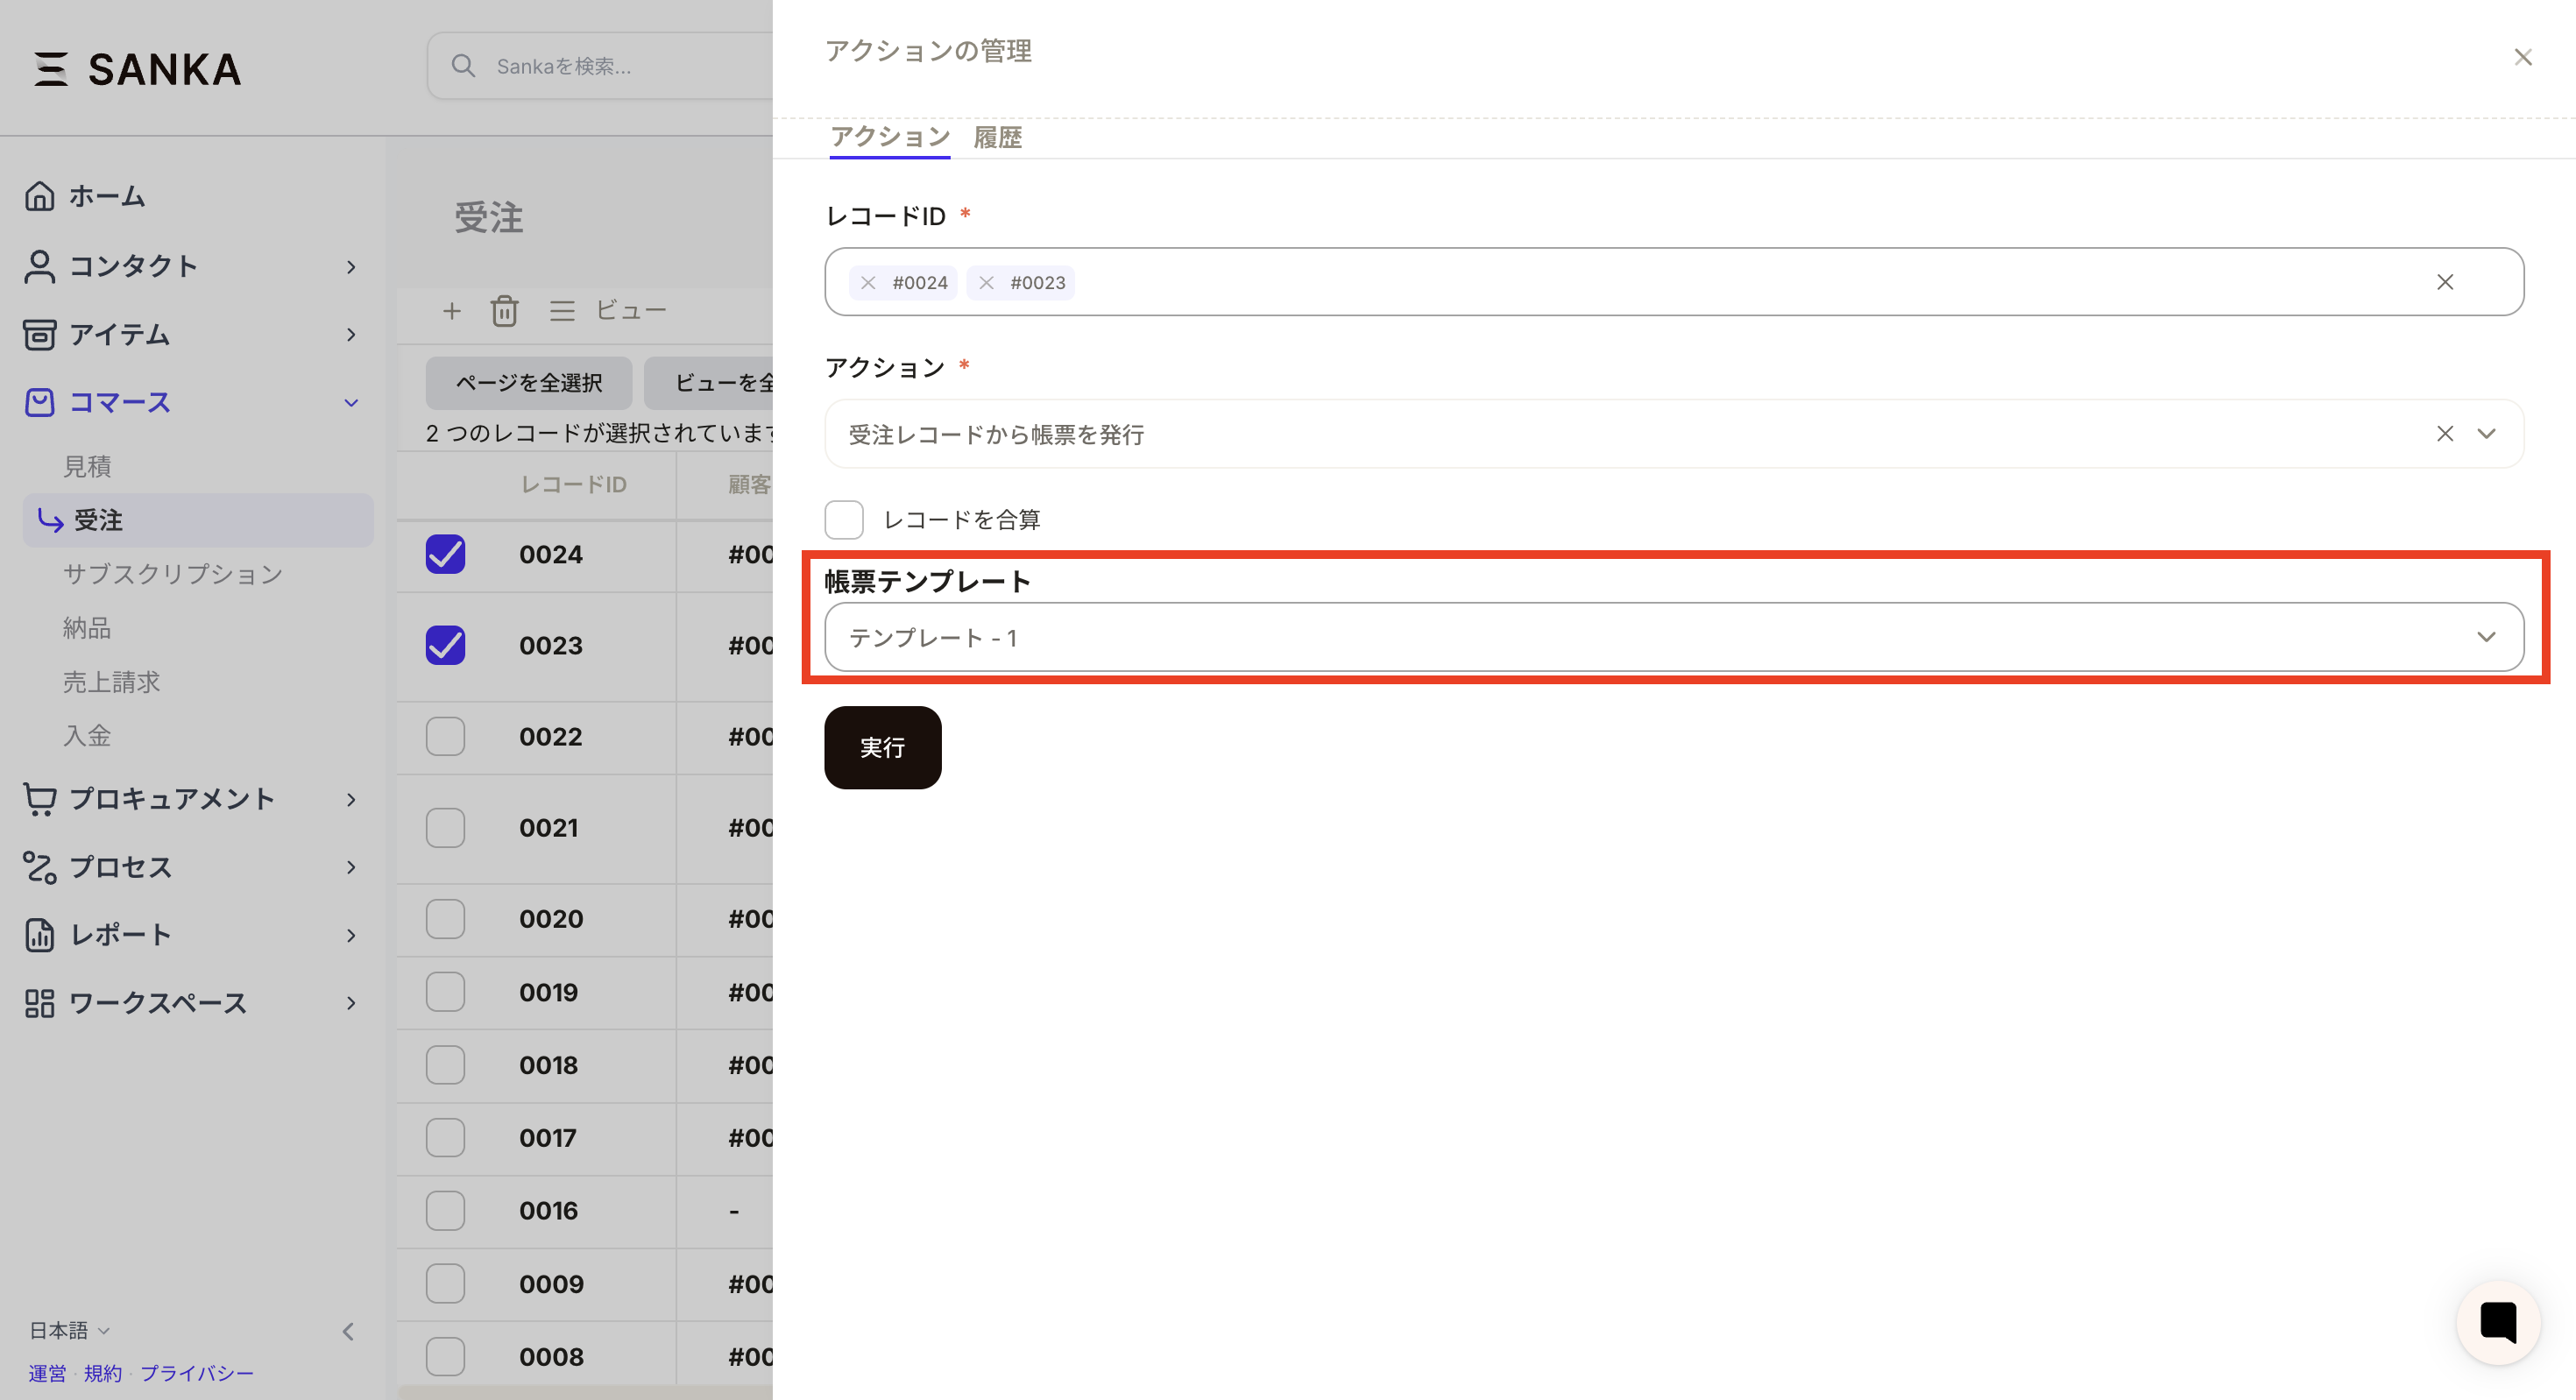
- Select the template you want to output.
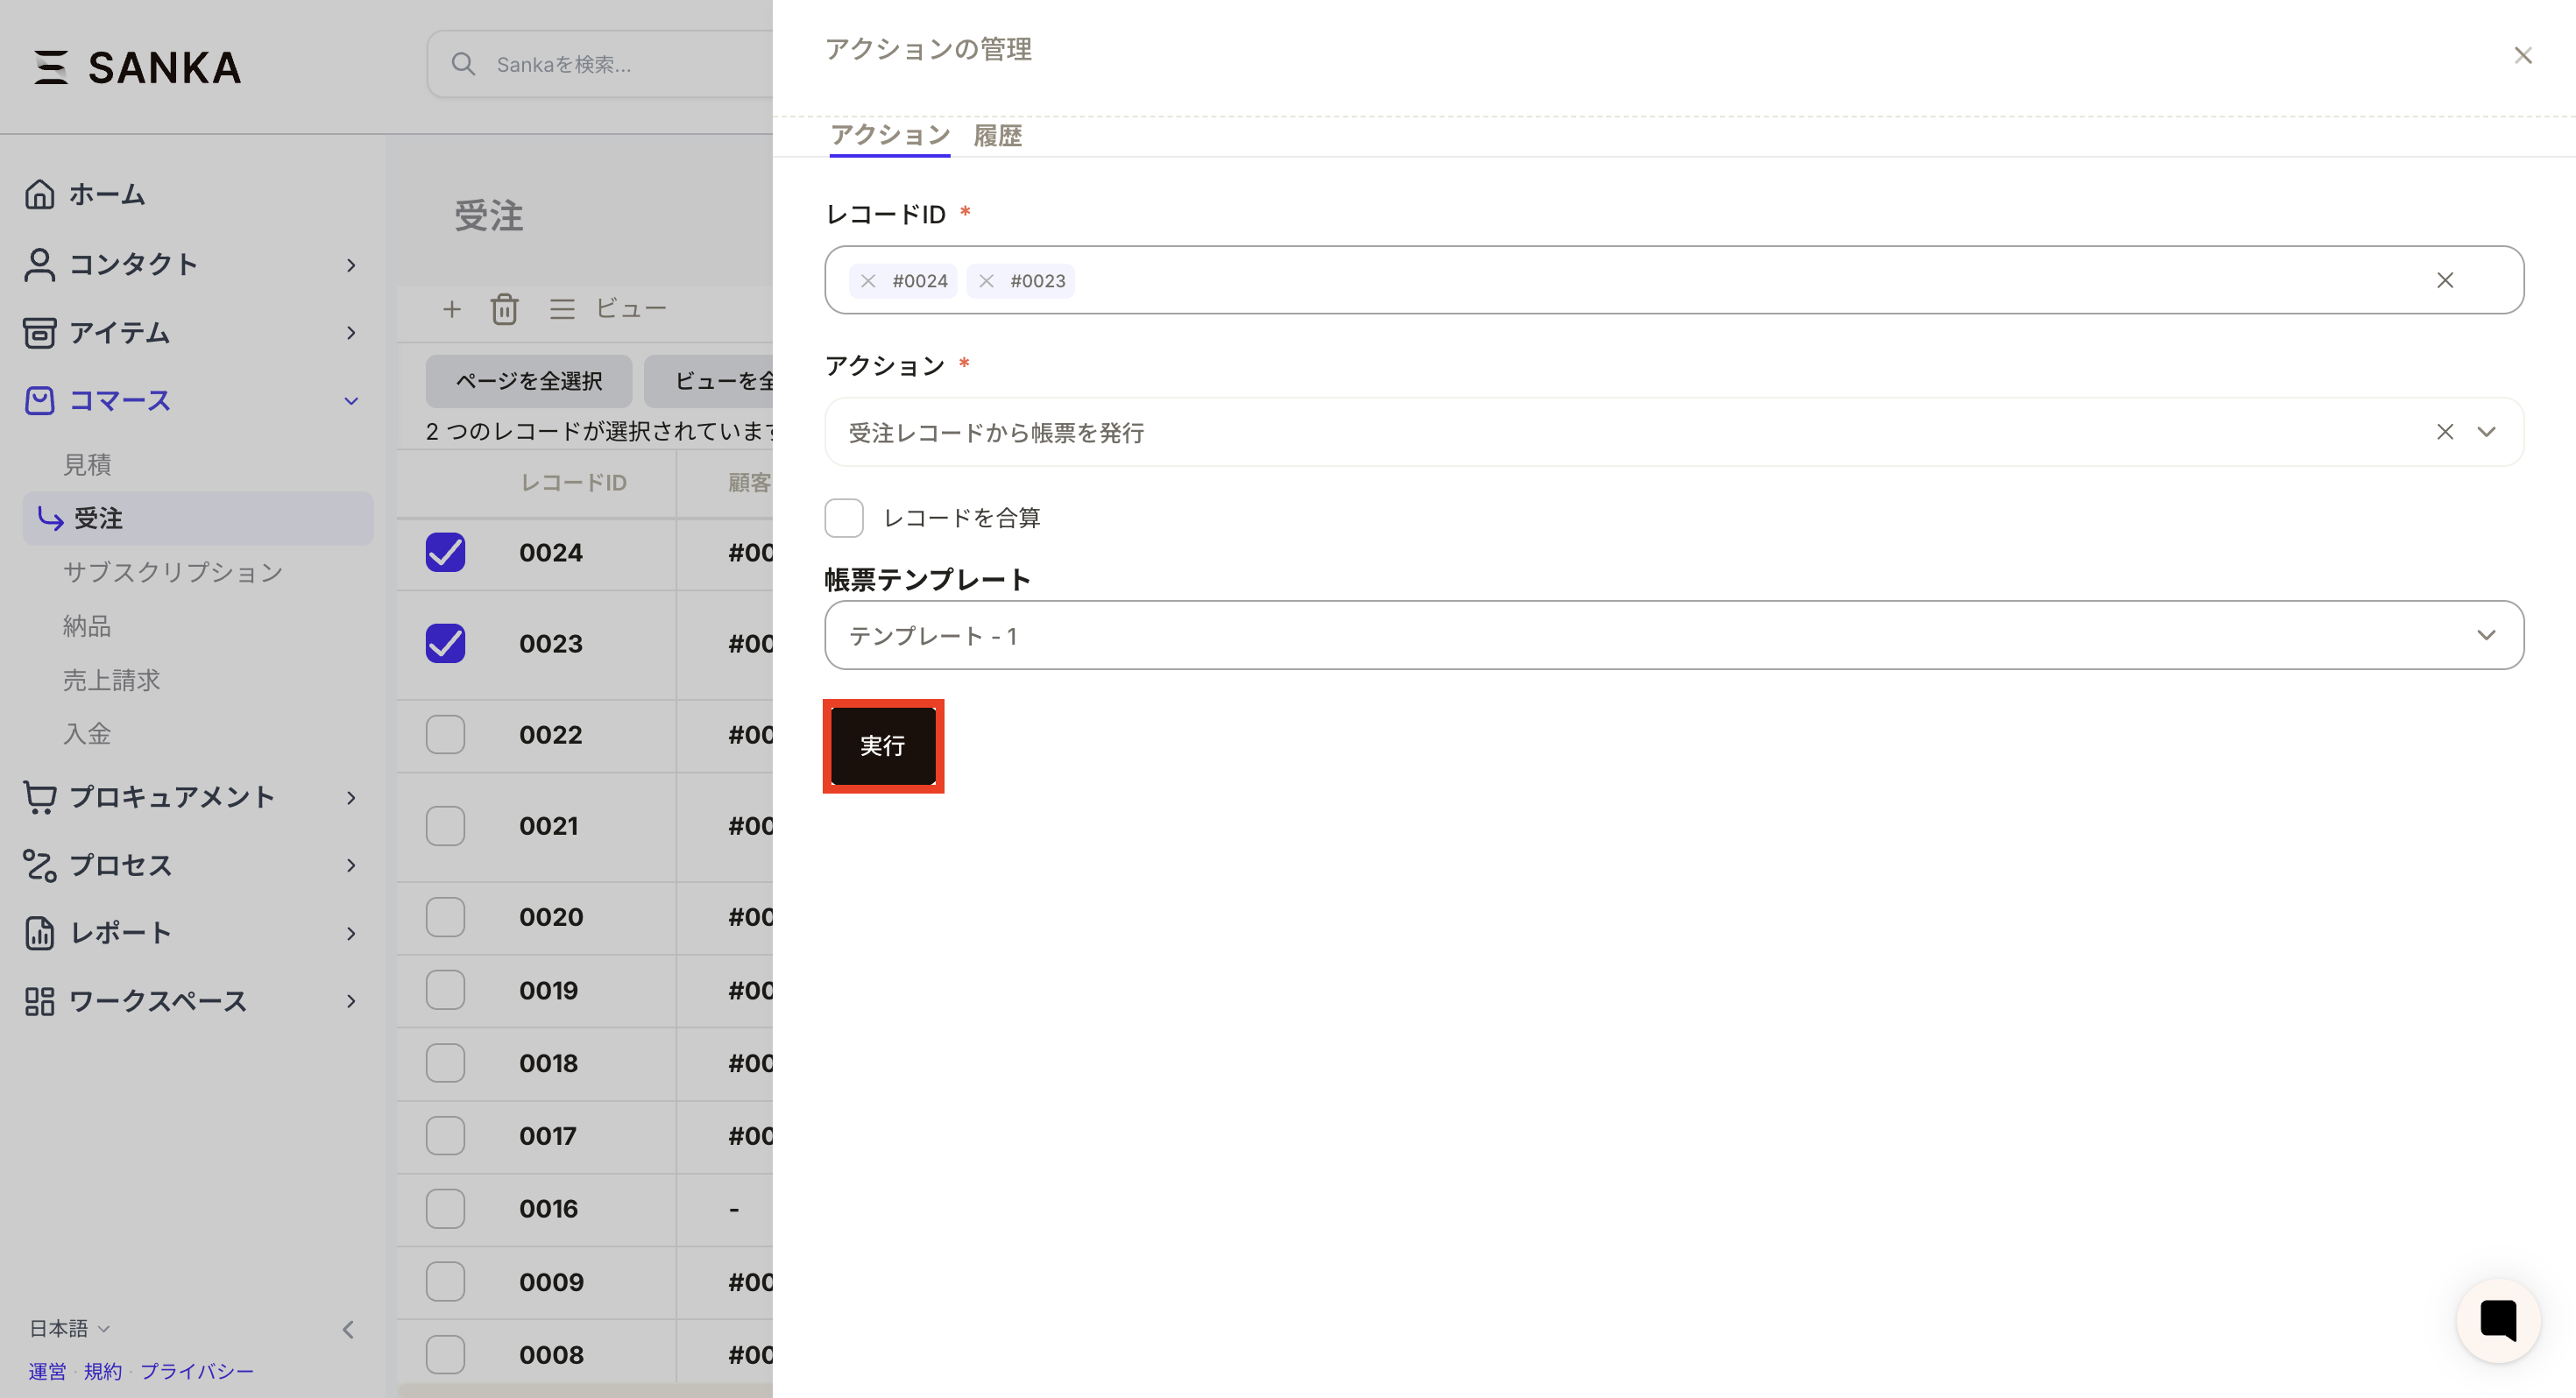
- After confirming the record ID, action, and form template contents again, press the Execute button. If you want to add up records and create a form, check “Add records”.
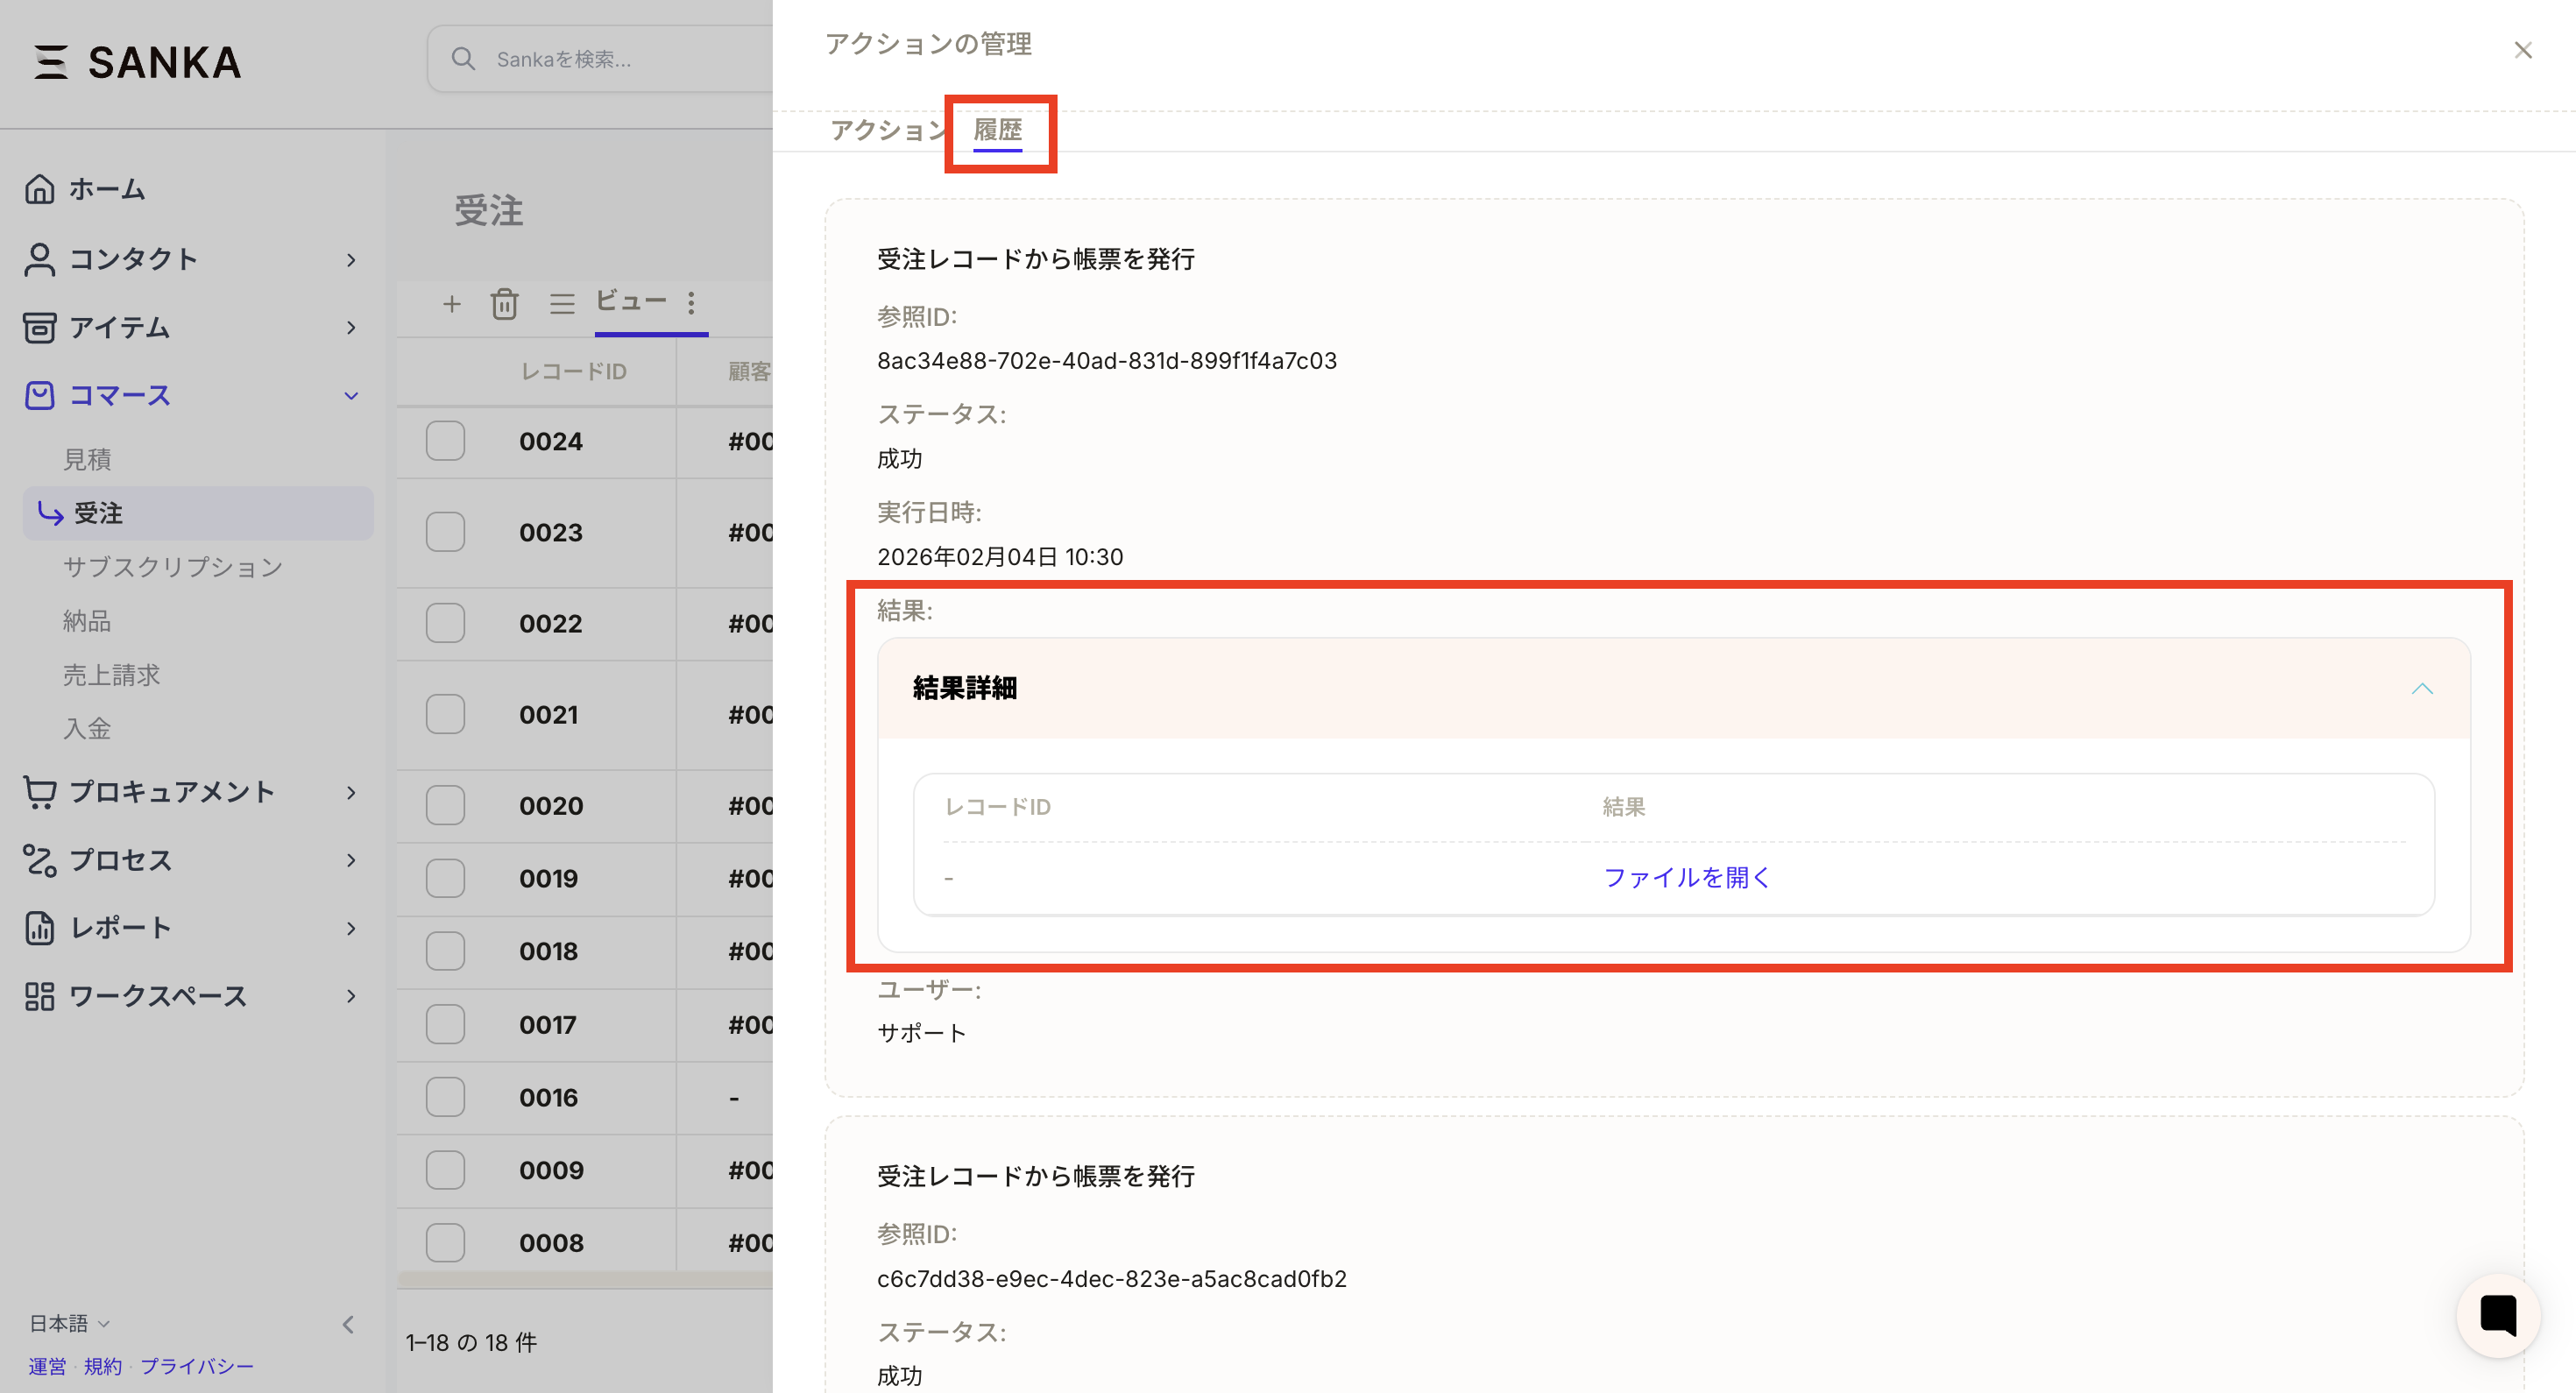
- You can download it from Action history → Result details → Open file.
Send the form file by email
This action allows you to automatically send documents such as estimates and invoices to pre-registered customer information.Advance preparation
Register your email address and other necessary information in the company or contact record you want to associate as a customer. Please be careful not to register incorrect information.How to send a form file by email
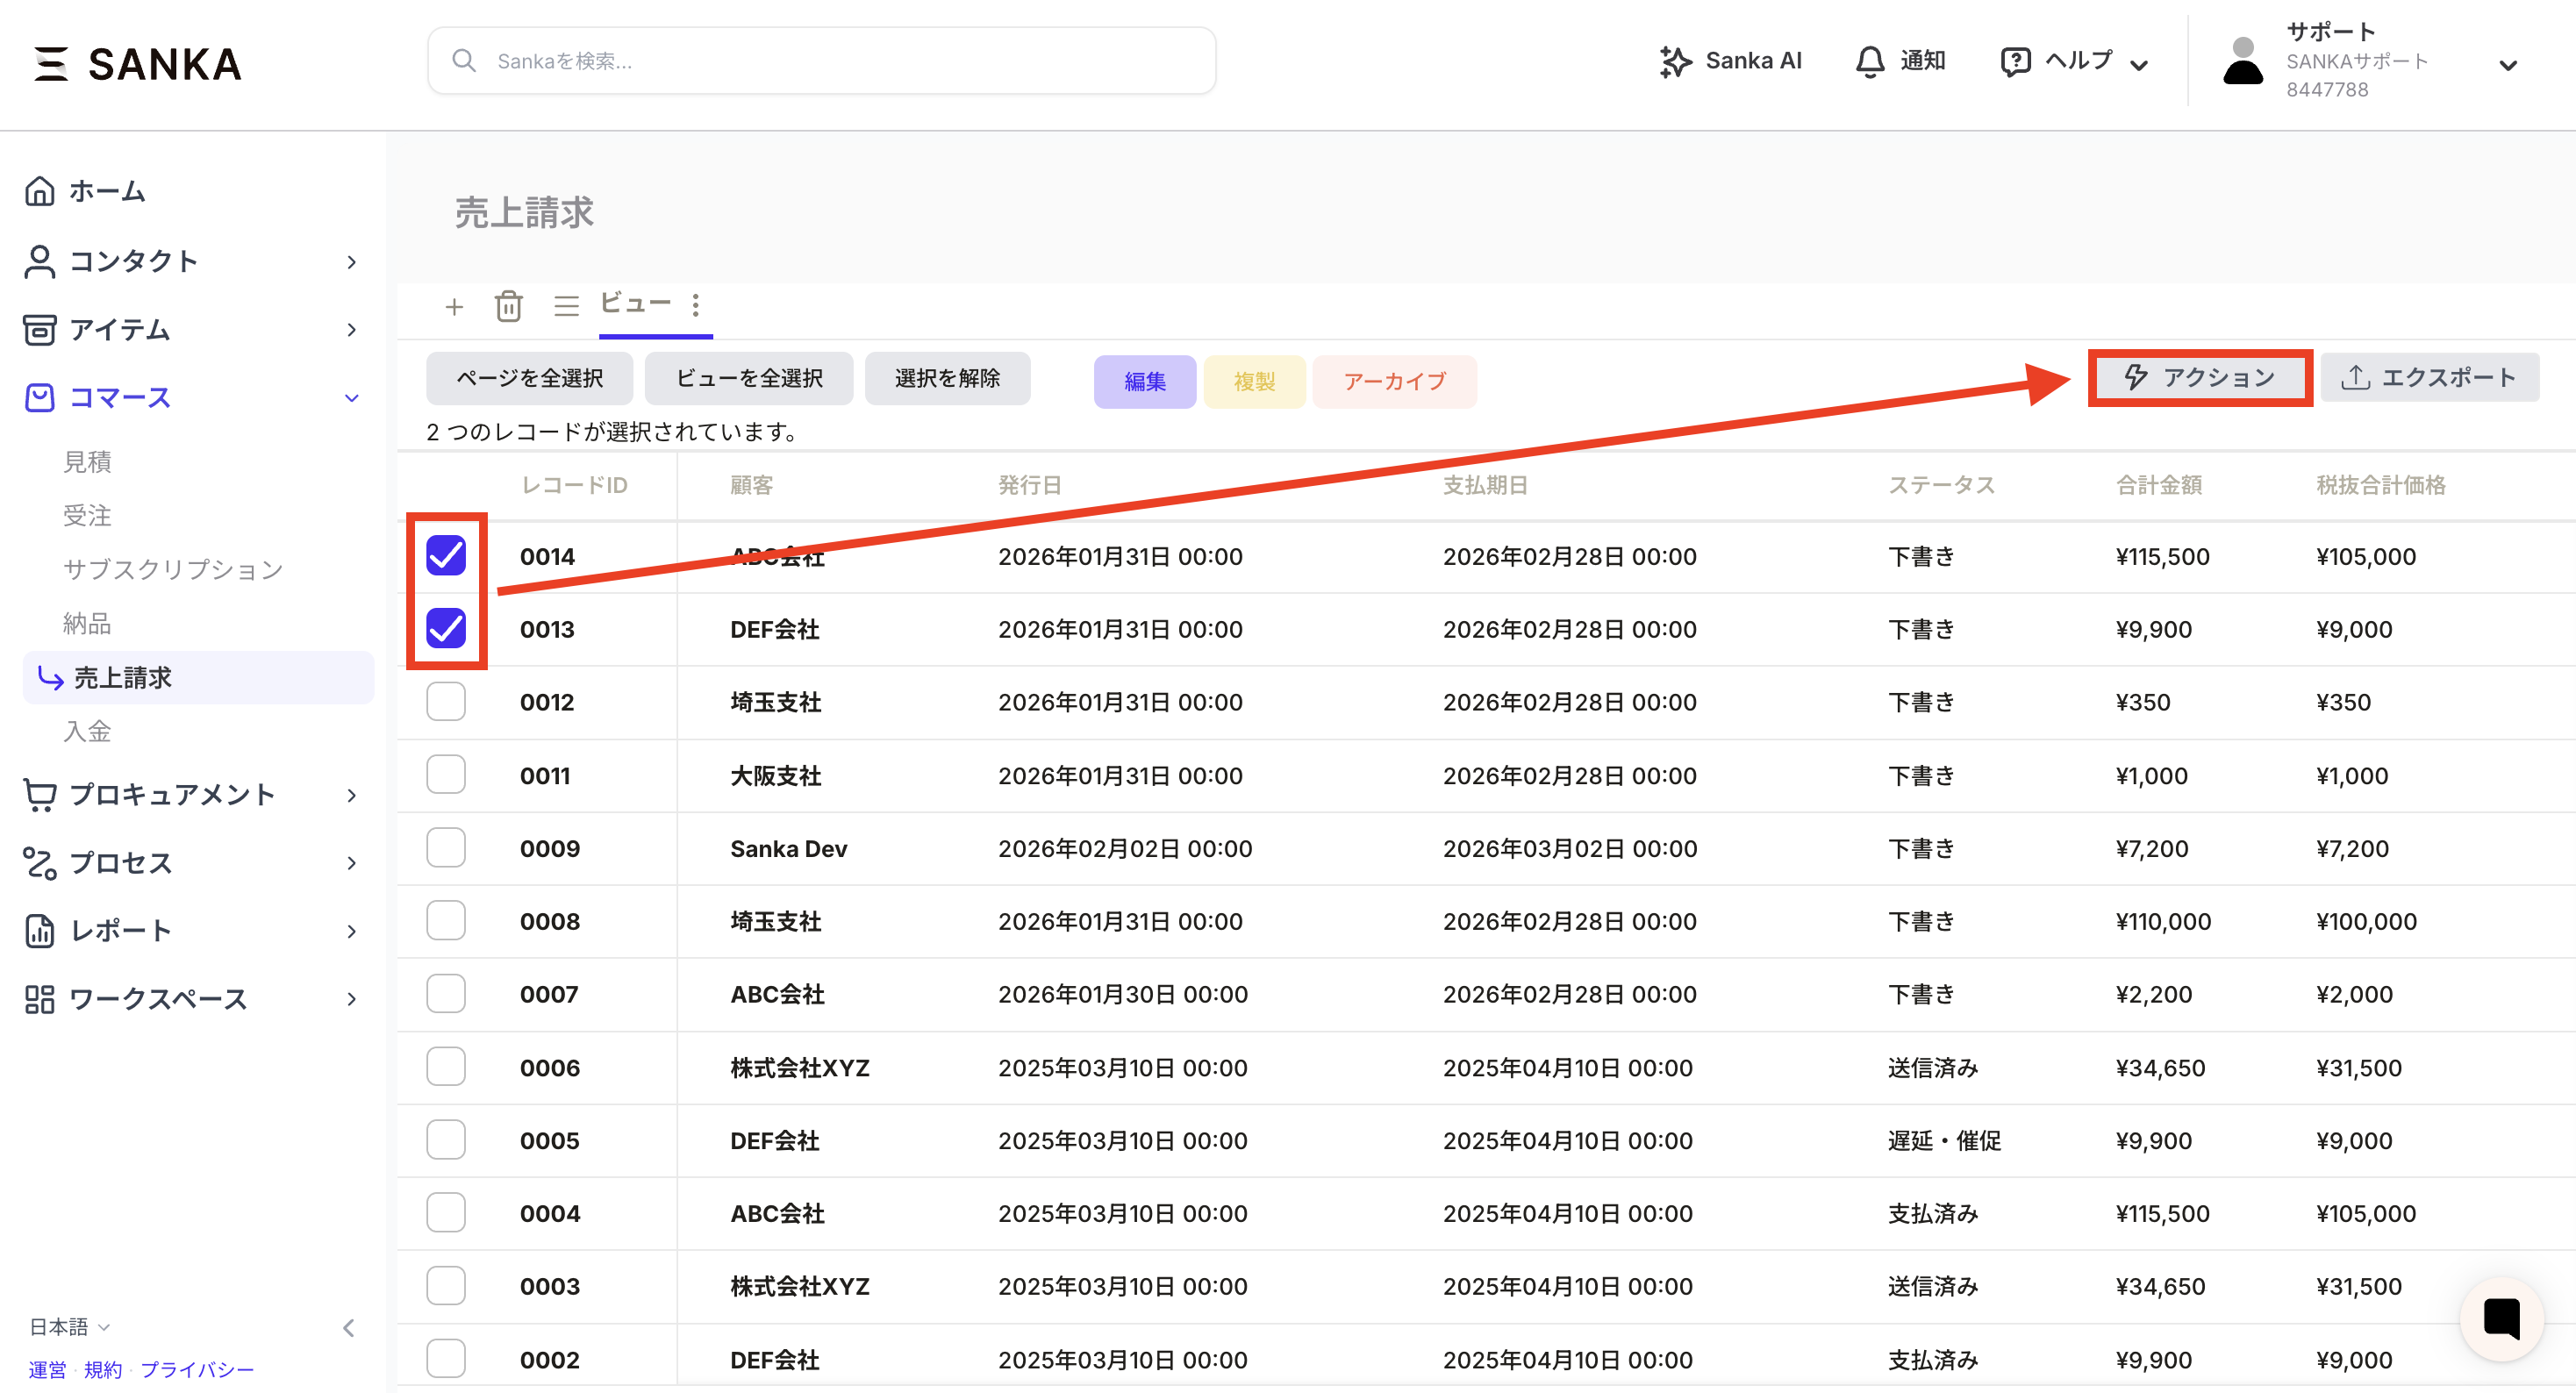
As an example, we will show you how to send sales invoices to multiple customers at once.- Select the record you want to send the form file by email and press the action button (if you want to send only one record individually, you can also use the record action).
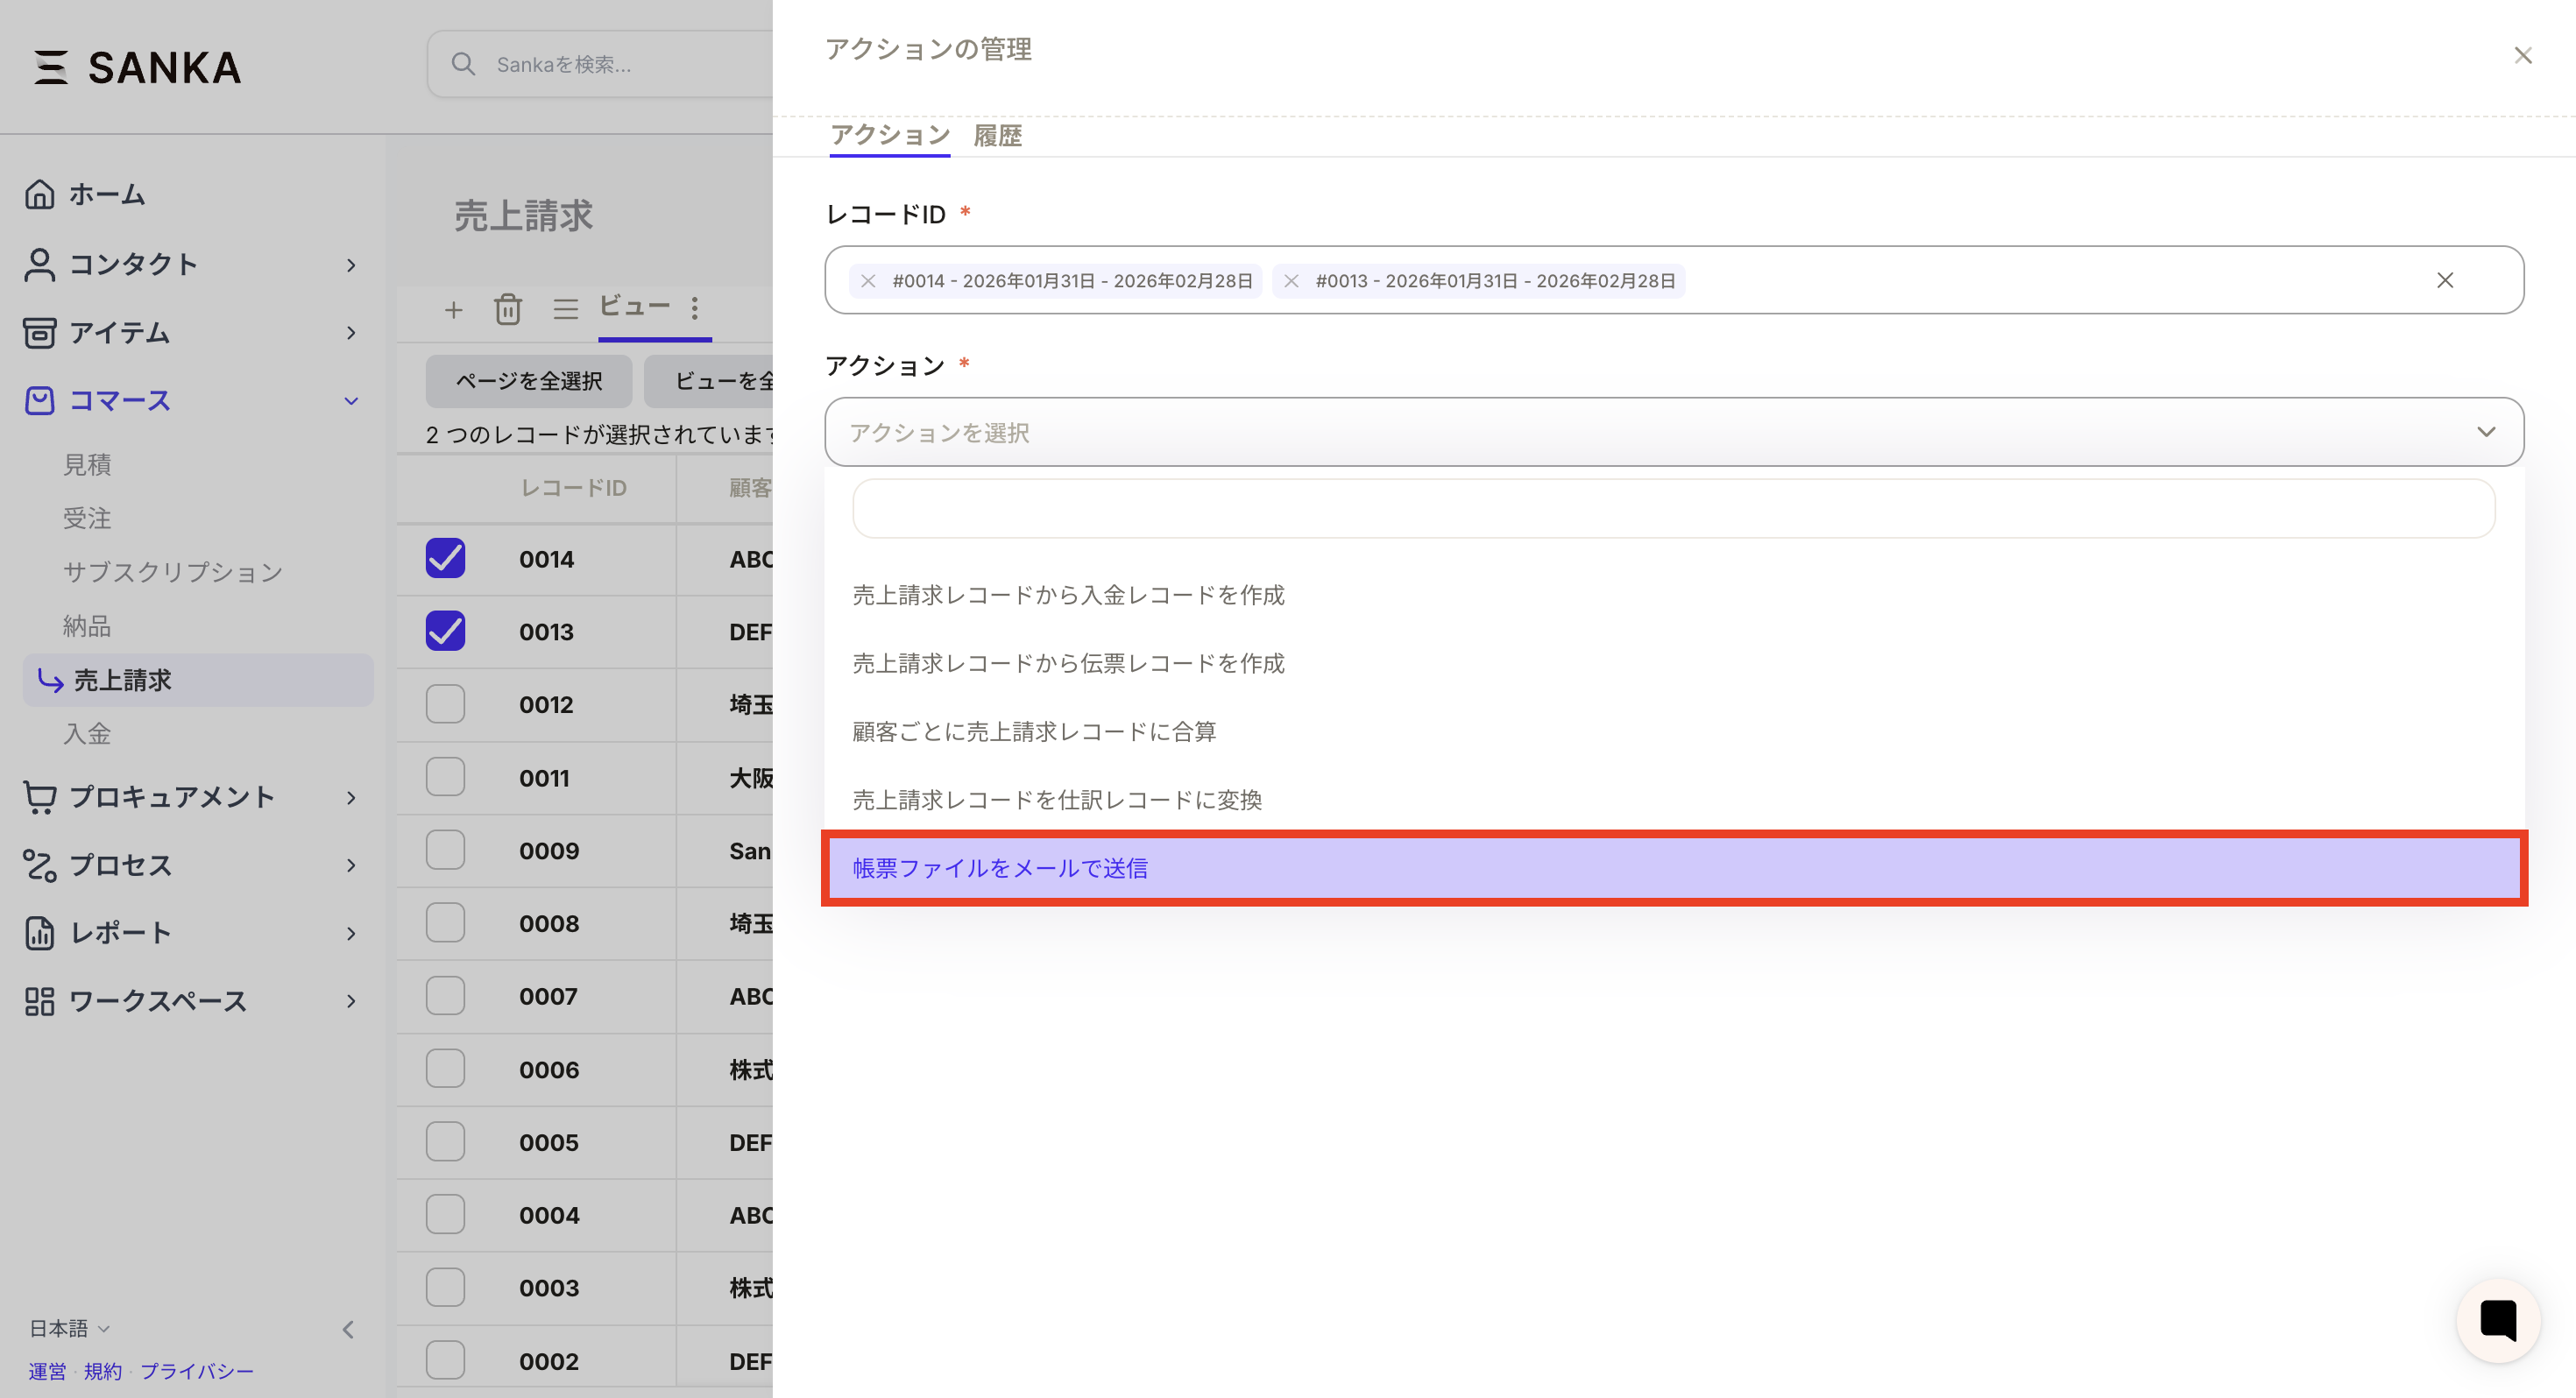
- Select Send form file by email.
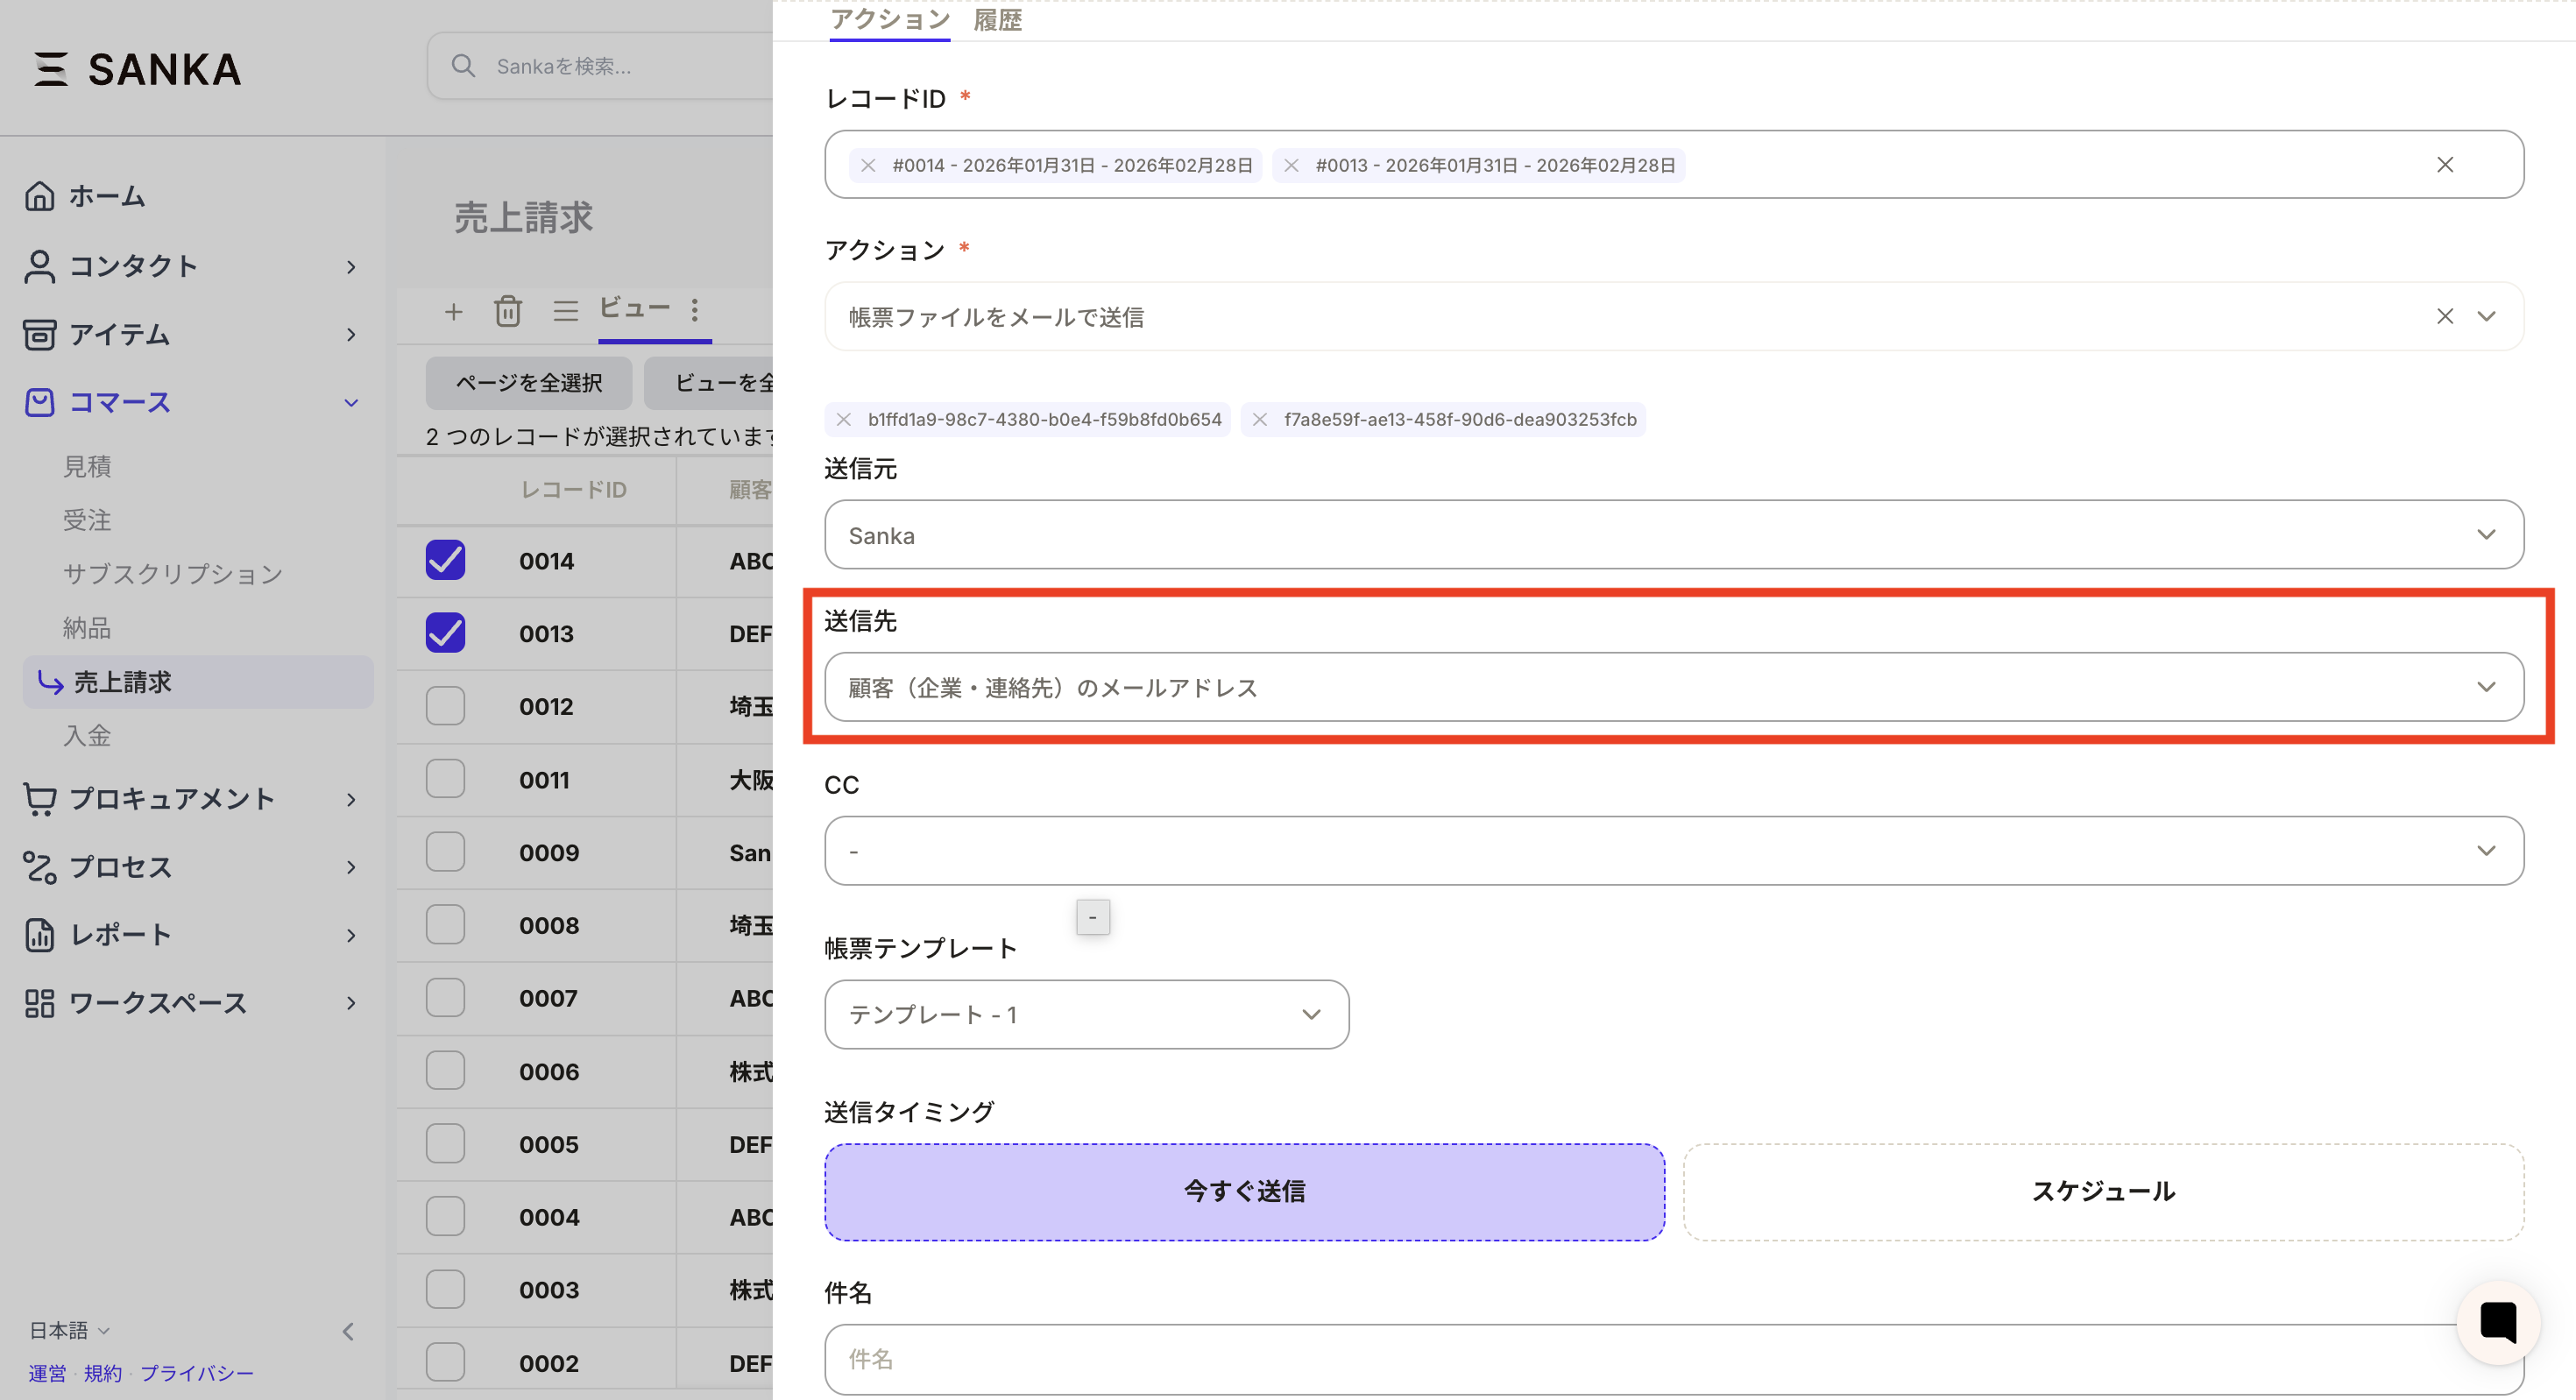
- Sanka is set as the sender, and the customer information set in the record is reflected in the destination.
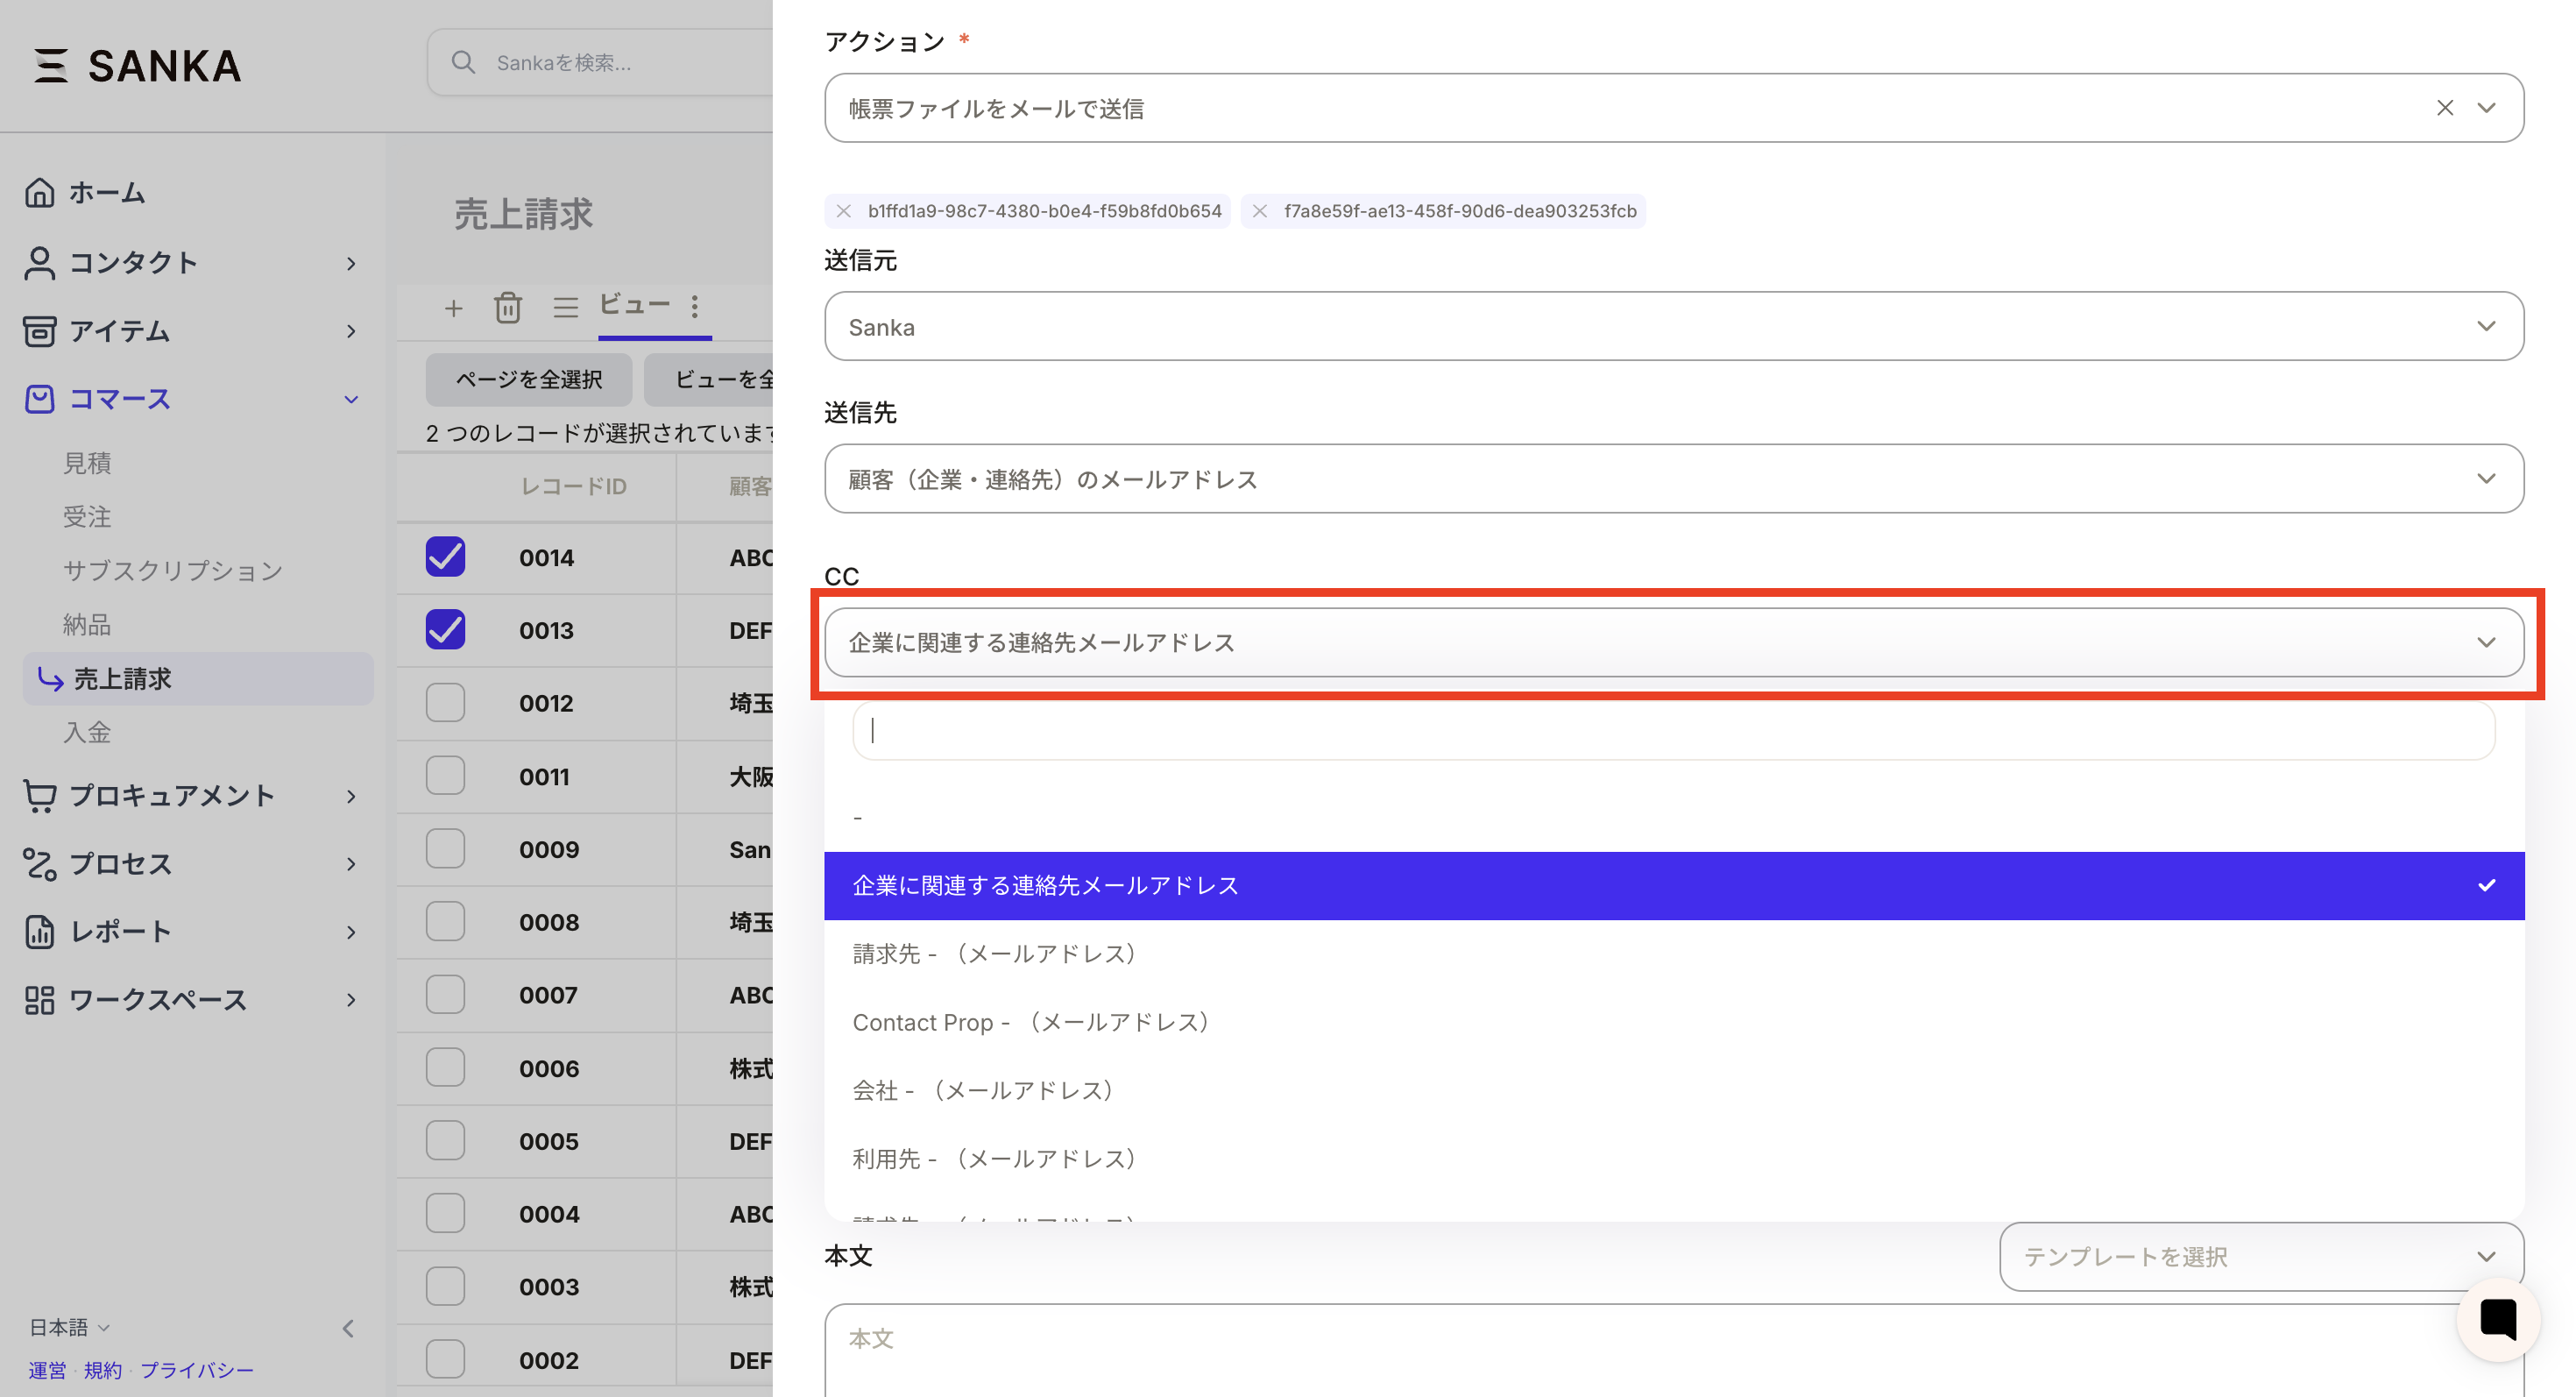
- Select the email address you want to set as CC. If not, skip it.
- Select a form template.

- Set “Send timing”. In the example, send now is set.

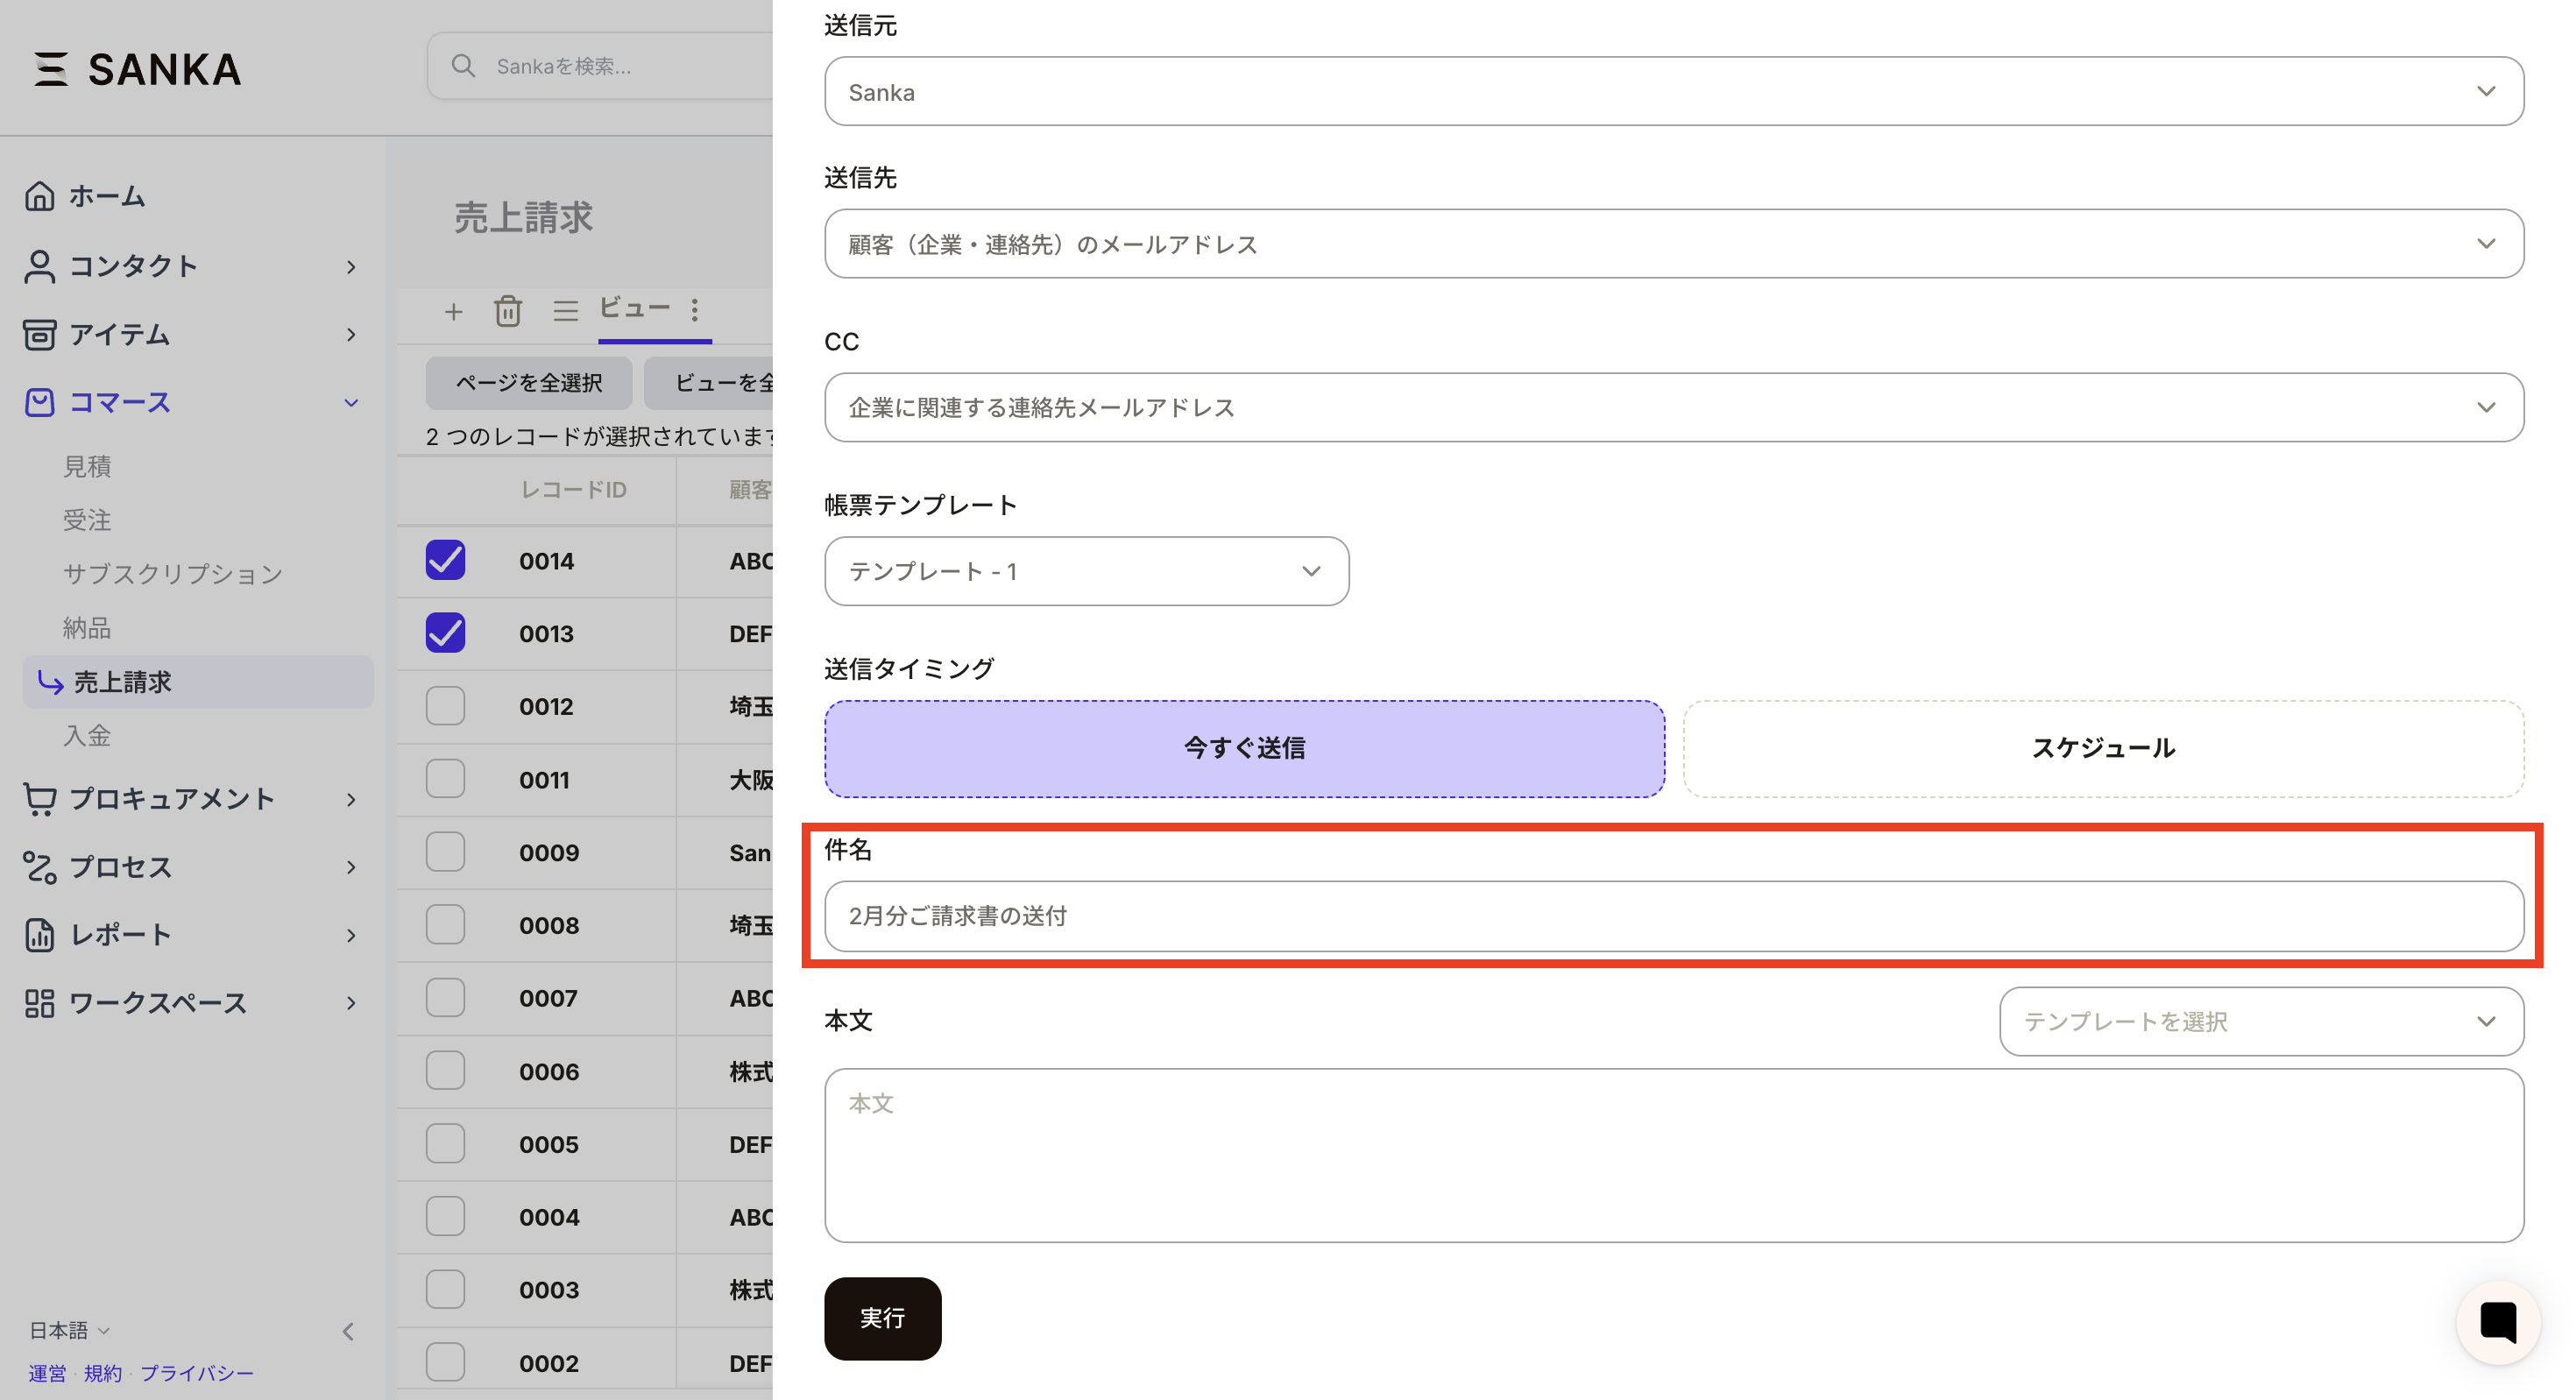
- Enter the Subject.
- Enter your message in “Body”. You can also select a pre-registered message template.
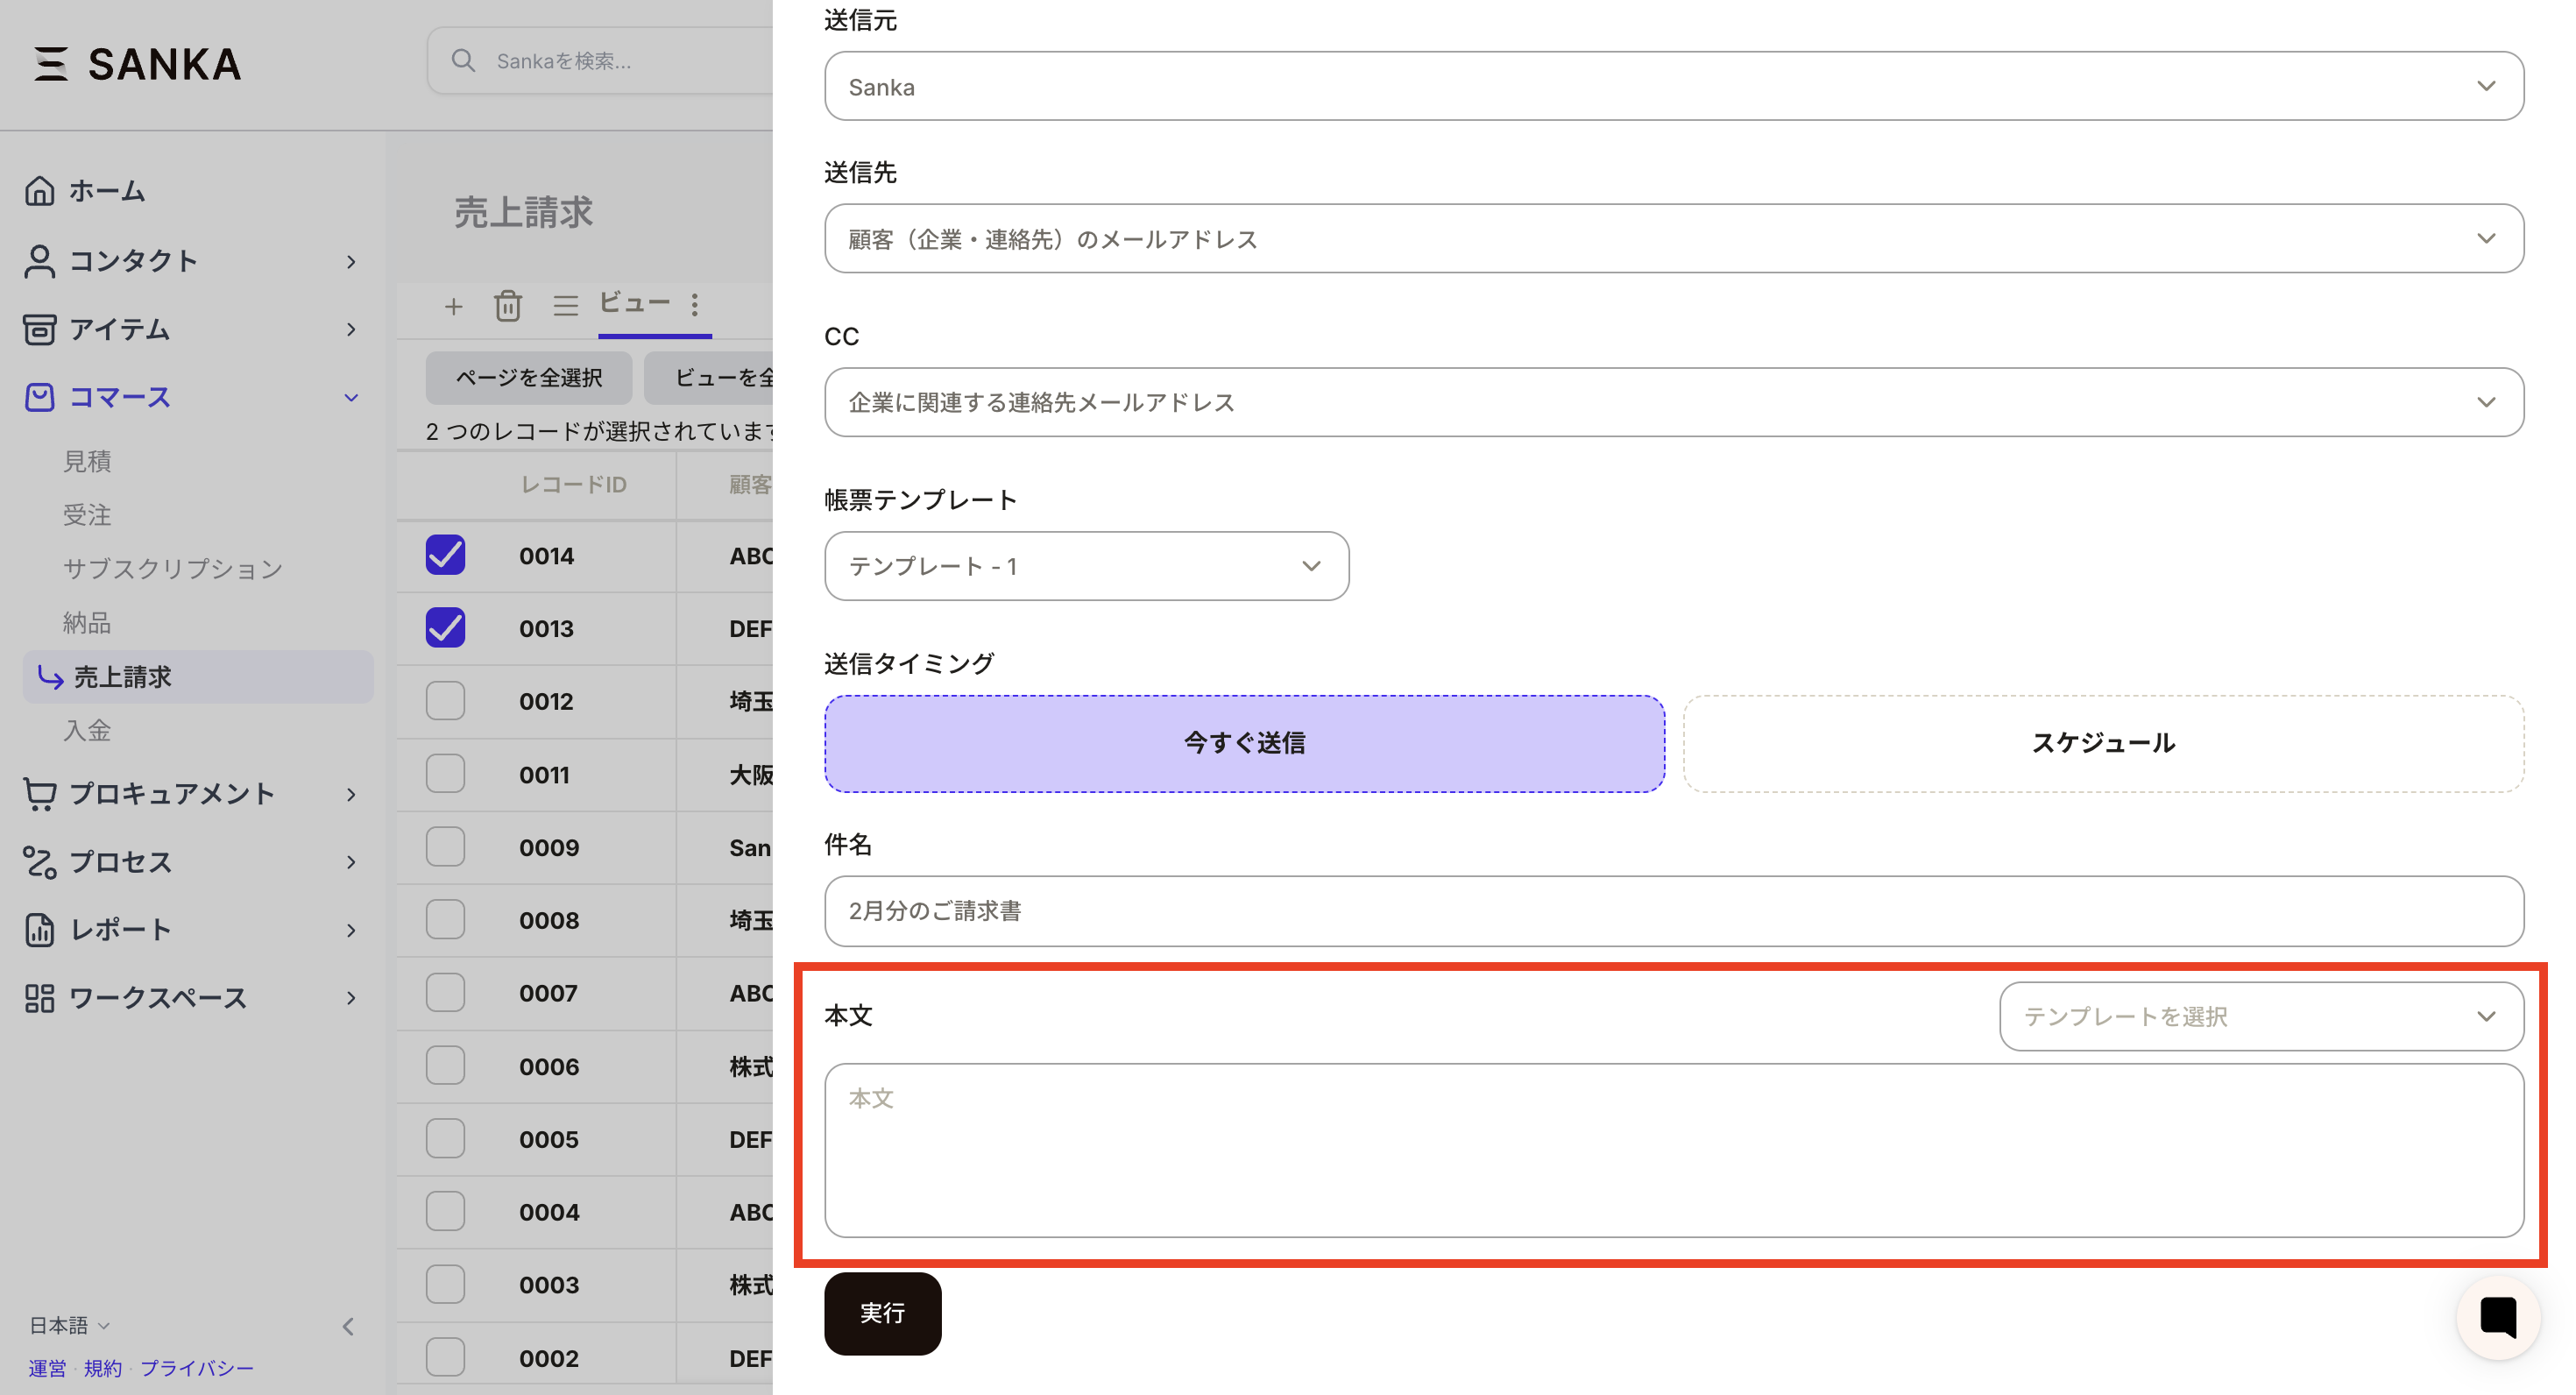
- After confirming all settings, press the Execute button. Since it will actually be sent when you run it, it is recommended that you try it with a test record first. Please be sure to enter the customer’s email address information correctly.

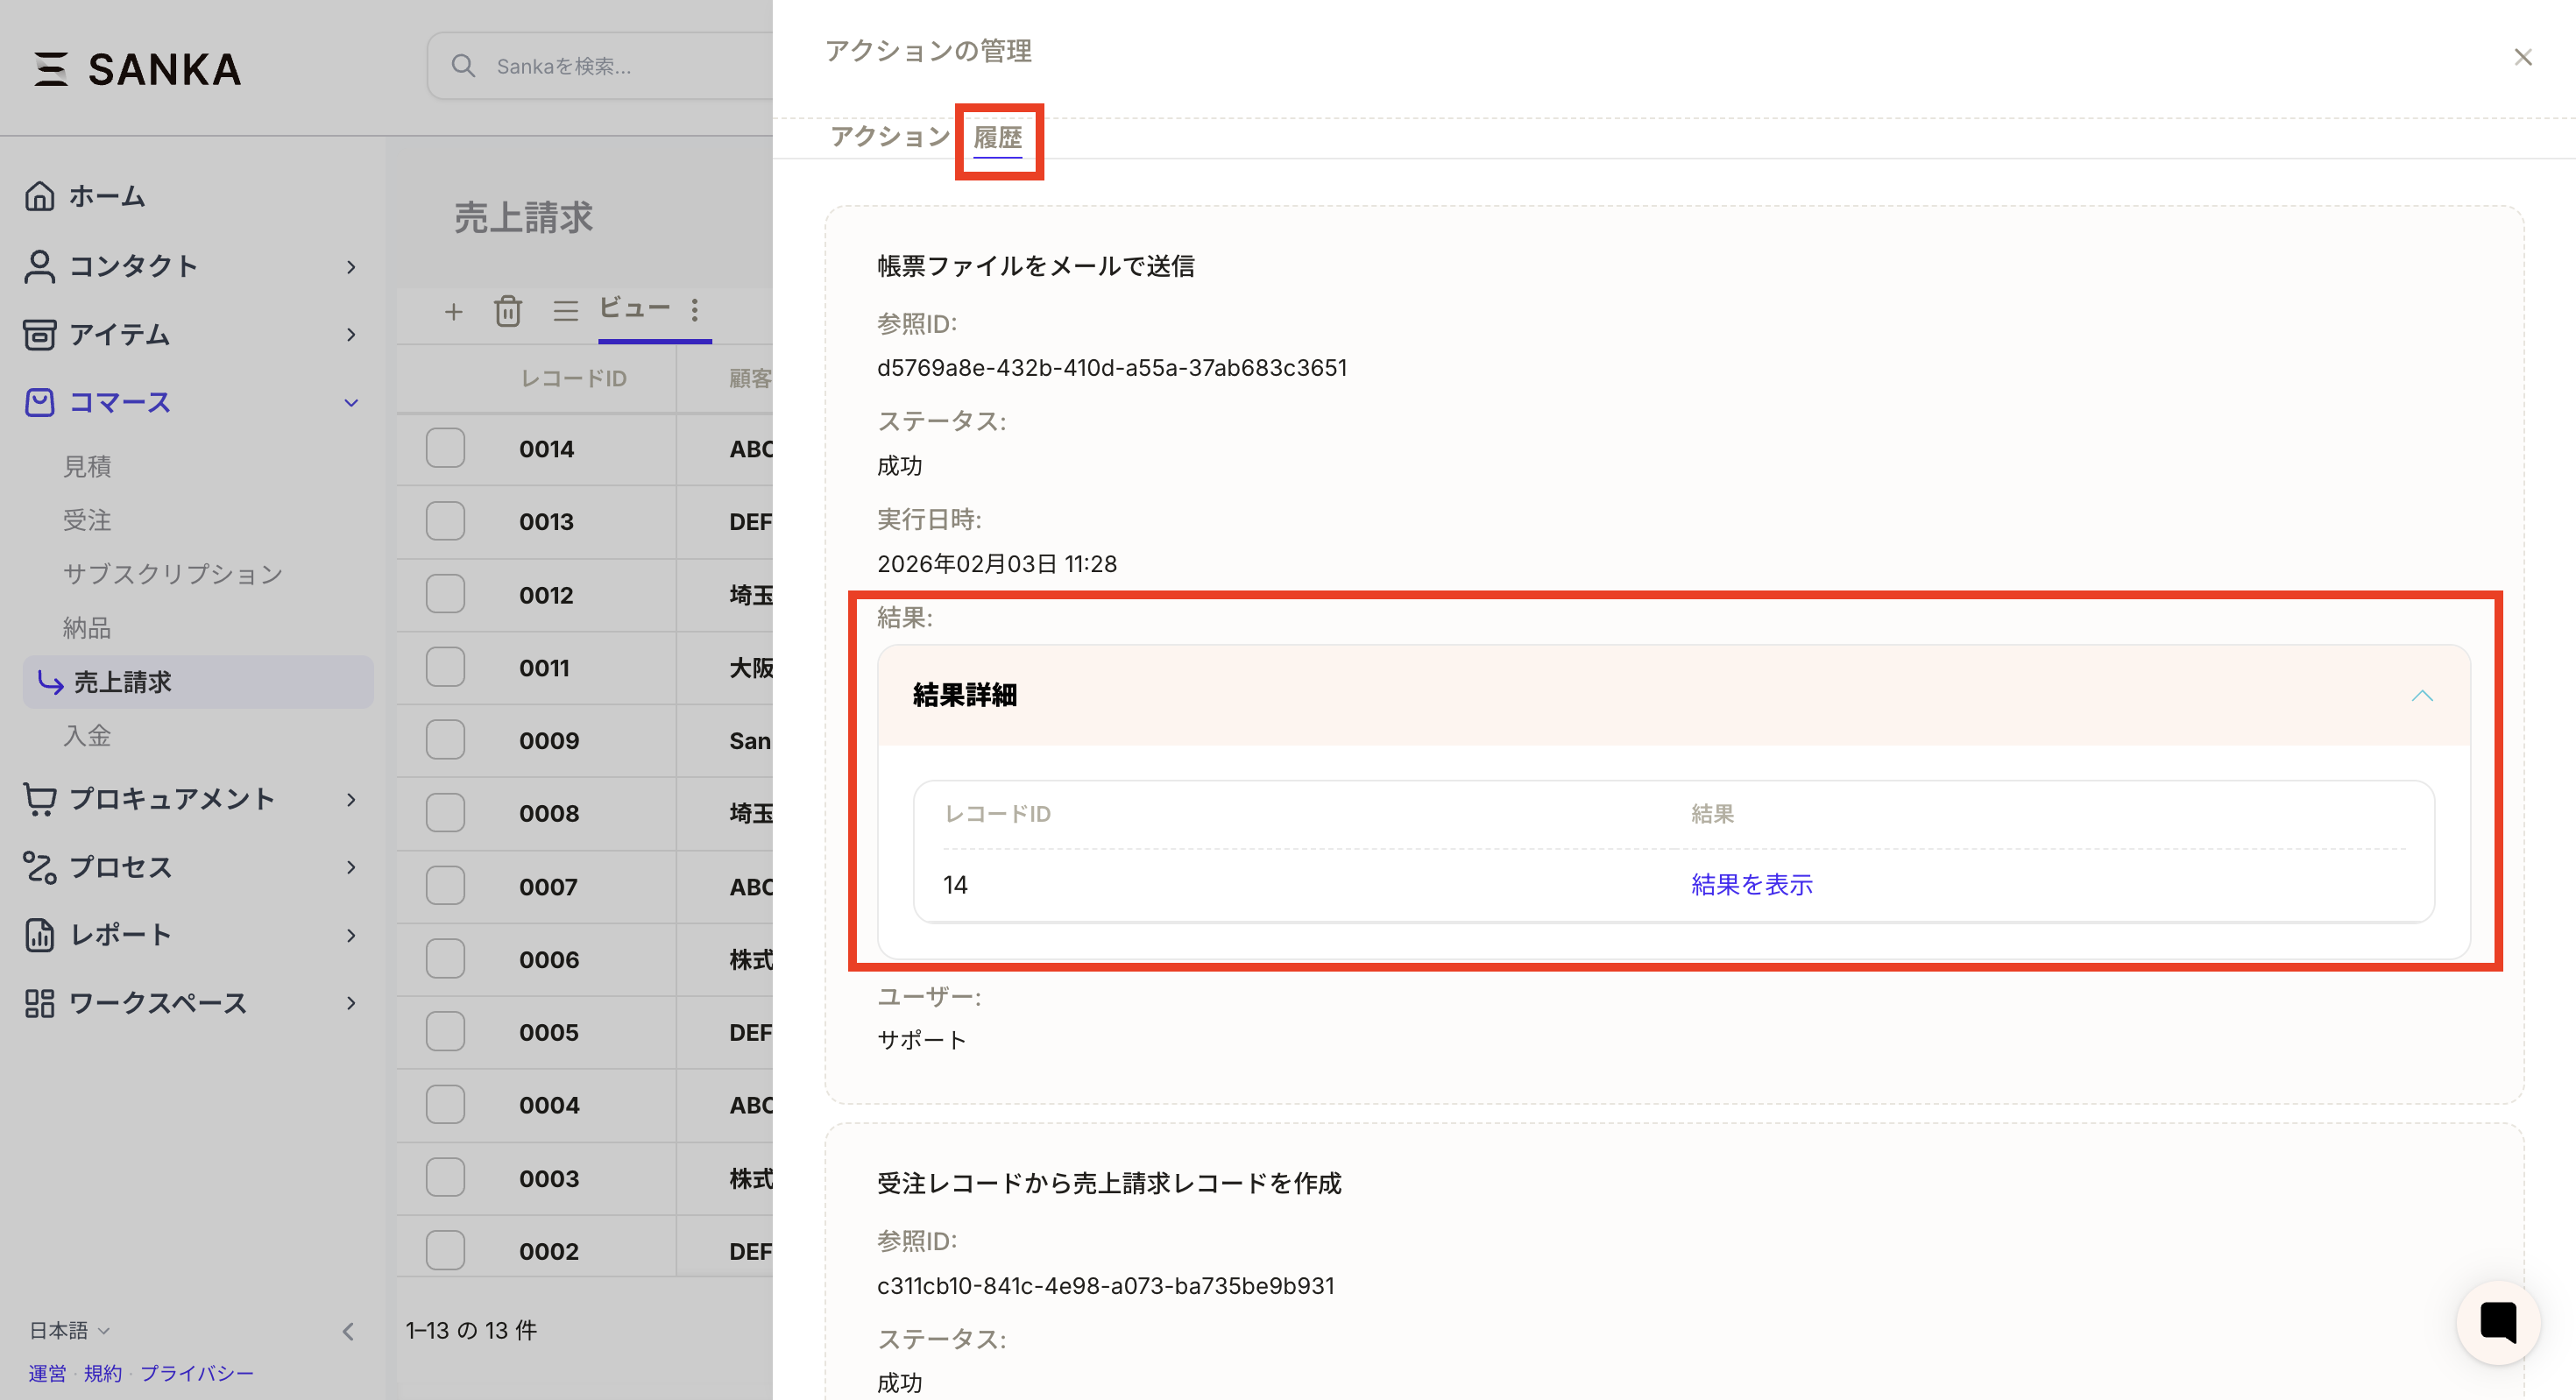
- You can view the sent results from the action history.
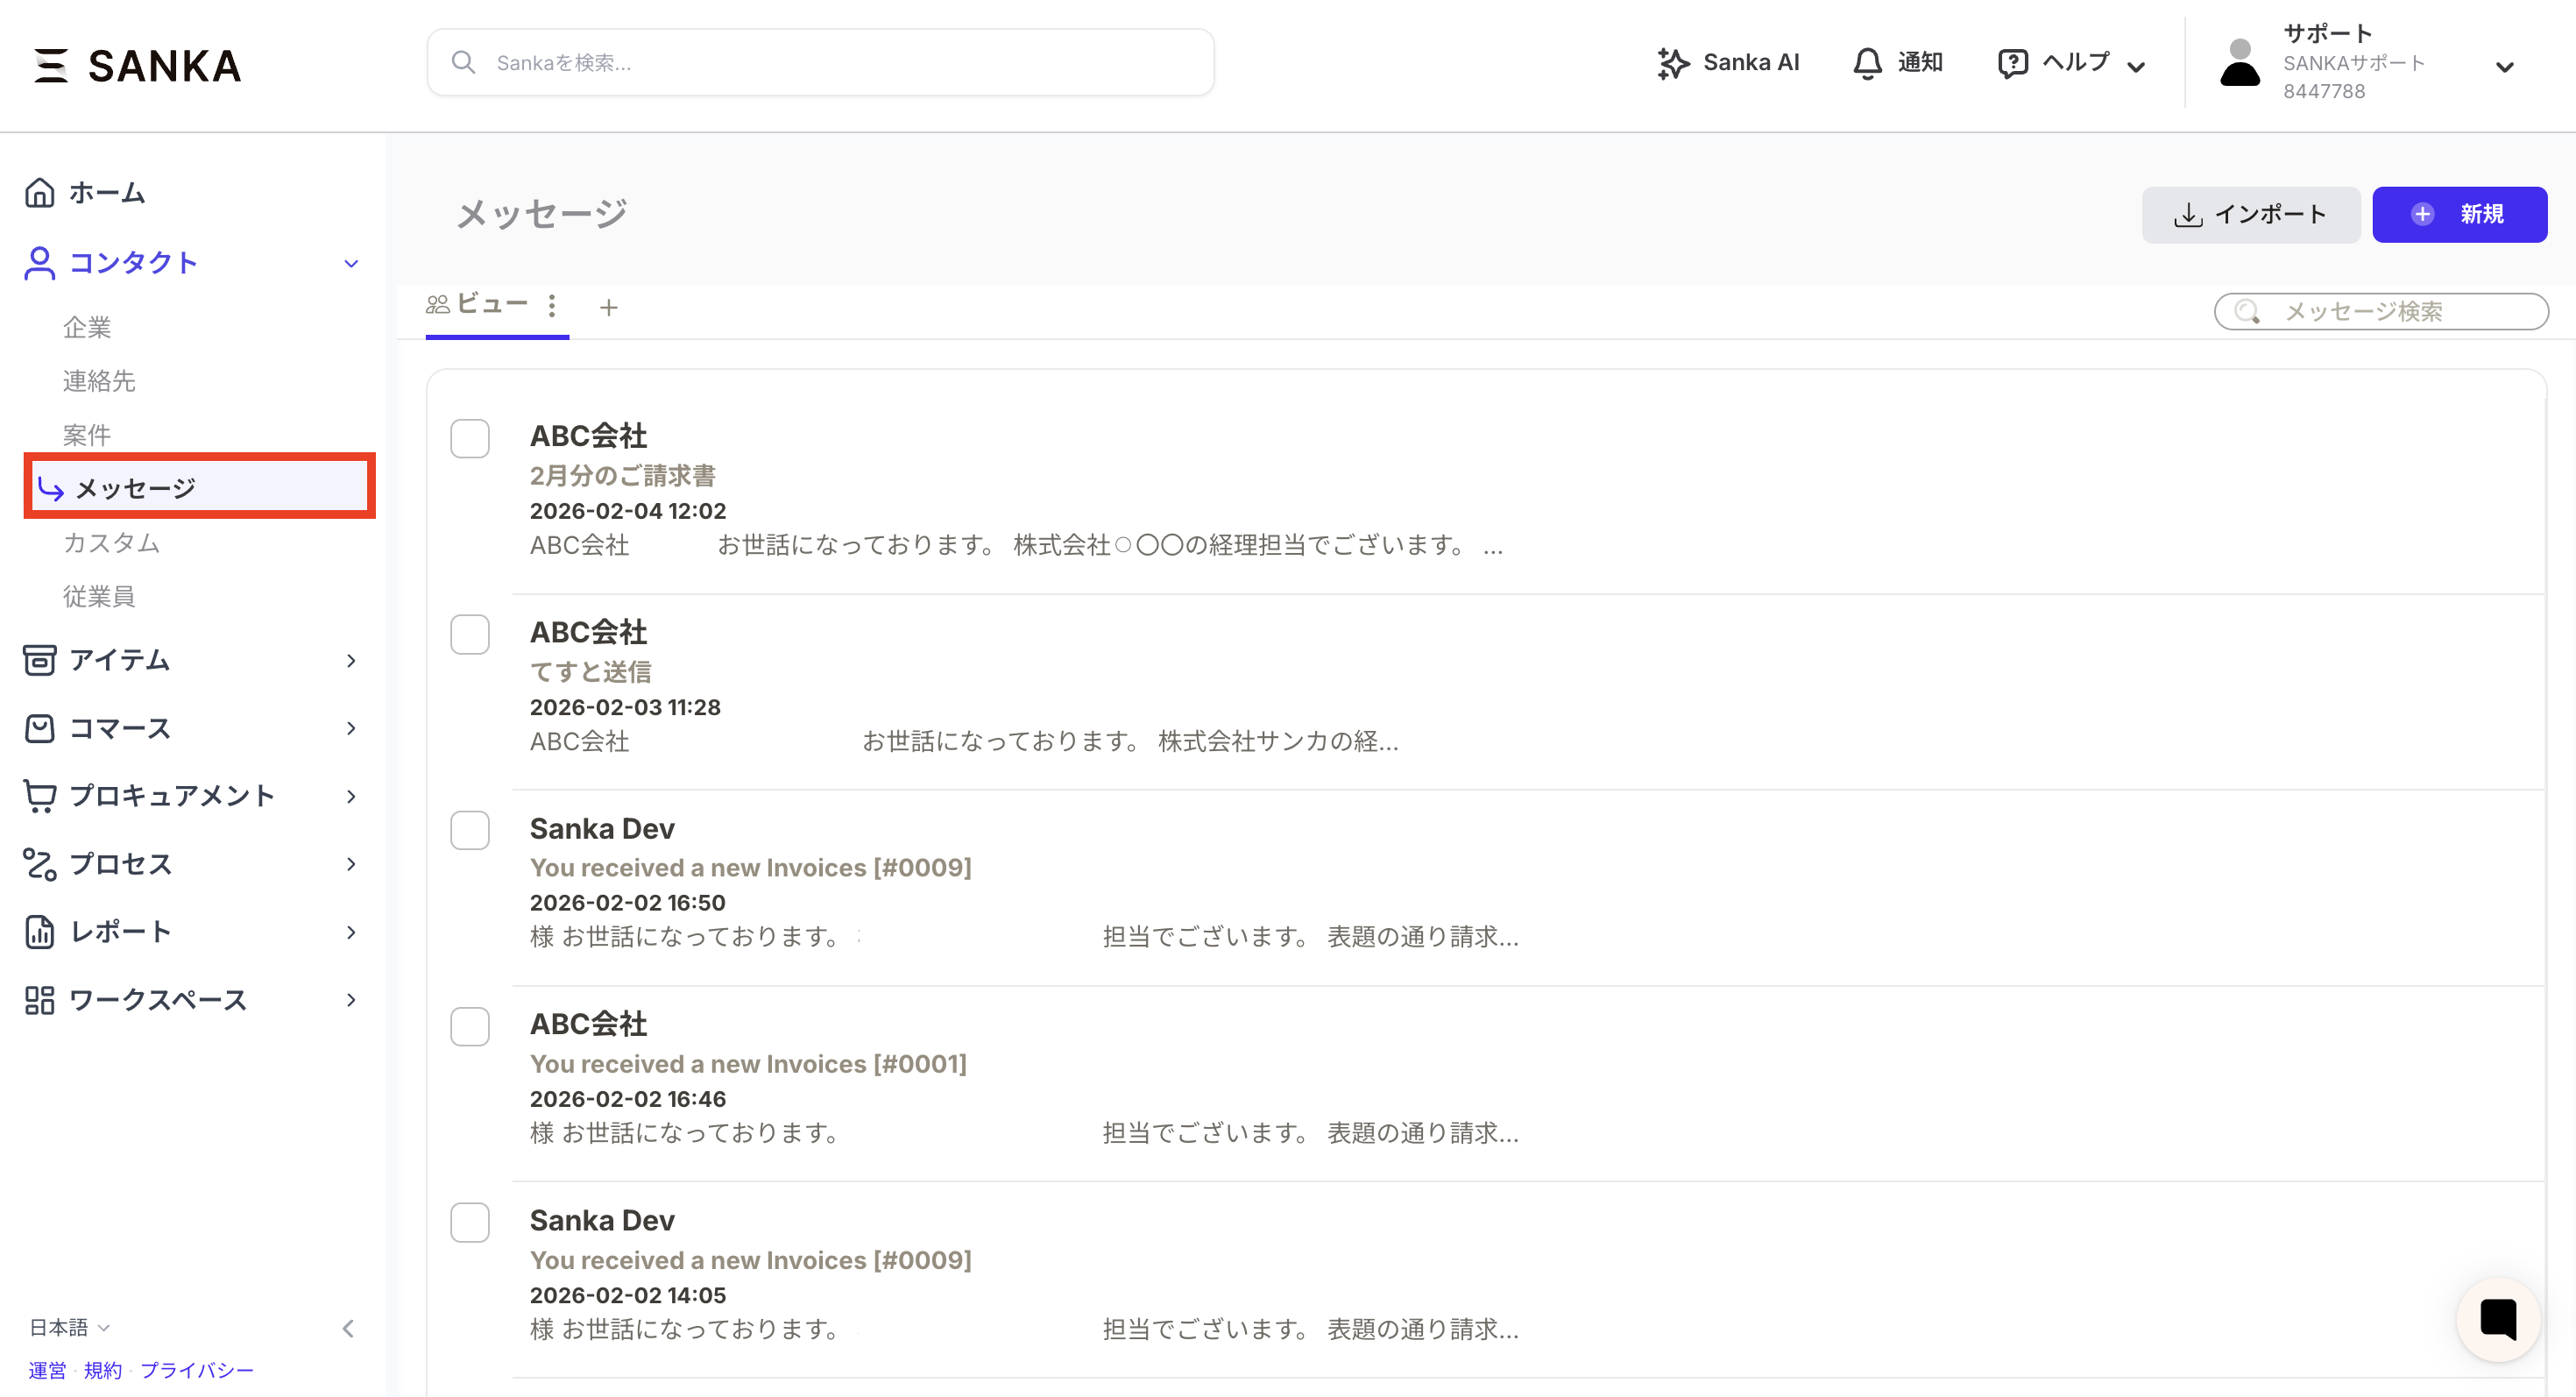
- Or you can view it from the message object.
How to configure message templates
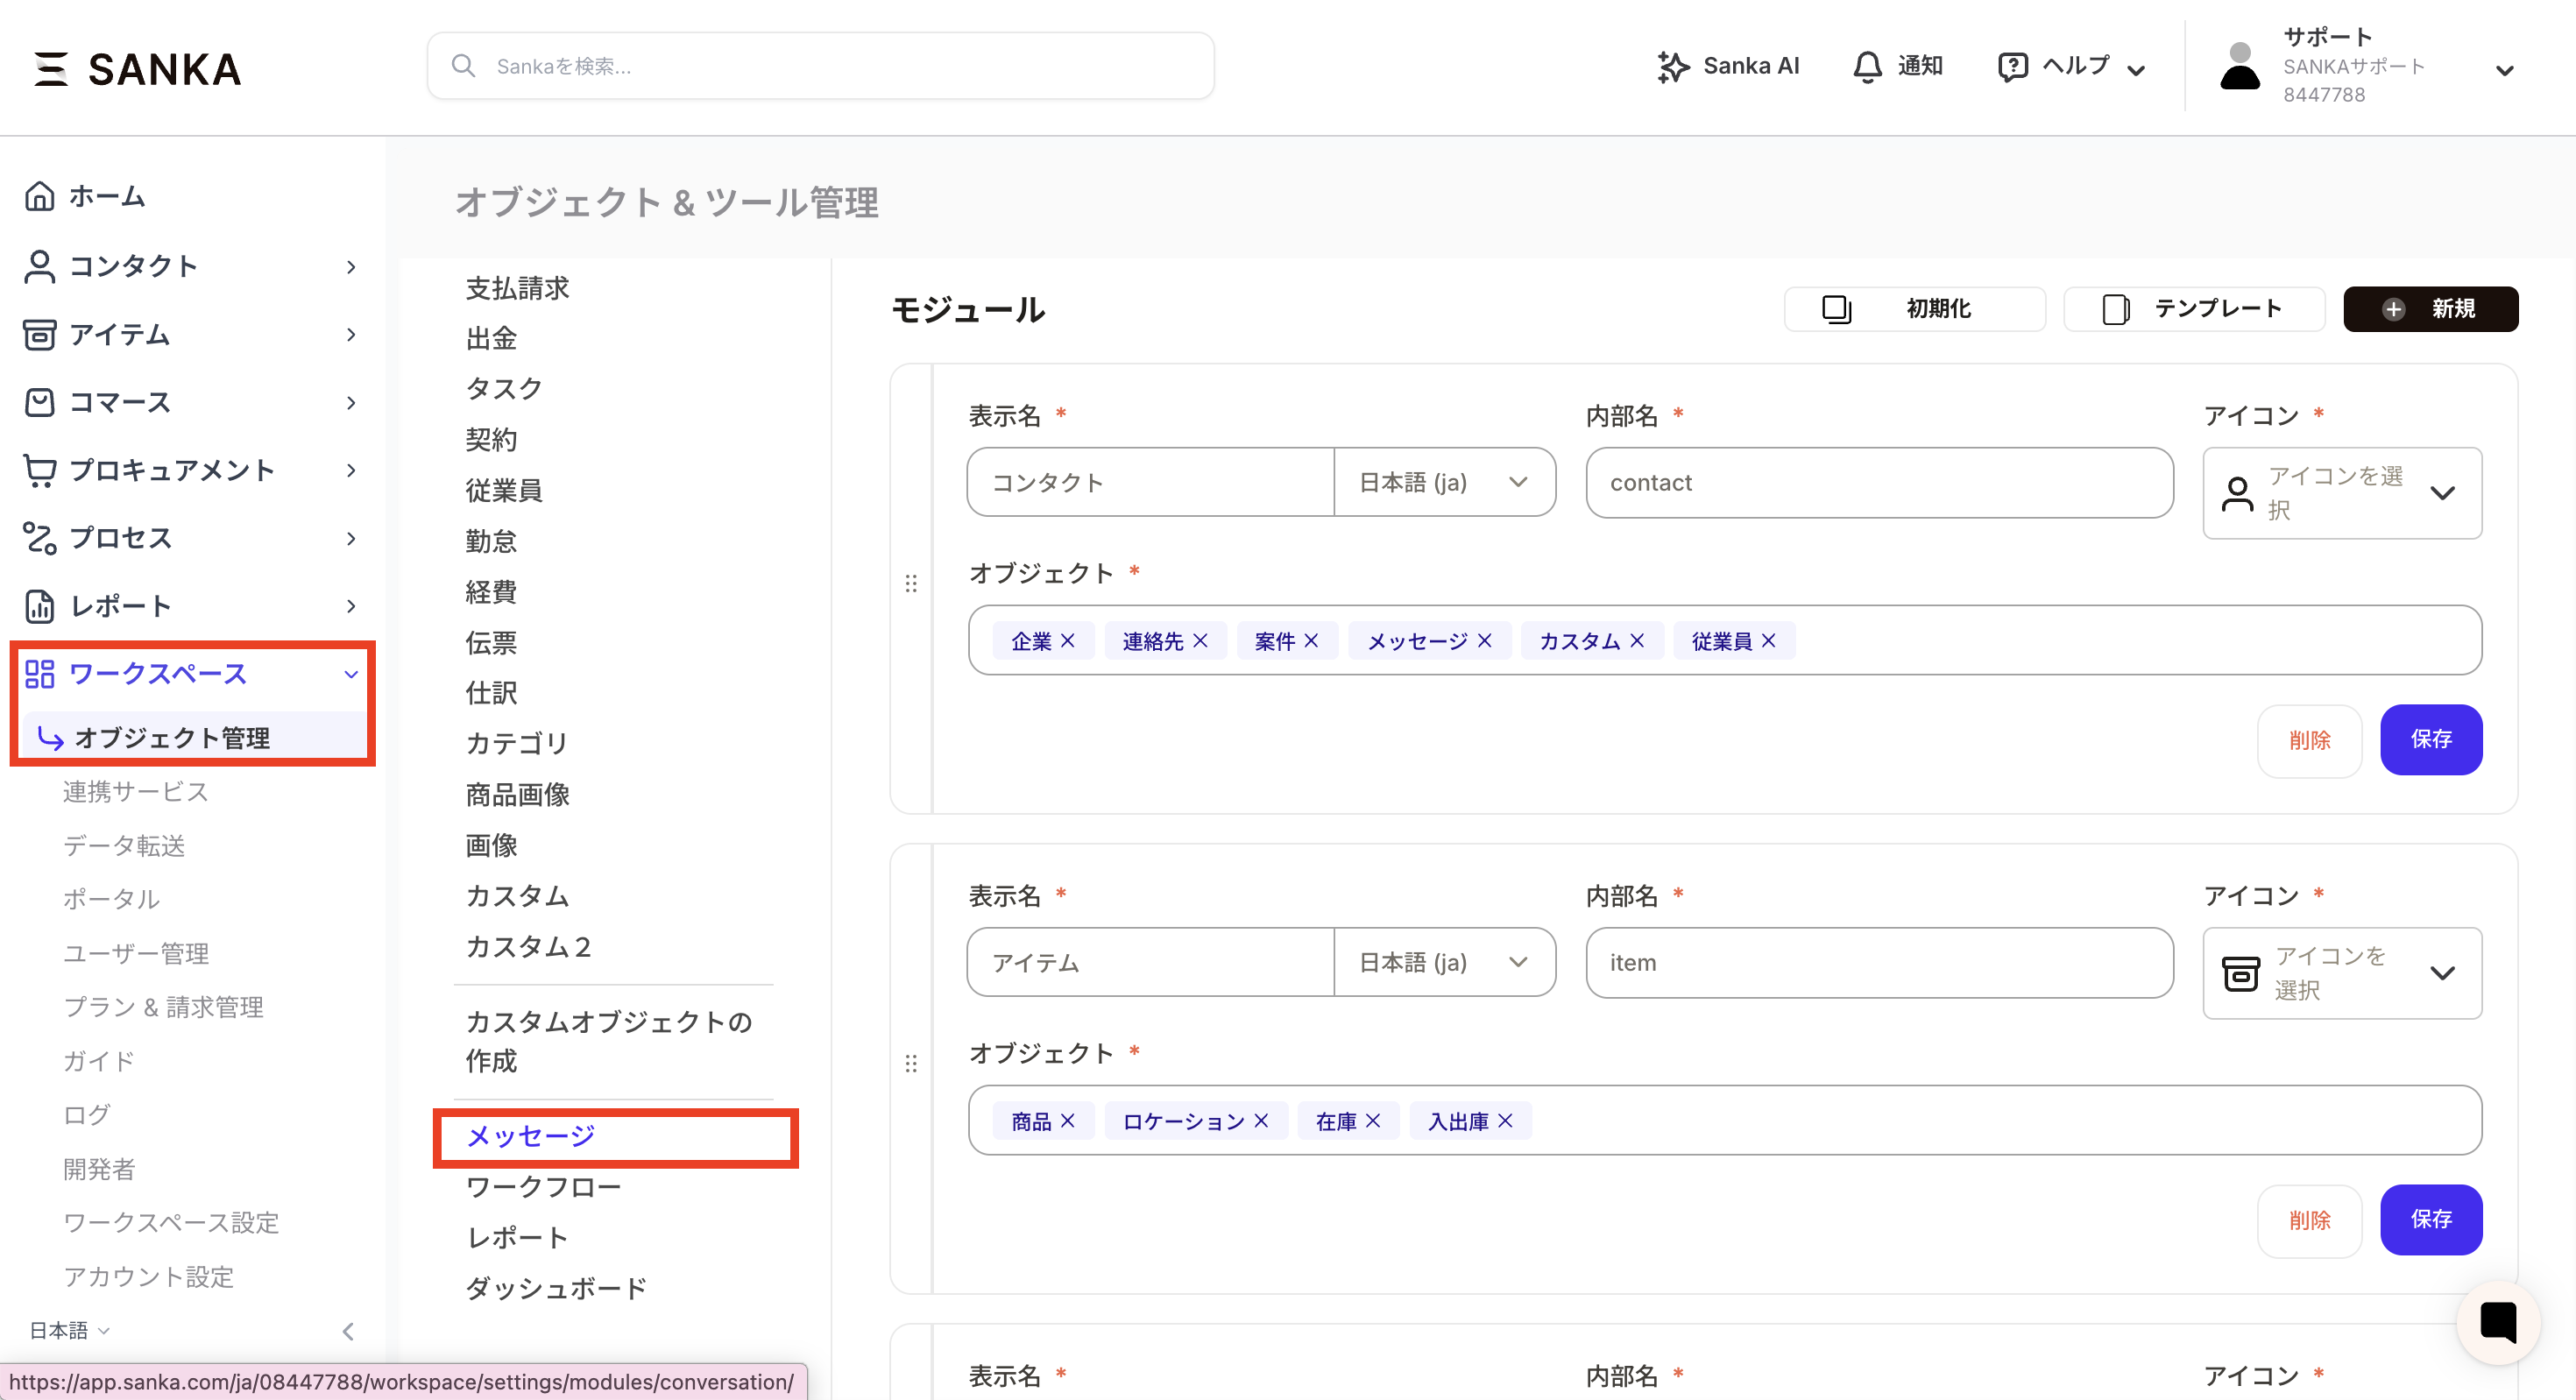
We will show you how to preset the message template for the action of sending a form file by email.- Go to Workspace → Object Management → Messages.
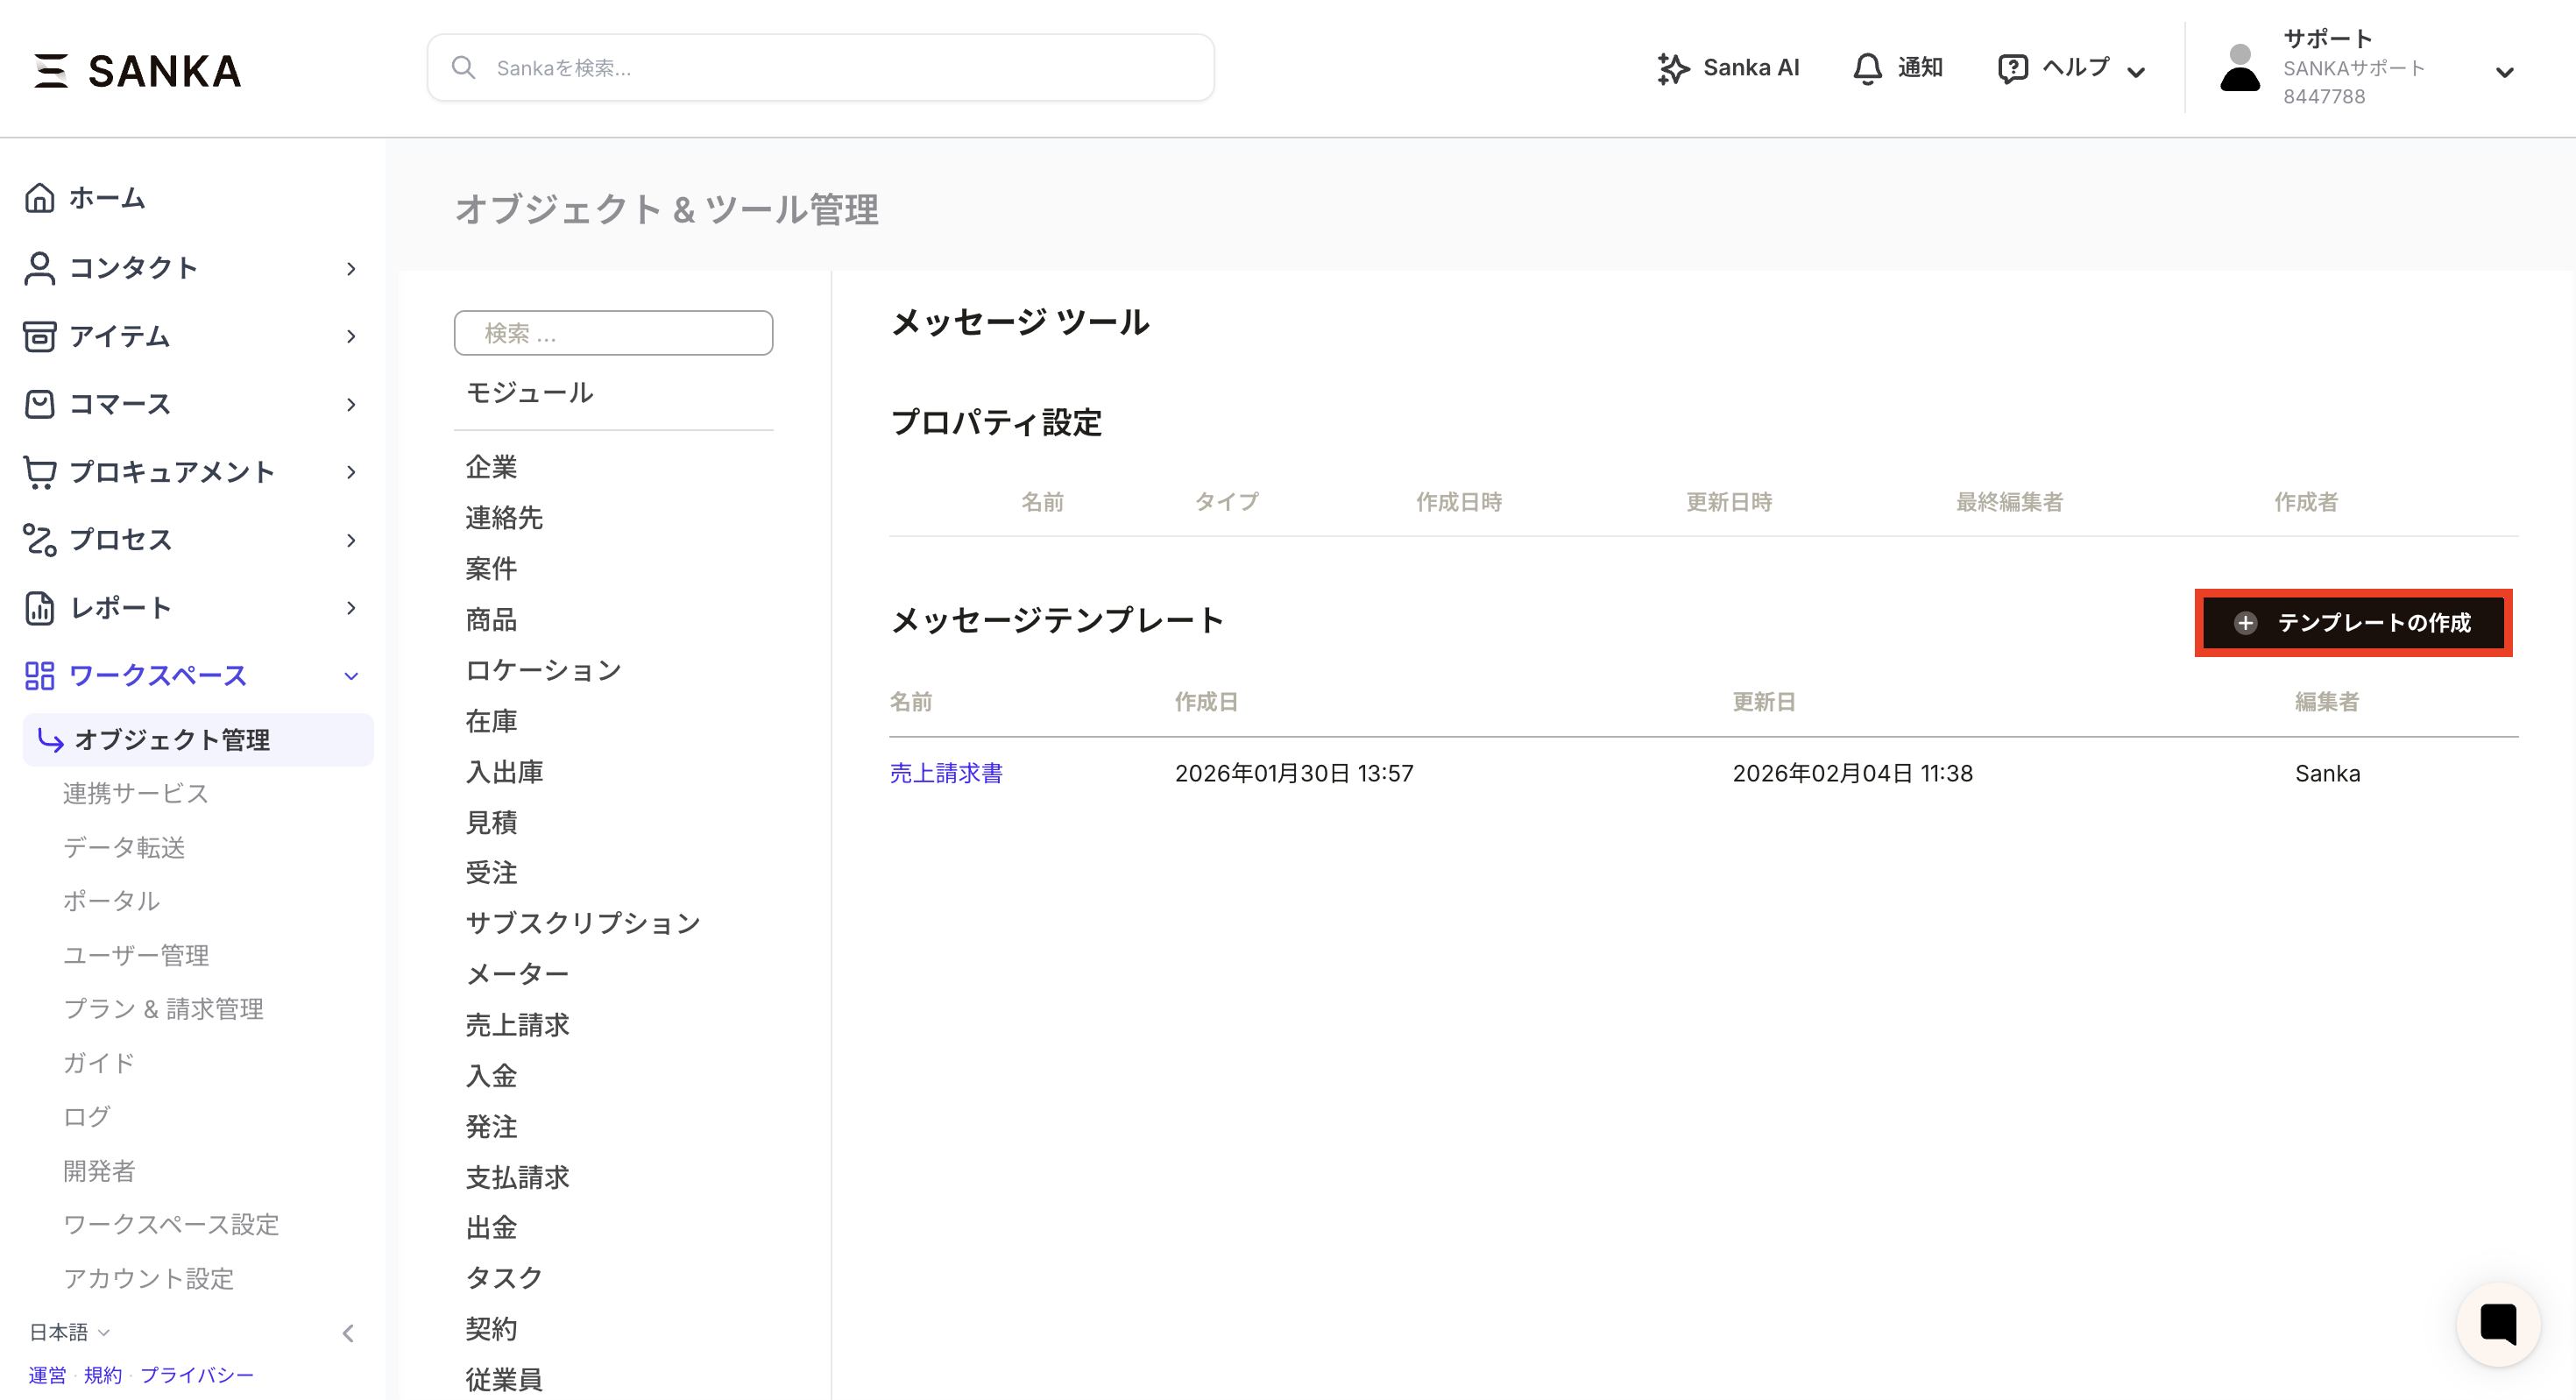
- Press “Create Template” from the Message Tool screen.
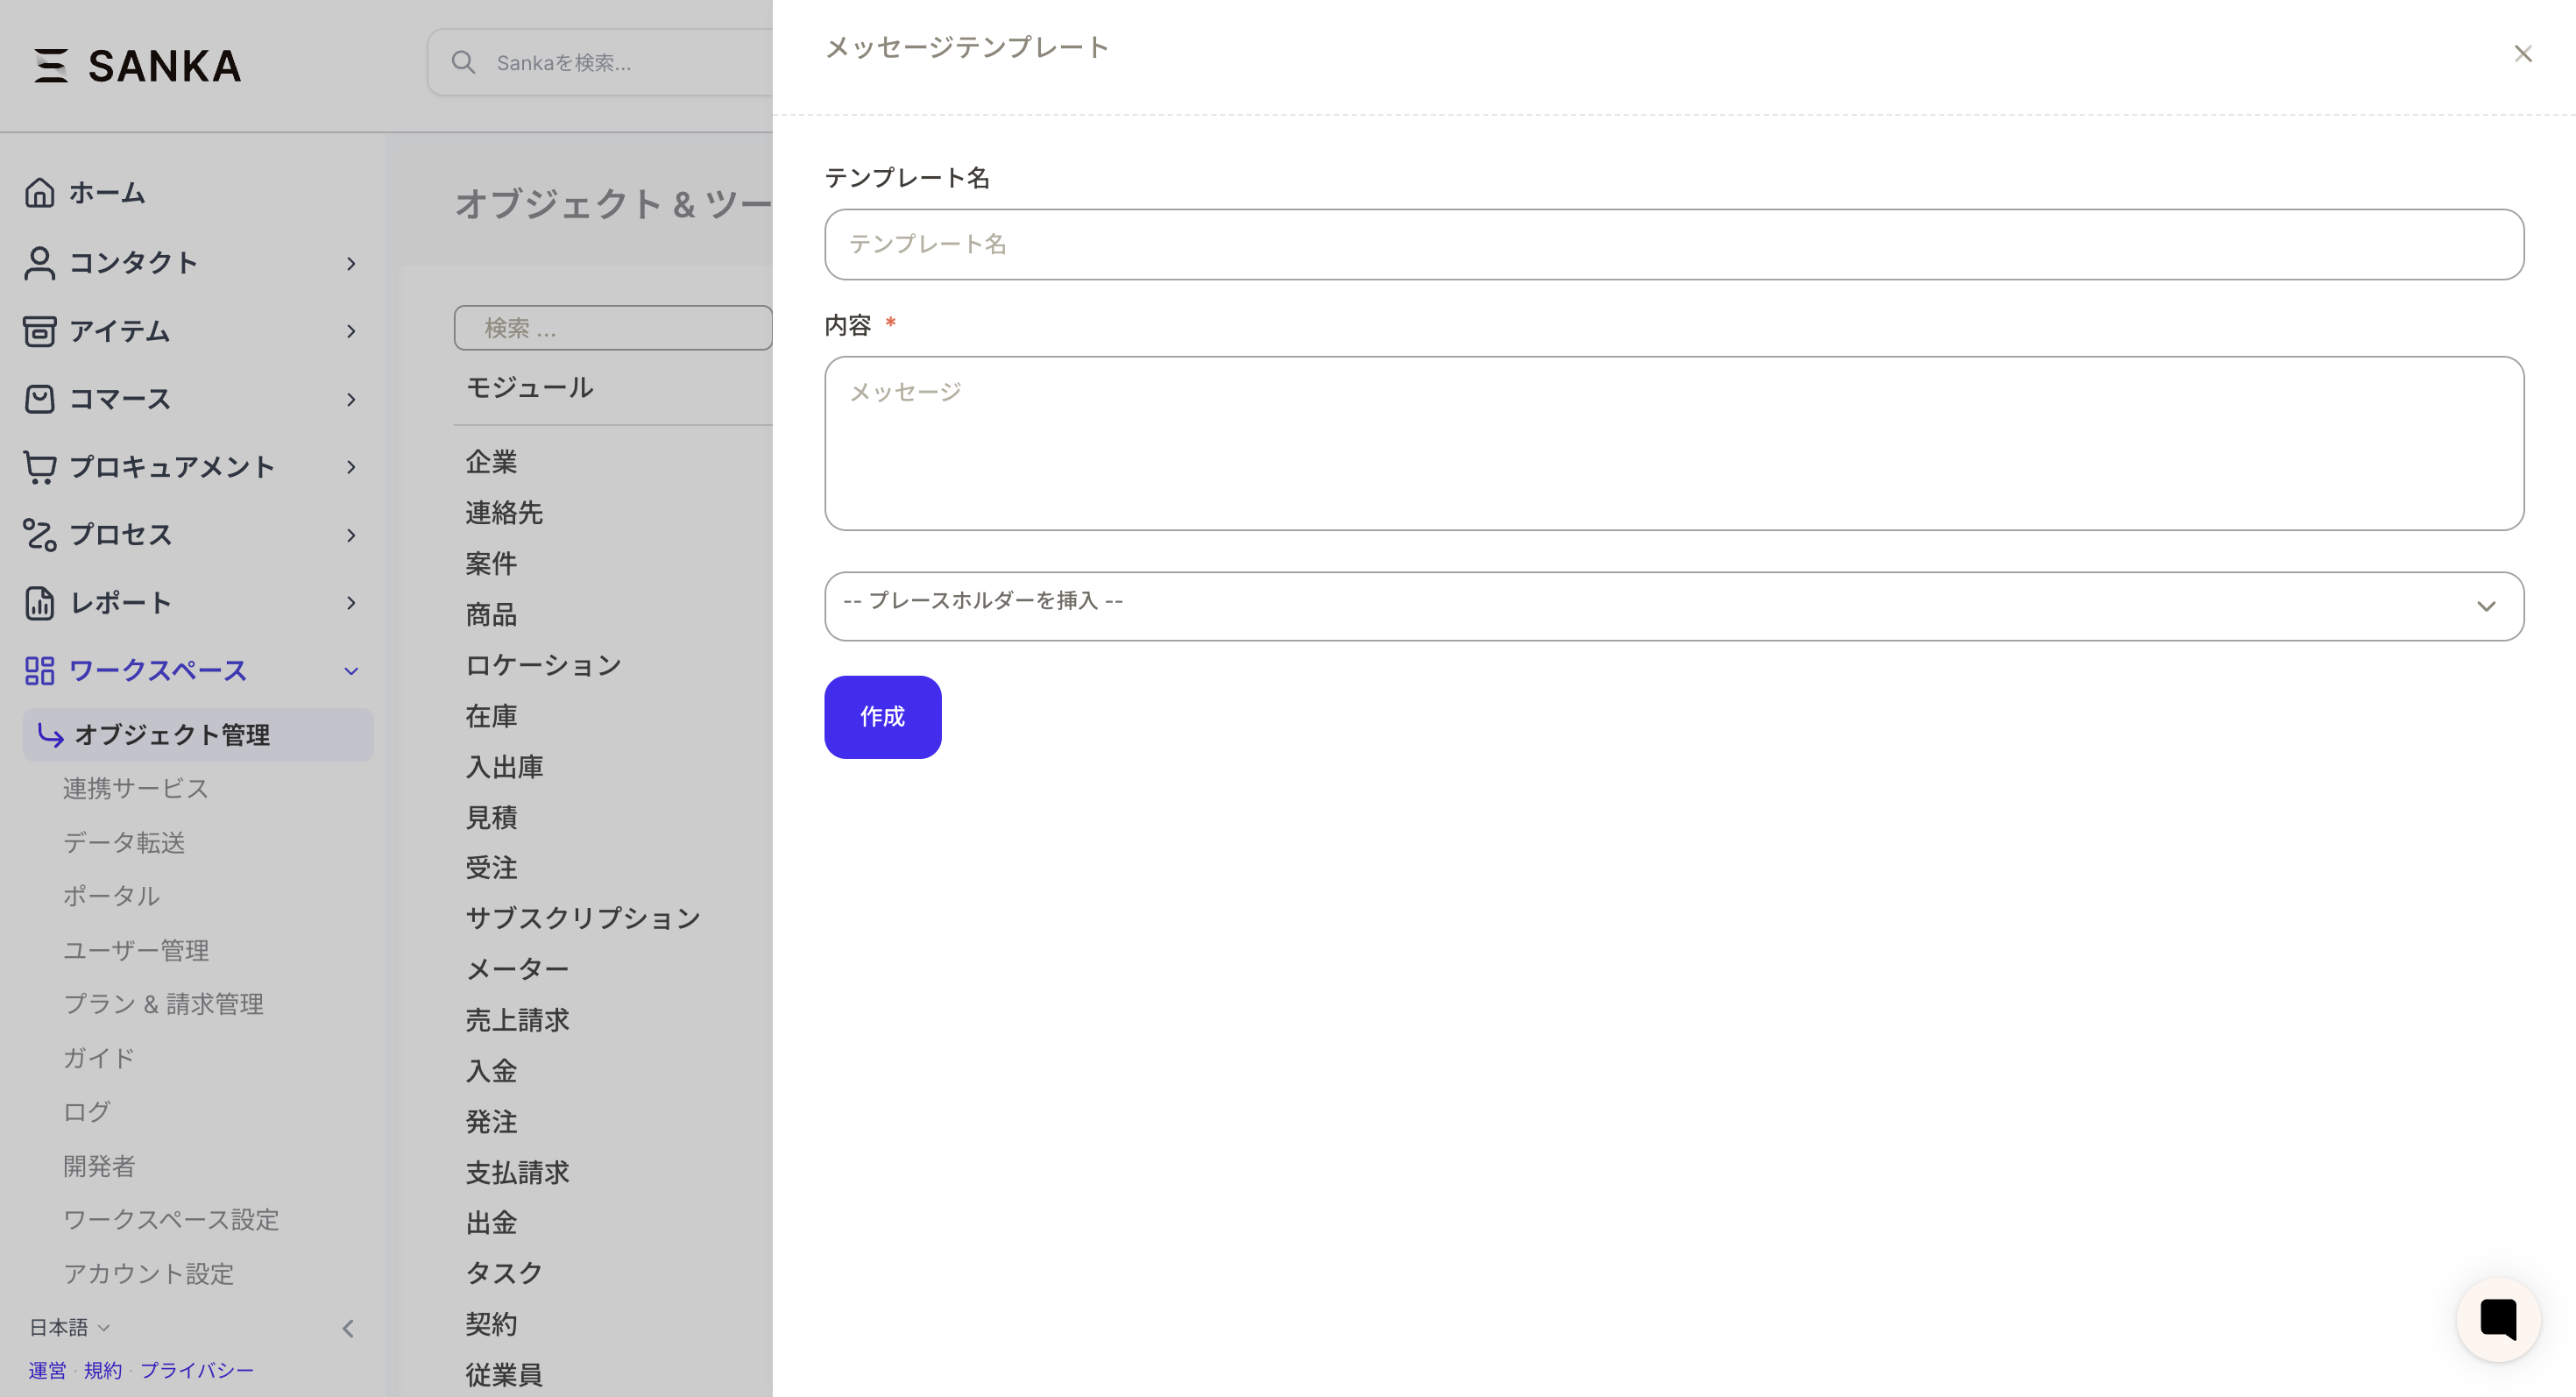
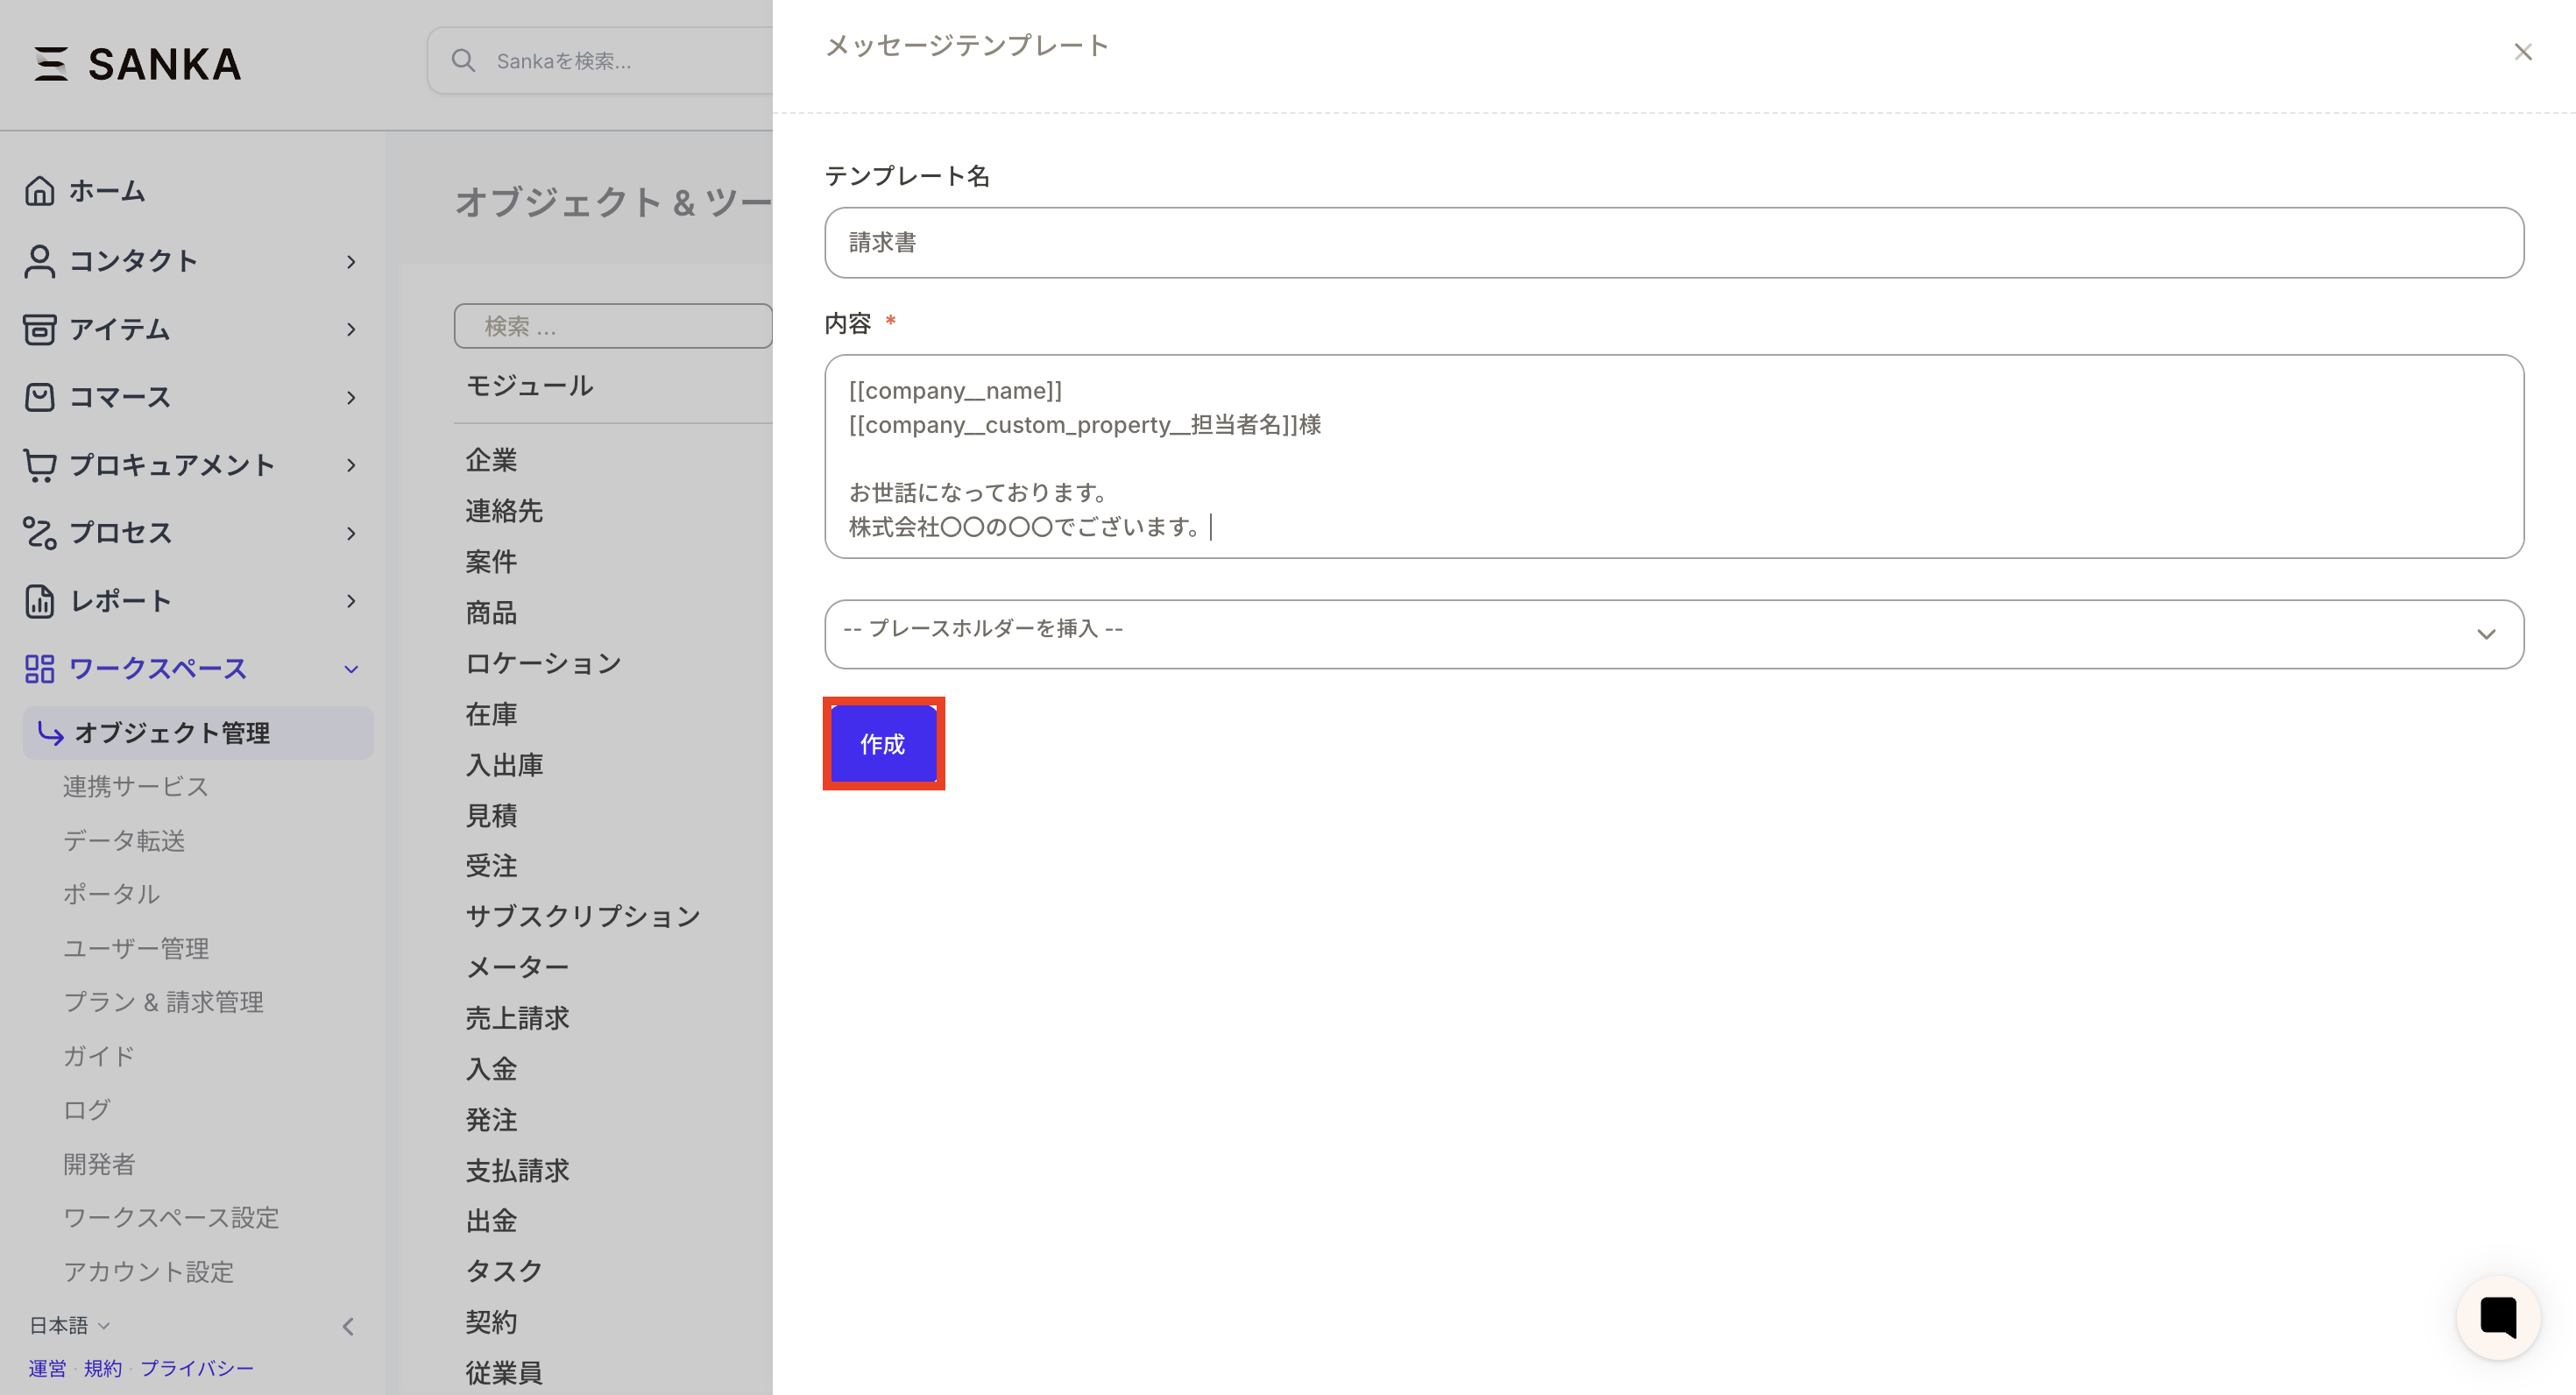
- Enter the template name and content.
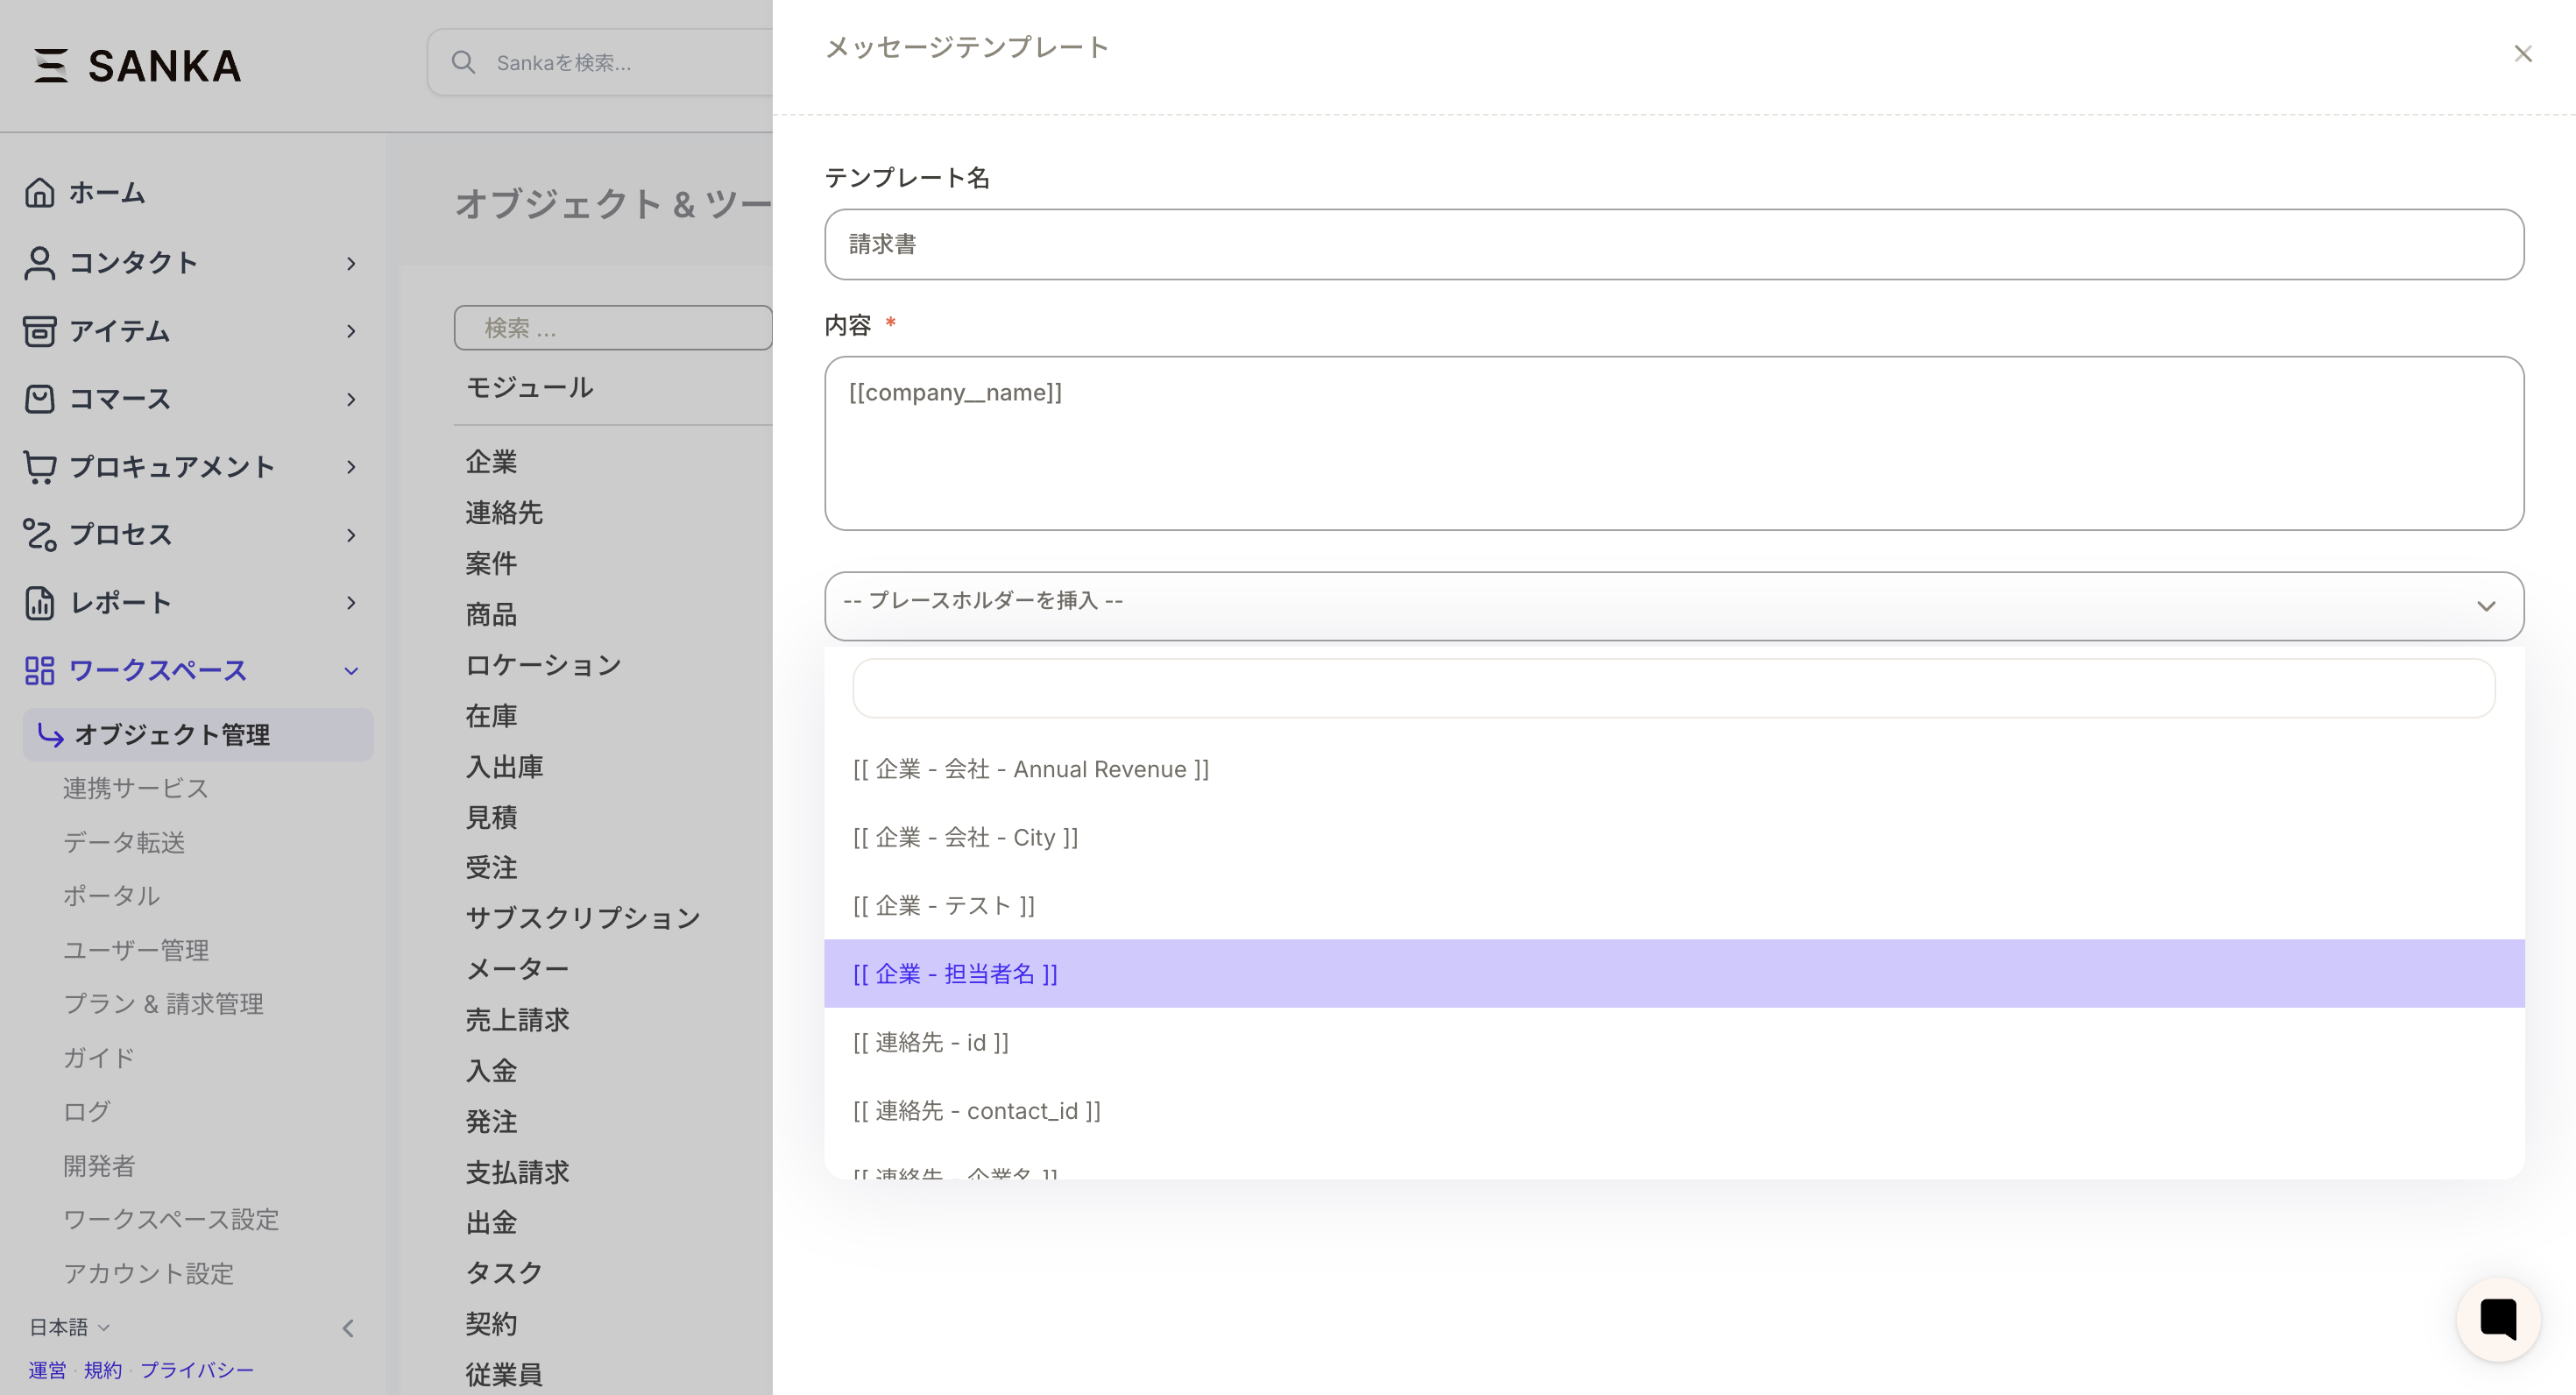
- When inserting a placeholder, specify the property information (company name, person in charge, etc.) that you want to reflect. If the properties of the corresponding record are blank, the changes will not be reflected, so we recommend creating a test sending record and checking.
- After entering all the contents, press “Create”.
Operation points
-Be sure to check the recipient’s email address and template contents before sending the form.- Check the operation with the send test record and then execute with the actual data.
- Make it a habit to perform pre-execution checks to prevent input errors and template selection mistakes when creating records.