Overview
The workflow approval action is a powerful feature for incorporating approval steps into business processes. Sanka’s approval actions enable the construction of flexible approval flows, such as multi-stage approvals involving multiple approvers, conditional approvals, and information collection using custom fields.Main Features
1. Designation of Approvers
- Single Approver: Requests approval from a specific user
- Multiple Approvers: Designate multiple users as approvers, allowing settings that require approval from all or only some of them
2. Custom Fields
It is possible to configure custom fields for entering additional information during the approval process:- Text Field: Entry for comments or explanatory text
- Date Field: Specify due date or scheduled date
- Selection Field: Choose from preset options
- Checkbox: Confirmation of Yes/No items
3. Approval Options
The approver may select from the following three actions:- Approve: Proceed to the next step of the process
- Reject: Stop the process and provide reasons
- Return: Revert to a previous step and request revisions
How to Configure
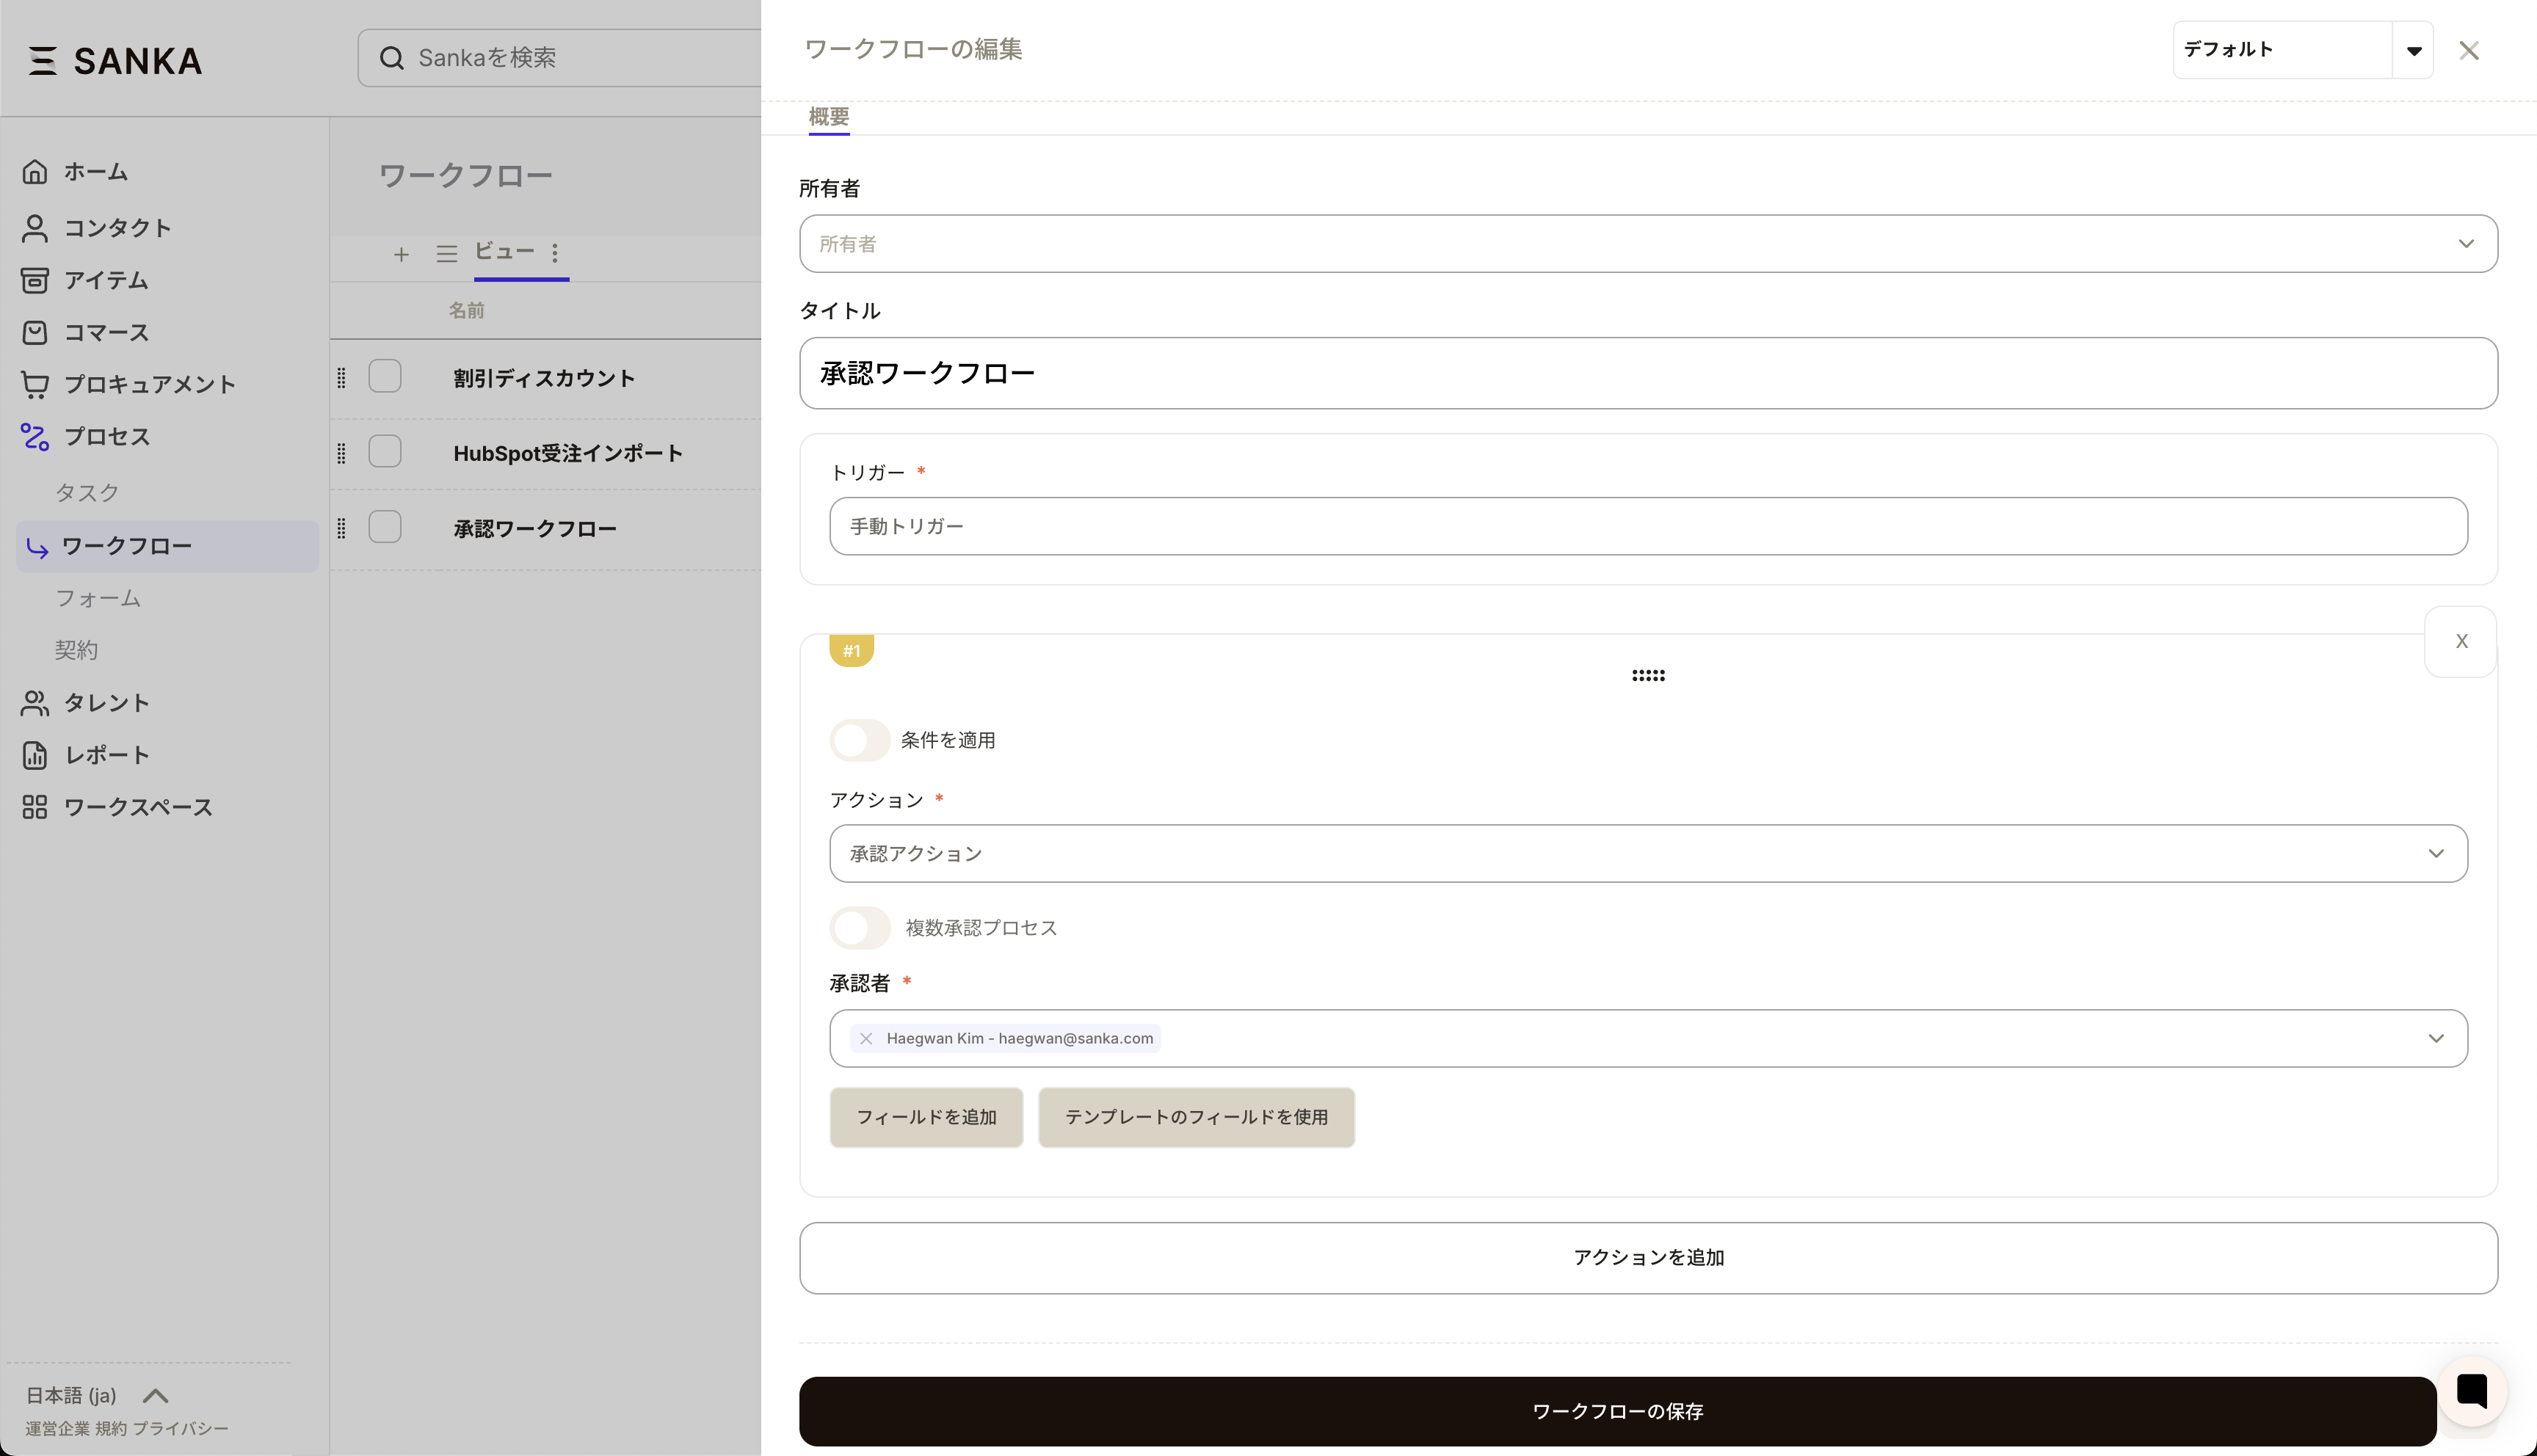
Step 1: Add an Approval Action to the Workflow
- Open the workflow editing screen
- Click the add action button
- Select “Approval Action”
Step 2: Set Up Approvers
- Specify the approver in the approver selection field Directly select a user
Step 3: Custom Field Setup (Optional)
- Click the “Add Field” button
- Select the field type (Text, Date, Select, or Checkbox)
- Set the field label and initial value
- Set as a required field if necessary
Step 4: Utilizing Approval Templates (Optional)
Frequently used combinations of approval fields can be saved as templates:- Click “Select from Template”
- Select an existing template, or create a new one
- Apply the template for efficient configuration
Behavior During Execution
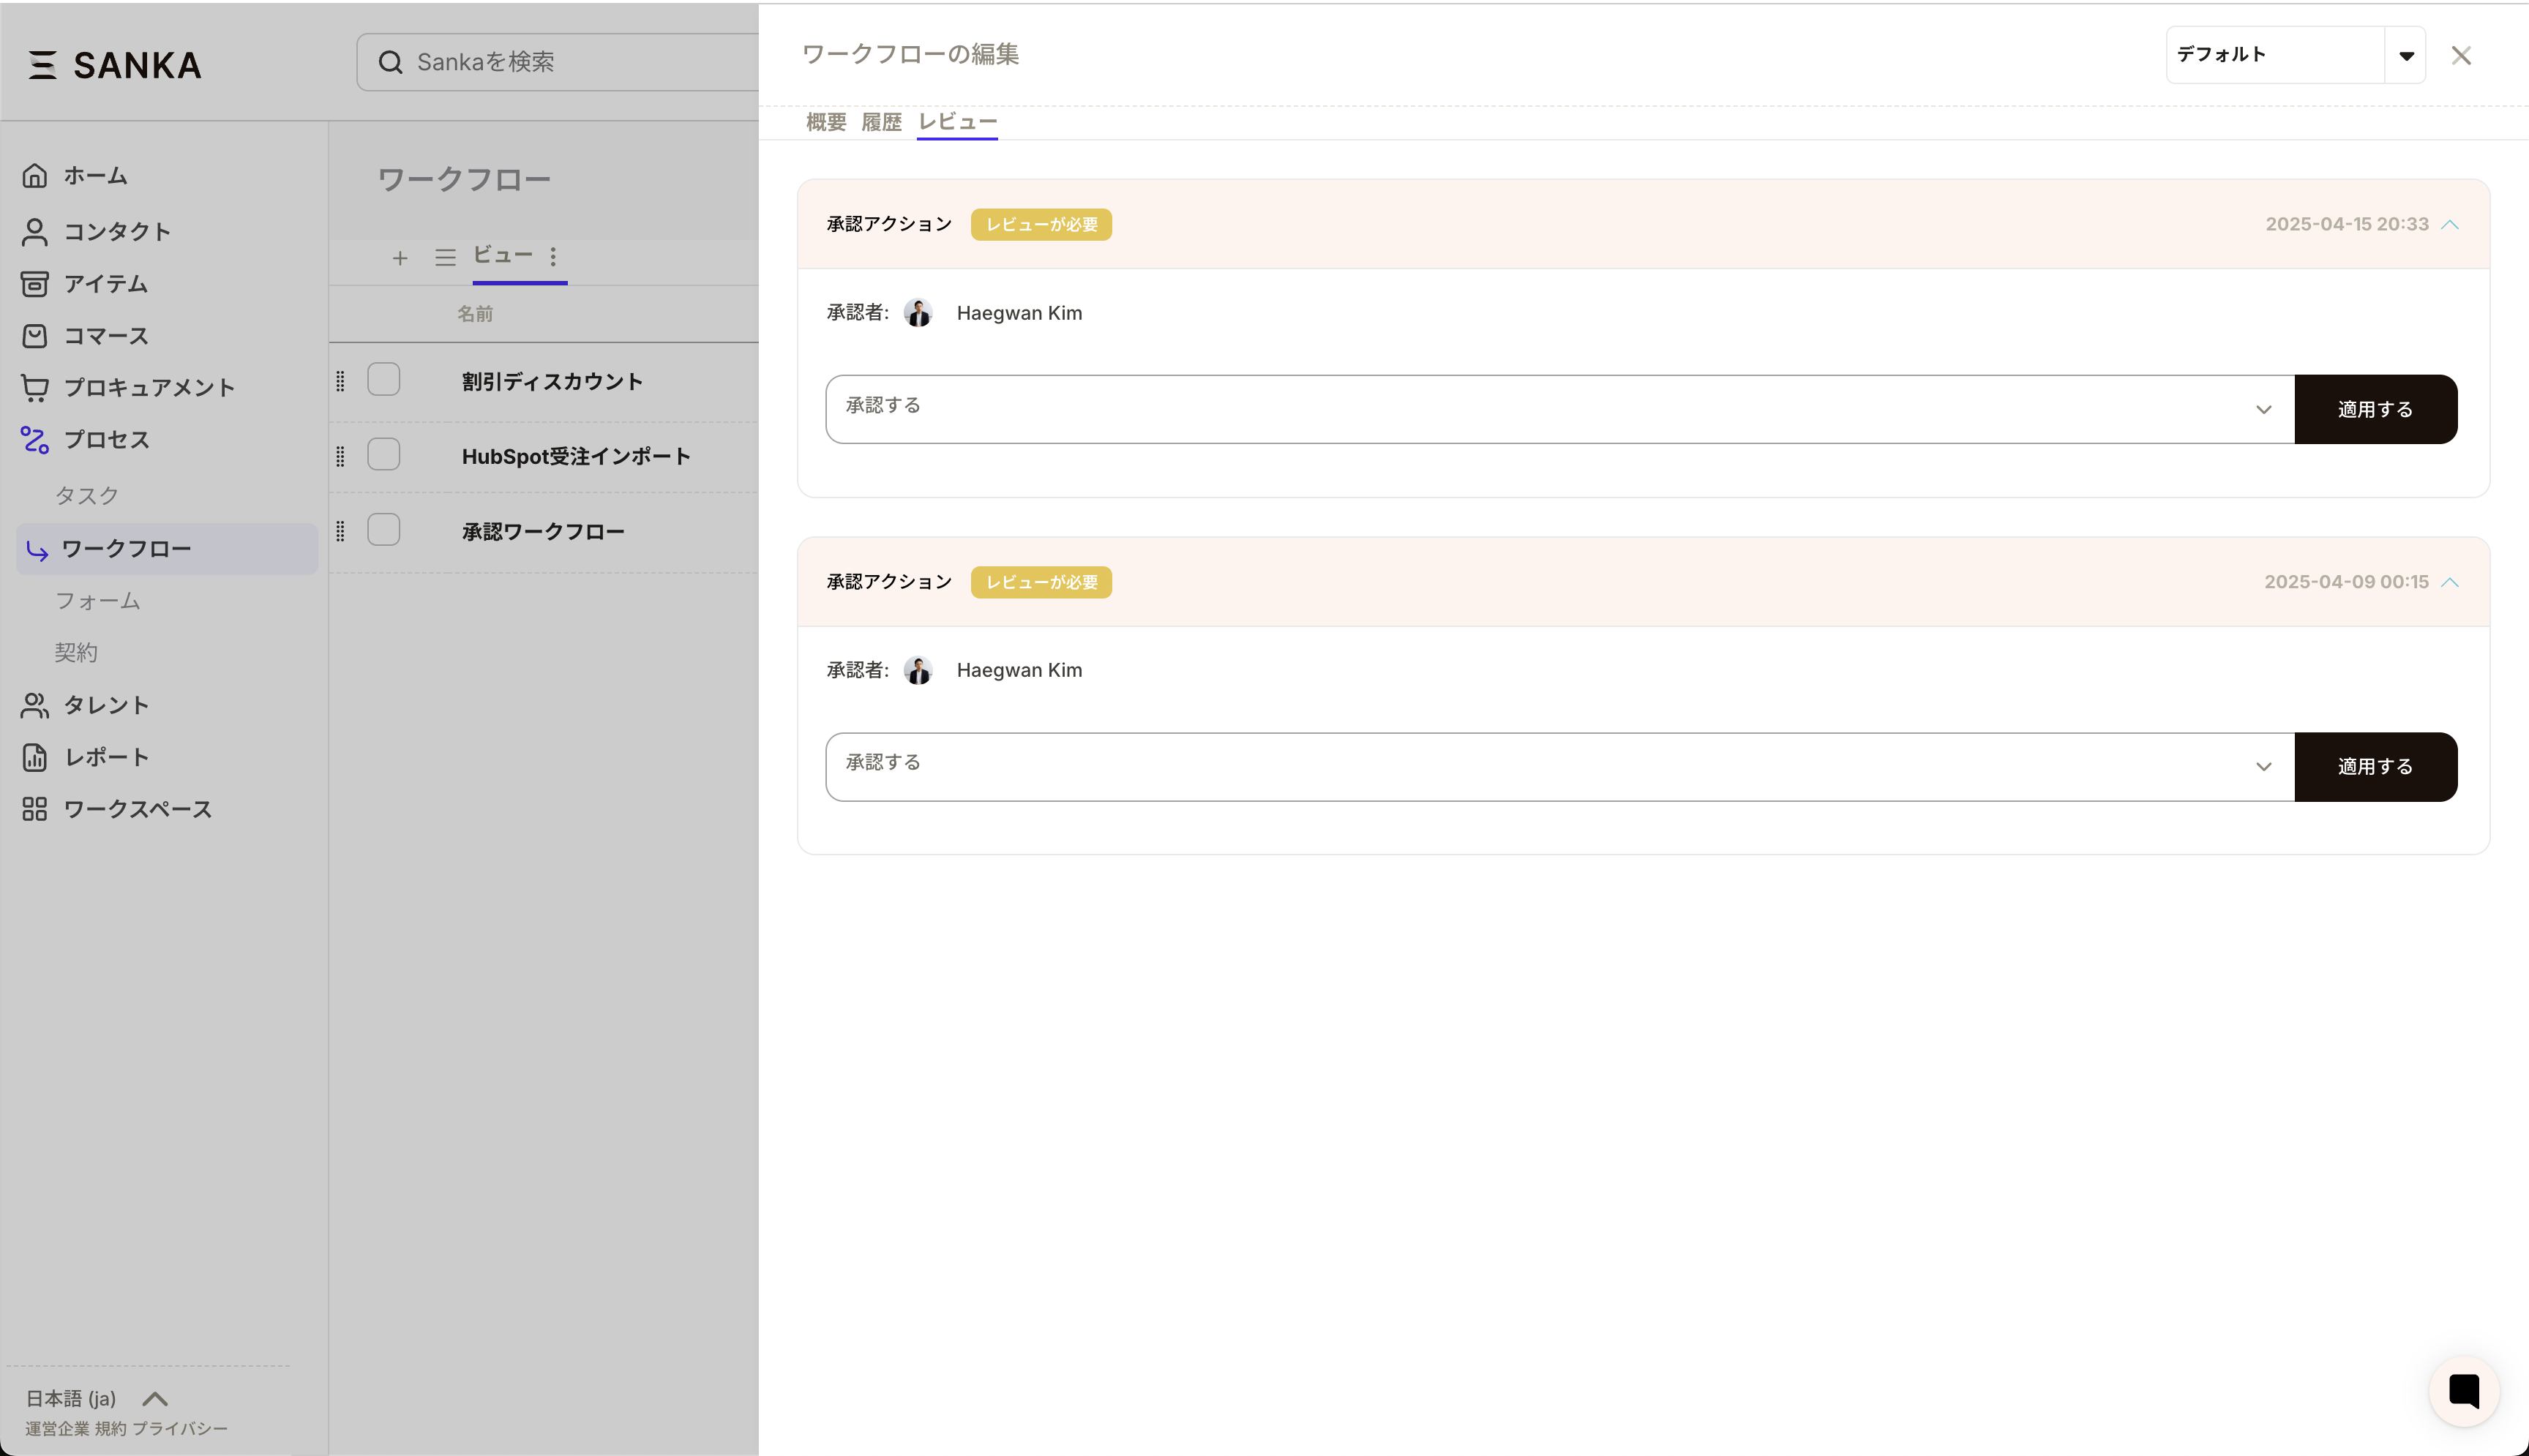
From the Approver’s Perspective
- Receive notification of approval request
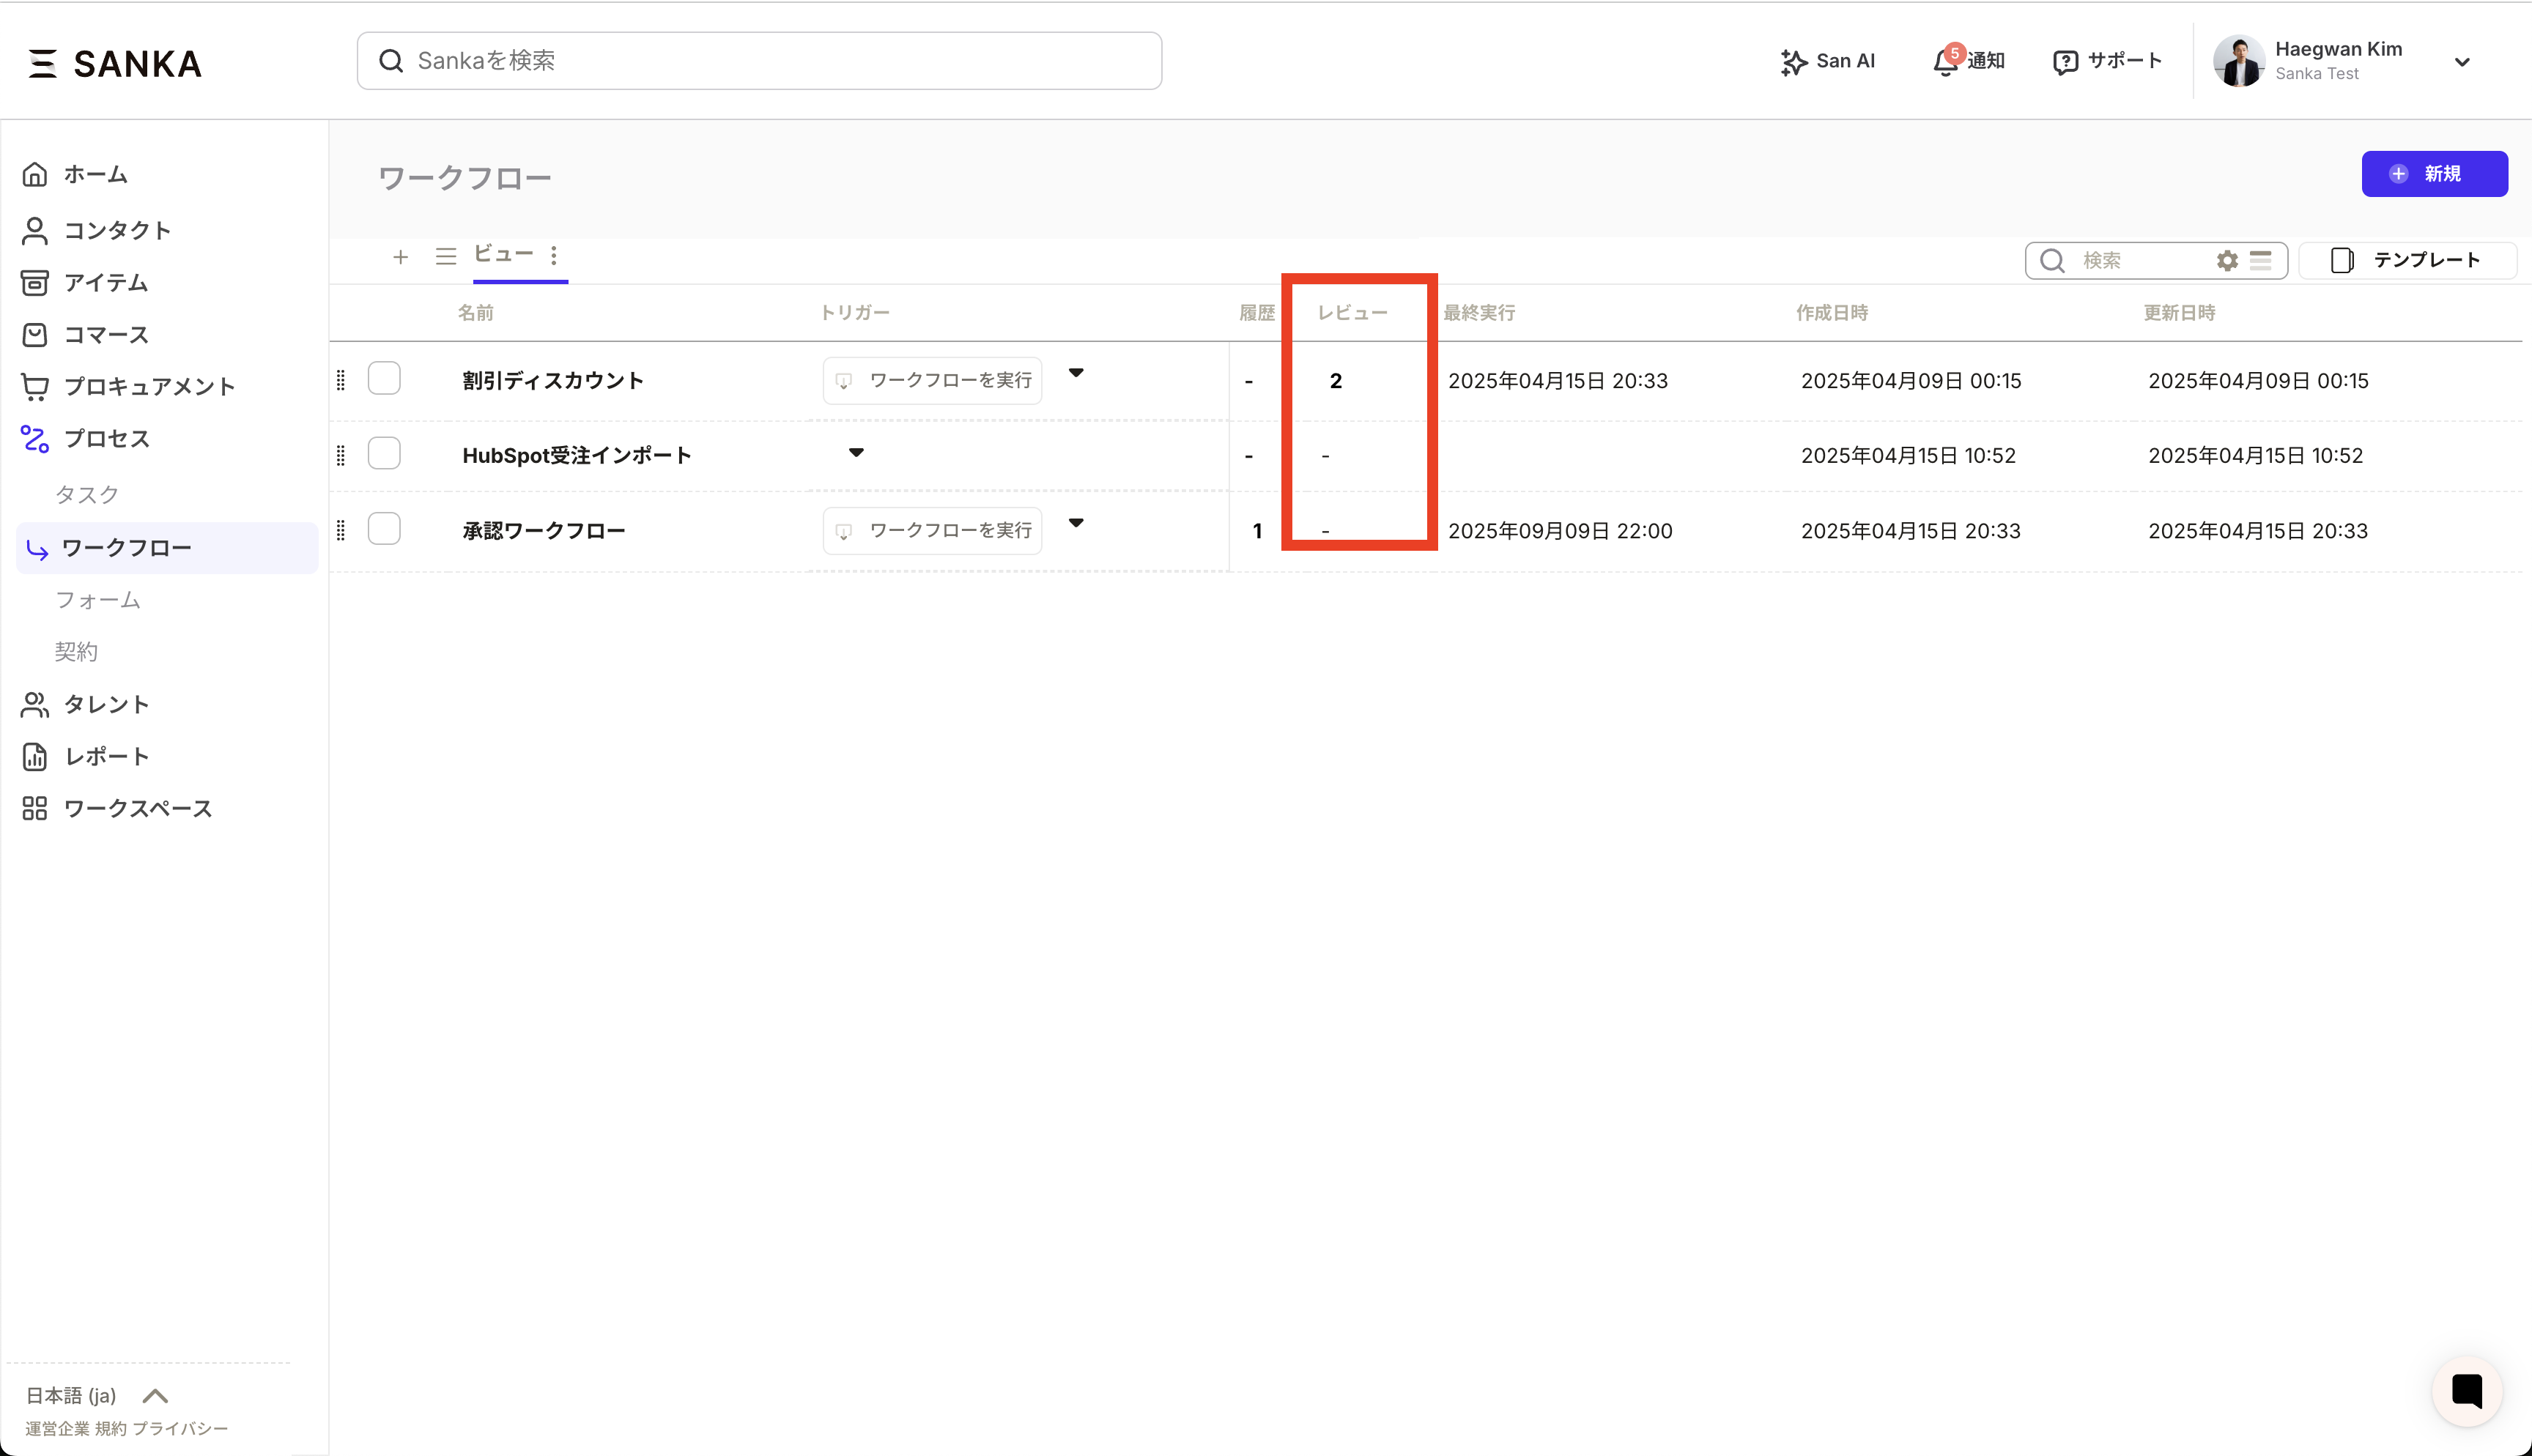
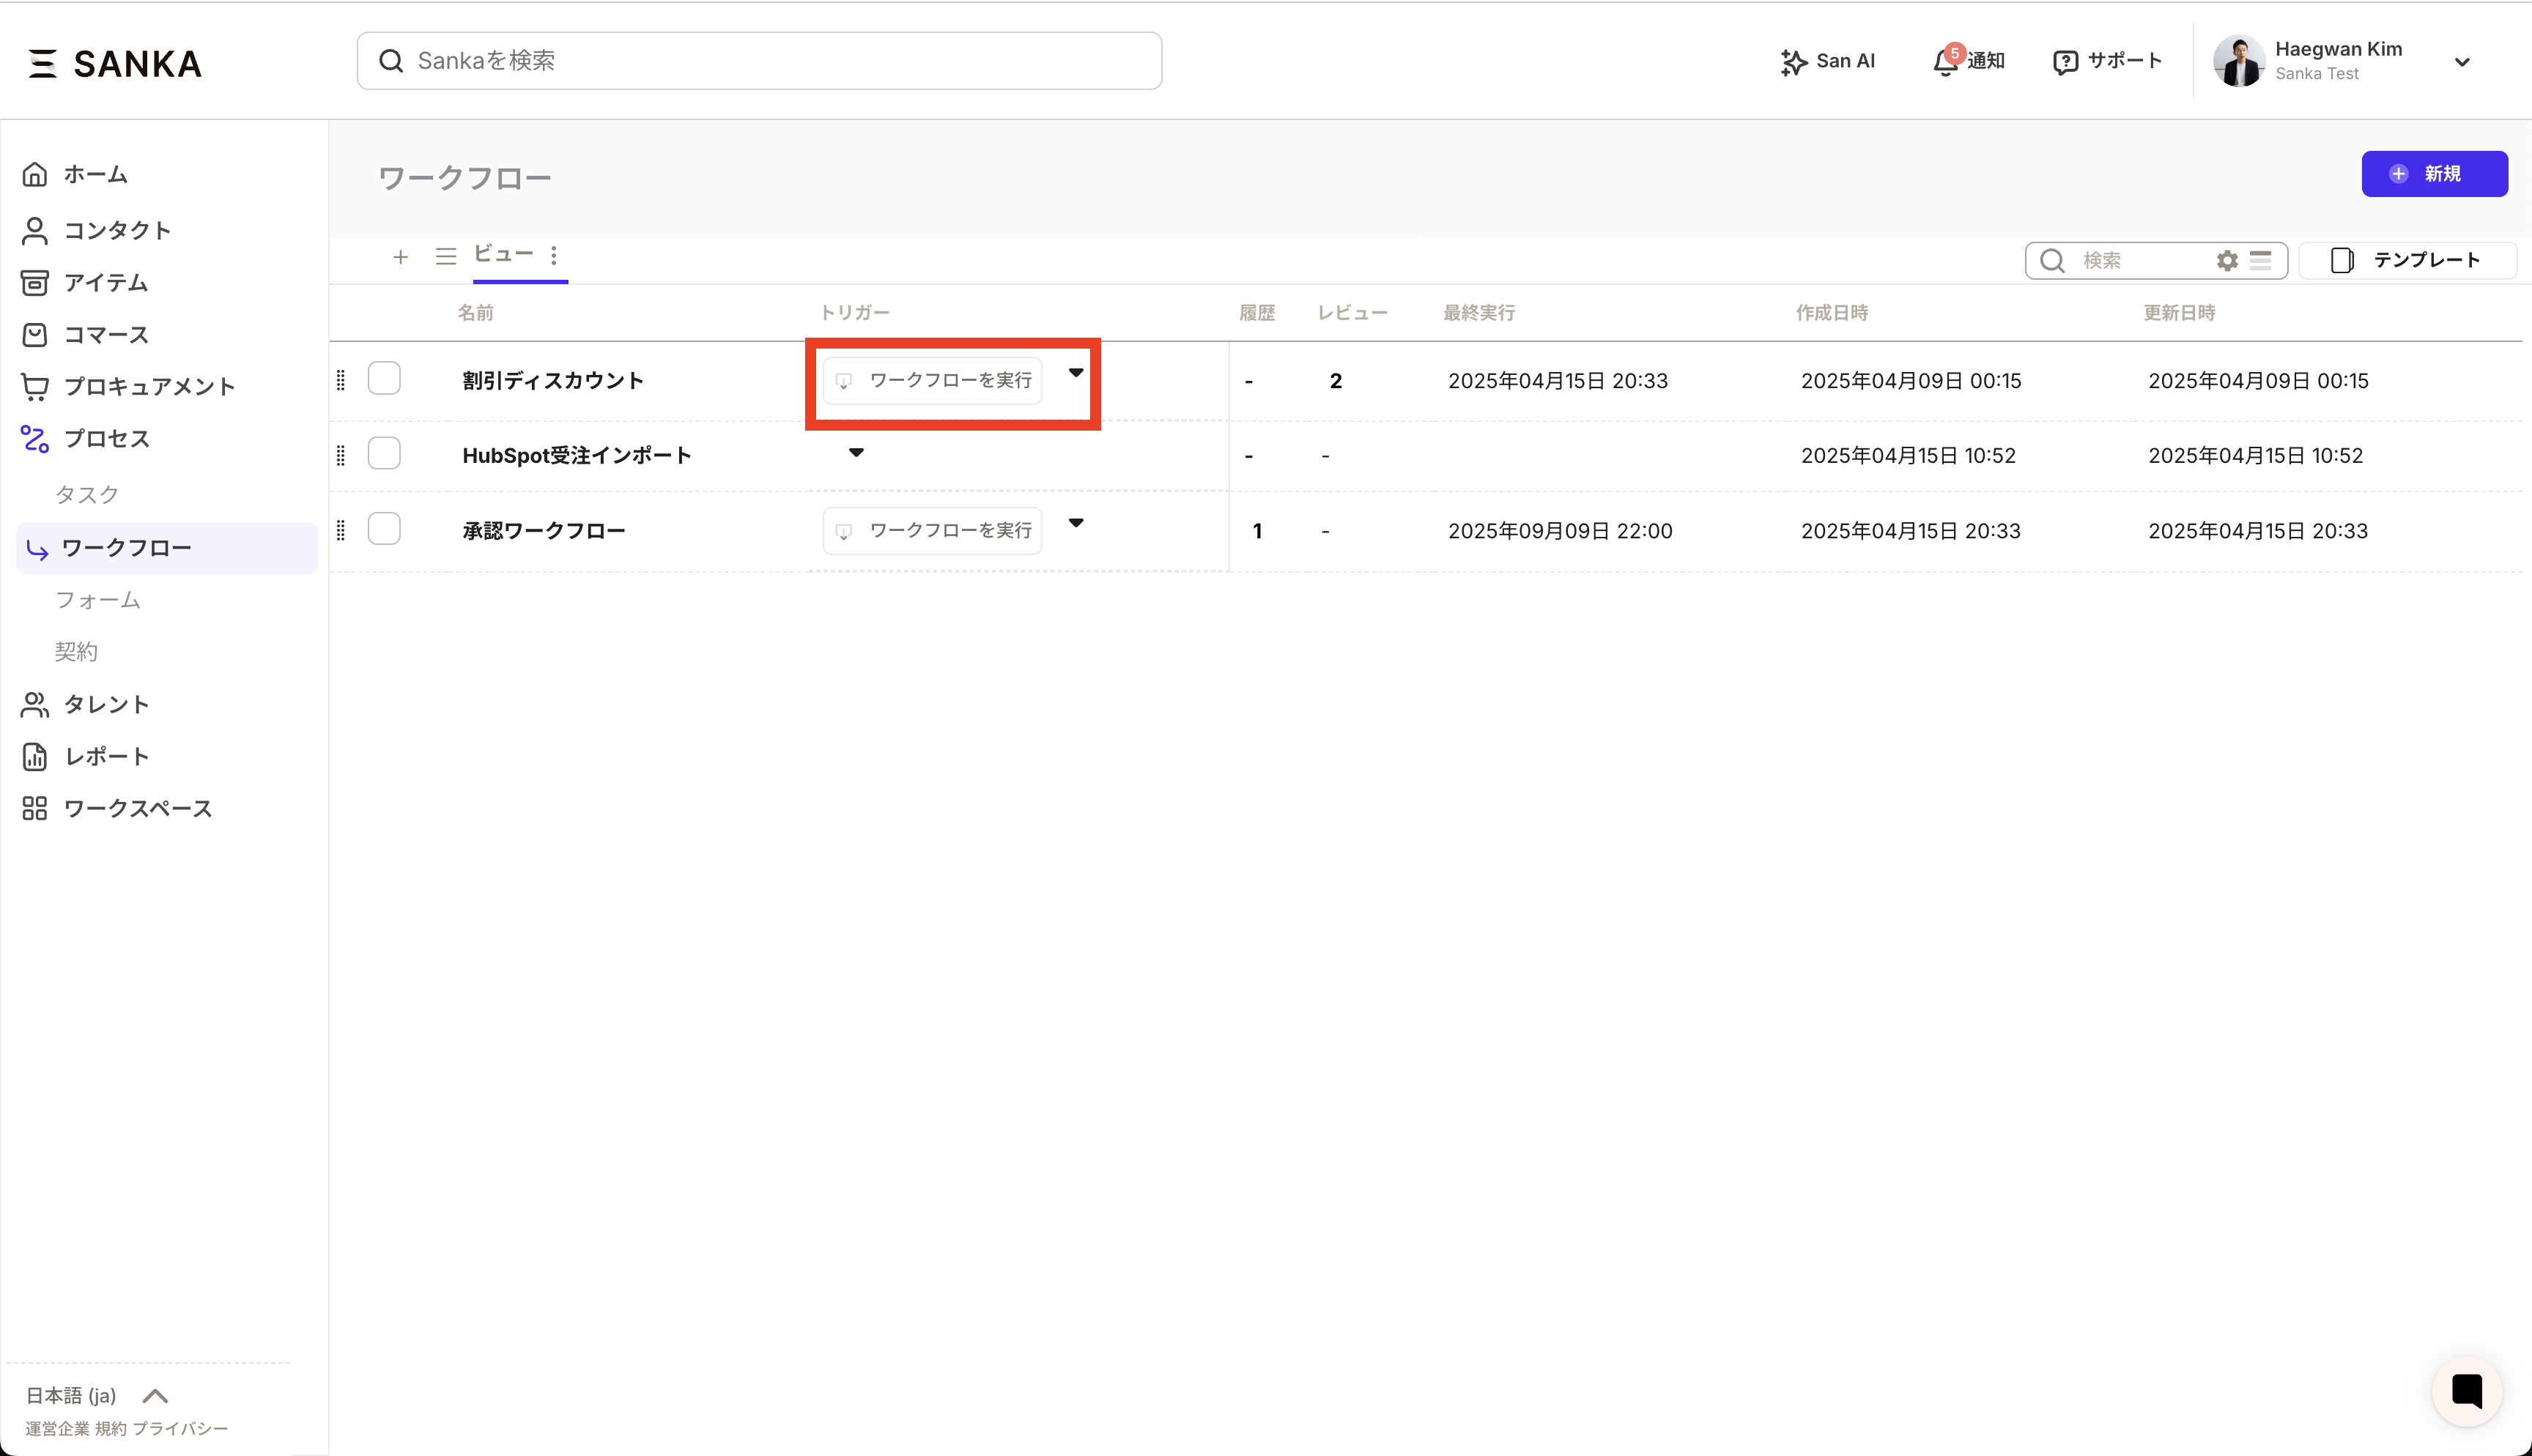
- Confirm details for approval on the workflow detail screen (click the review column)
- Enter required information for any custom fields, if applicable
- Select either Approve, Reject, or Remand
- If rejecting or remanding, state the reason
Applicant’s Perspective
- Apply for approval by executing the workflow
- Wait for the approver’s action
- If approved: Automatically proceed to the next step
- If rejected: Workflow stops and the reason can be checked
- If returned: Possible to re-execute from the specified step
Usage Examples
Example 1: Approval of Purchase Requests
- Change approver based on the amount
- Collect purchase reasons and usage via custom fields
Example 2: Approval of Leave Requests
- Set the direct supervisor as the approver
- Enter the vacation period in the date field
- Specify the vacation type in the selection field
Example 3: Approval of Quotation Amount
- Requires approval from both the Sales Manager and the Finance Manager
- Enter the date and amount in the applicable fields
Frequently Asked Questions
Q: Can I check the approval history? A: Yes, on the workflow history screen, you can review who approved/rejected the request, when, and for what reasons. Q: Can I set an approval deadline? A: By combining it with the workflow-wide timeout settings, you can manage approval deadlines. A reminder notification will be sent when the deadline approaches.Troubleshooting
Approval button is not displayed
- Confirm that the approver is set correctly
- Verify that the workflow is in a pending approval state
- Clear the browser cache and reload
Custom field values are not saved
- Confirm that all required fields are completed
- Verify that the field format (such as date format) is correct
- Check the network connection
Approval notifications are not received
- Confirm that approval notifications are enabled in notification settings
- Verify that the email address has been registered correctly
- Check the spam mail folder
Best Practices
- Clear approval criteria: Clearly specify approval criteria to facilitate decision-making by approvers
- Appropriate number of approvers: If there are too many approvers, the process will be delayed, so keep the number to a necessary minimum
- Escalation settings: Escalate to superiors if approval is not given within a specified period
- Utilization of templates: For frequently used approval patterns, create templates to streamline processes
- Regular review: Periodically check and improve to ensure the approval flow aligns with actual practices